Hello everybody, today I am back again with a new post in the Fall series. I hope you are enjoying these posts. It breaks my heart to say that tomorrow’s post will be the last one in this series. If you are enjoying these posts then don’t forget to share them with your friends with the hashtag #fallwithcherryontopblog!
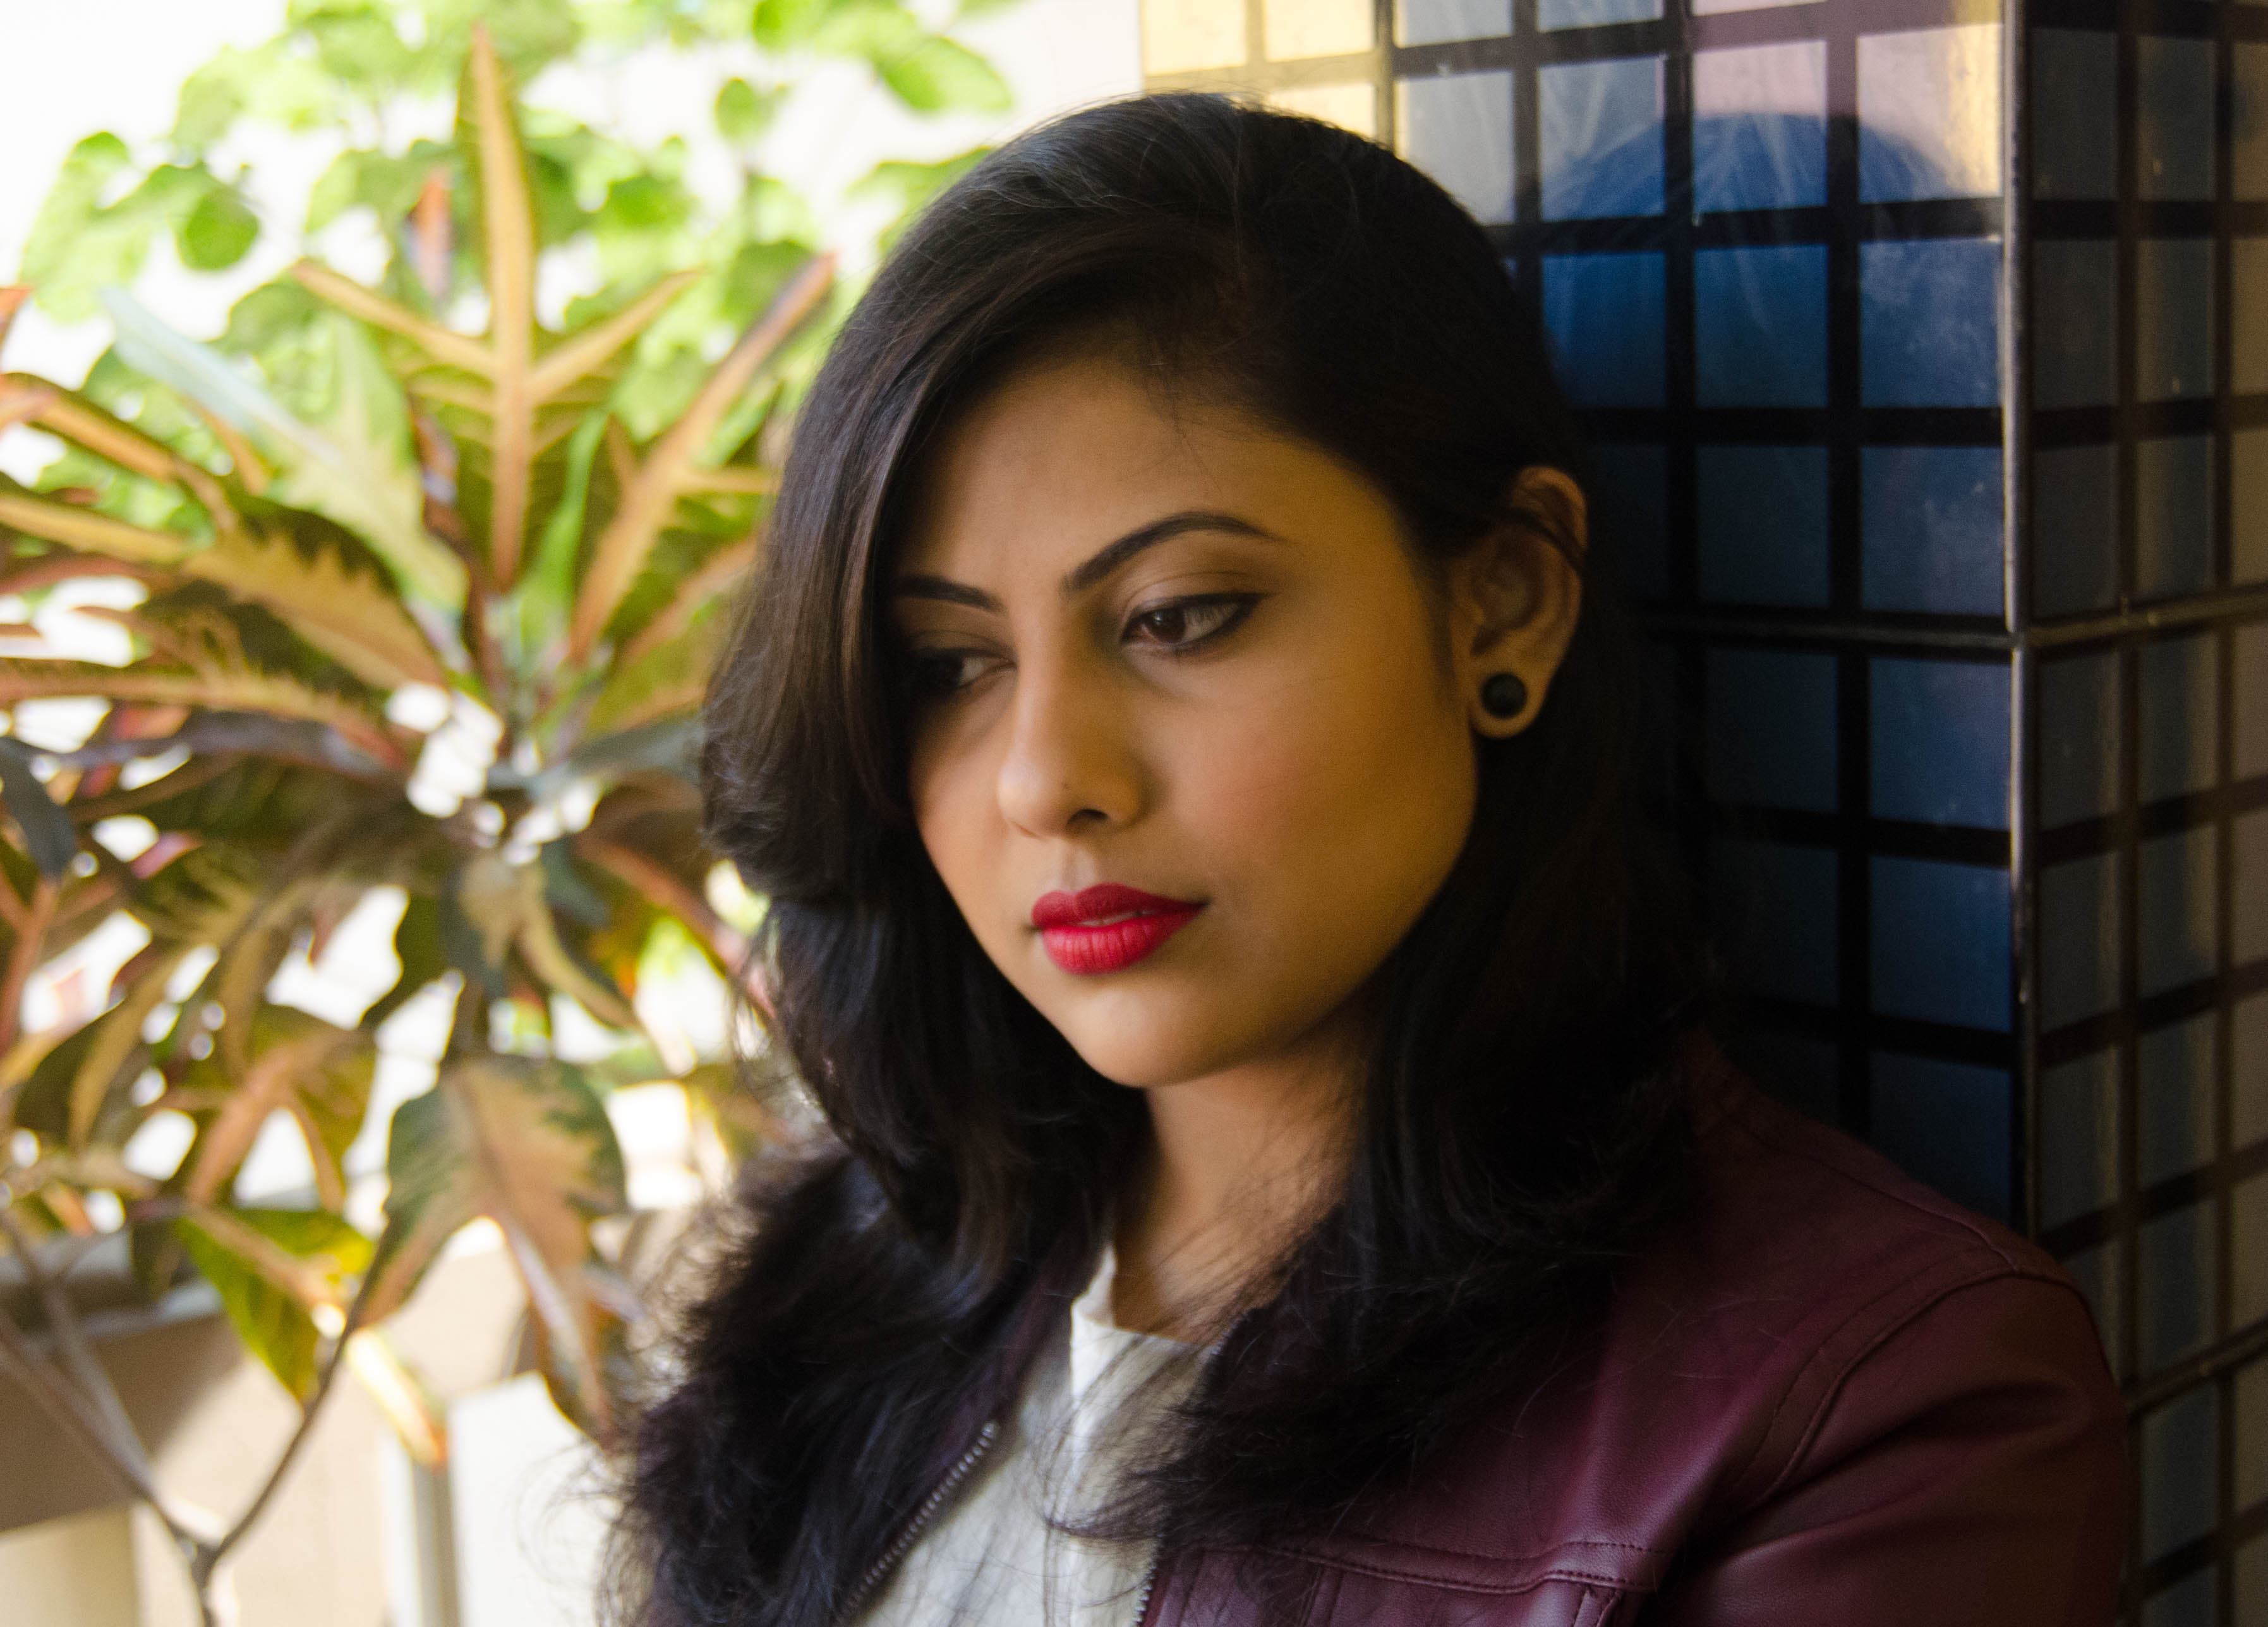
Today’s post is about a dramatic Fall look. If you are following this series then you would know that I did a Daytime Look for Fall a couple of days back. Today’s post is a dramatic one that is appropriate for Fall and the other upcoming festivities. I have used shimmery eye shadows to make the look perfect for the evenings.
All the eye shadows I used are from the Too Faced Chocolate Bar palette. I have used the shade Creme Brulee to the entire lid and then applied the shade Cherry Cordial which is a nice burgundy shade to the crease taking it slightly upwards towards the brow bone. Then, I blended the two shades very well to eliminate any harsh line. To highlight the brow bones I used the shade White Chocolate. I took the Creme Brulee shade again to highlight the inner corners of my eyes. I applied the shade Cherry Cordial to the lower lash line as well to balance out the whole look. Then, I lined my upper lash line very thickly and created a wing at the end. I finished off the look with applied generous coats of mascara to my top and bottom lashes. I did not use any kohl or eye liner to my lower lash line. Finally, I applied some dark berry lipstick to my lips!
If you want me to create a step-by-step tutorial for this look then let me know that in the comments.
I hope you liked today’s post. If you did then don’t forget to share this post. I will be back tomorrow with the last post of this series. Till then, be safe & keep smiling!
Hey guys, thanks for coming to the second day of the Fall Party. Today, I am going to share a daytime makeup look with you all which is perfect for fall/autumn. This makeup look is perfect for the days you want to look a bit more special without any hassle. This quick and simple everyday makeup look will be perfect for autumn and winter days. So, let’s get into the details now-
1. Face- As I do not like foundations in daytime, I opted for my Lakme CC Cream. I applied my MeMeMe Concealer on the problem areas like under the eyes, around my nose and mouth. I used my Maybelline Dream Lumi Touch Highlighting Concealer over the concealer and a little bit down the bridge of my nose, on my forehead and chin to highlight those areas. Then, I set my under-eye area with the Lotree Rosa Davurica Powder Pact that I received in my Wishbox Cosmic Bloom (Read Here) and used my Lakme 9 to 5 Flawless Matte Complexion Compact for the rest of my face and neck.
For blush, I used my NYX powder blush in Espresso. I did a little bit of contouring with the Sleek Face Contour Kit. I am still learning the art of contouring, so, please pardon me for any mistake.
2. Eyes- First of all, I primed my eyes with the ELF Eyelid Primer. The I applied the NYX Jumbo Eye Pencil in Milk to the entire eyelid up to the crease. Then I took some burnt orange type of shade from (I am very bad at describing colours) my BH Cosmetics Day & Night palette and swiped it across my crease, taking it slightly up towards the brow bone. Then, I took a matte beige shade from the same palette and applied it to the entire eyelid with a patting motion (this gives the maximum coverage and pigmentation). I blended the two colours very well to eliminate any harsh line. I also applied some matte brown eye shadow along the lower lash line to intensify the look.
I lined my upper lash line with the Maybelline The Colossal Liquid Liner creating a wing at the end. For mascara, I opted for the Maybelline Hyper Curl mascara.
3. Lips- For the lips, I chose a bright reddish colour to brighten up the face and at the same time keeping it wearable. I have the Estee Lauder Pure Color Envy Sculpting lipstick in Envious. I got the sample with my Sephora purchase (Read Here).
That’s all, guys! I hope you liked the post. I kept the look pretty simple. It is easy and really quick! So, you can try this out even if you are not a pro. With this post, I wrap the the second day of the Fall Party. Share the posts as much as you can to make this a hit! See you tomorrow with a new post. Till then, be safe & keep smiling!
Hi all! It’s been a long time since my first and so far last eye makeup tutorial which was posted in the month of February. As the festival of lights and glamour a.k.a Diwali is around the corner, I thought of doing another makeup tutorial for you, theme being the lights and sparkles of Diwali. You must agree with me that nothing comes in mind except for golden eye-makeup when it comes to Indian festive makeup look.
Here is my look inspired by the glitz and glam of the most glamorous Indian festival. Hope you enjoy it. Please read this post till the end for the disclaimer. Now, let’s get into the post-
Products Used-
(Face)
Ponds’ BB Cream
Maybelline Dream Lumi Touch Concealer
Lakme 9 to 5 Flawless Matte Complexion Compact
L’Oreal True Match Blush in Rosy Cheeks
(Eyes)
ELF Eyelid Primer
Maybelline Color Tattoo in Bold Gold
MUA Glamour Nights Palette (Golden and Black)
MUA Undressed Palette (Shade 1)
Maybelline Colossal Kajal
MUA Eyeliner (White)
Maybelline The Volume Express Mascara
(Brows)
MUA Glamour Nights Palette (Black)
(Lips)
Colorbar Velvet Matte Lipstick- Oh My Magenta
Essence XXXL Shine Lipgloss- True Love
(Brushes & Tools)
Real Techniques Expert Face Brush
Faces Eye Shader Brush
ELF Small Angled Brush
Colorbar Emphaseyes Blending Brush
ELF Crease Brush
Faces Eyelash Curler
Gone Gold | Simple and Easy Festive Makeup Tutorial (Step by Step)
Step 1: Prep your face with your favourite foundation and concealer and set it with a compact or loose powder.
Step 2: Fill in your brows with a black or deep brown eye shadow or eyebrow powder understanding your skin-tone. [Tip: Use an angled brush to fill in your eye-brows. It works precisely on the arches.]
Step 3: Prime your eyelids with any eyelid primer. I have used my favourite ELF eyelid primer. This step is mandatory in order to make your eye makeup last longer no matter how long you let yourself on the dance-floor.
Step 4: Now, apply the Maybelline Color Tattoo in Bold Gold all over your lids, leaving the crease area. This will act as a base and will give your eye shadows something to stick to. [Tip: Apply the product with your finger. It will allow you to work smooth and it will distribute the product evenly on the lids.]
Step 5: Apply a golden eye shadow that best matches your skin all over the lids with the help of a good shader brush. Here you can also use your fingers to apply the eye shadow.
Gone Gold | Simple and Easy Festive Makeup Tutorial (Step by Step)
Step 6: Take a crease brush and apply a little bit of any matte black eye shadow and dab it on the outer ‘v’ of your eyes. Don’t overdo it. We just want a subtle hint of black to eliminate the flatness of the eye look and add a little definition.
Step 7: Blend it very well with a fluffy blending brush. [Tip: When you are using a black eye-shadow, make sure you blend it extra carefully. Don’t drag it to the entire lid.]
Step 8: Tightline the upper waterline with a jet black kohl. I have used the Maybelline Colossal Kajal as it lasts long. Curl your lashes and apply multiple coats of mascara. Make sure you apply generous coats of mascara on top and bottom lashes as we are not using any eyeliner to define the eyes. In this case, mascara will do it. Apply a flesh-tone shade to the brow bones. [Tip: Use a long-wear and water-resistant eye-pencil for tightlining the eyes. It won’t transfer and won’t smear the eye with black kohl.]
Step 9: Apply white kohl on your lower waterline. With the help of the same angled brush and black eye-shadow you used for the eyebrows and trace along your lower lash line, leaving the inner corners of your eyes. [Tip: Applying white liner on the lower waterline creates the illusion of bigger eyes.]
Step 10: Final look.
Gone Gold | Simple and Easy Festive Makeup Tutorial (Step by Step)
You can use your choice of products, it’s not mandatory to use what I used.
~Finished look~
Gone Gold | Simple and Easy Festive Makeup Tutorial (Step by Step)
Disclaimer:
1. Makeup is not what I think is extremely important in our lives, nor that I preach that everyone should use makeup. Some like makeup and some don’t. It’s just like some people love dressing up and some love to be in their pajamas most of the time (Even I belong to the latter category :P). So, there is nothing wrong in doing makeup and nothing wrong in not doing it as well. One should not be judged in terms of their preferences.
2. I am not a makeup guru, nor that am I claiming myself a makeup expert. It’s just what I tried on myself and wanted to share with all of you. There are many expert makeup artists and bloggers who are way better than me. I do not compare myself to them as I feel I have a long way to walk before I reach that level. Please do not judge me.
The title of the post makes me the ‘official Gone Girl fanatic’. LOL 😛
I hope you liked the look and the tutorial. Feel free to comment below. Show your love, write down your queries and expert advices. Love you all. Till next time. Bye J


")


