Category

Maybelline

Category

Maybelline Baby Lips Candy Wow- Peach | Review, Swatches & Price| cherryontopblog.com

Hello guys, I am back again with a new review post for you. Today I will be reviewing the new Maybelline Baby Lips Candy Wow lip balm sticks that they launched recently. Maybelline Baby Lips  lip balms have been my absolute favourites since they came to the Indian market. I have always beena fan of their cute packaging, fruity smell and great texture. So, when I was approached for reviewing this new launch I was really excited. Guys, let’s not waste your time anymore and let’s get straight in to the review.
Price- Rs 275/- for 2g
Maybelline Baby Lips Candy Wow- Peach | Review, Swatches & Price| cherryontopblog.com
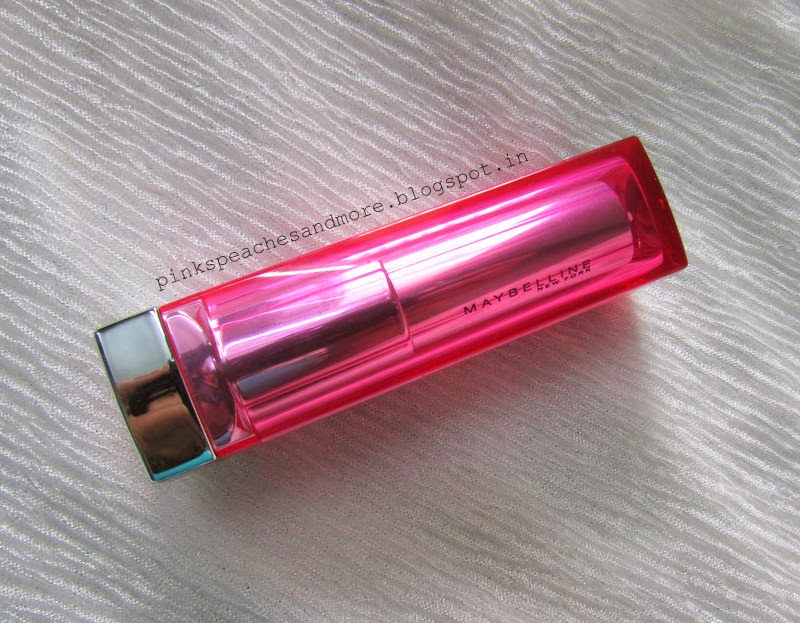
Packaging- The Maybelline Baby Lips Candy Wow lip balms are housed in a cute, plastic twist up packaging. It’s somewhat similar to the classic Baby Lips packaging but it has been given a chubby stick/lip crayons style packaging which I found is really cute, cool and offbeat. The packaging is sturdy and travel friendly. Every shade variant comes with a different packaging in terms of colour. The one I received came in a bright, peach coloured packaging doing complete justice to the shade of the balm inside. 
Maybelline Baby Lips Candy Wow- Peach | Review, Swatches & Price| cherryontopblog.com

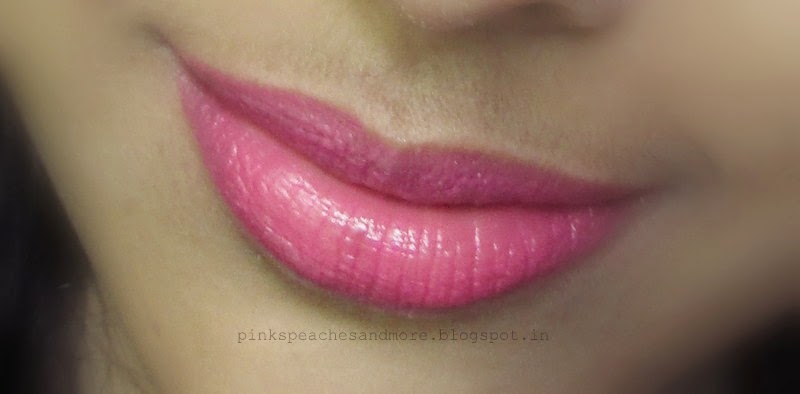
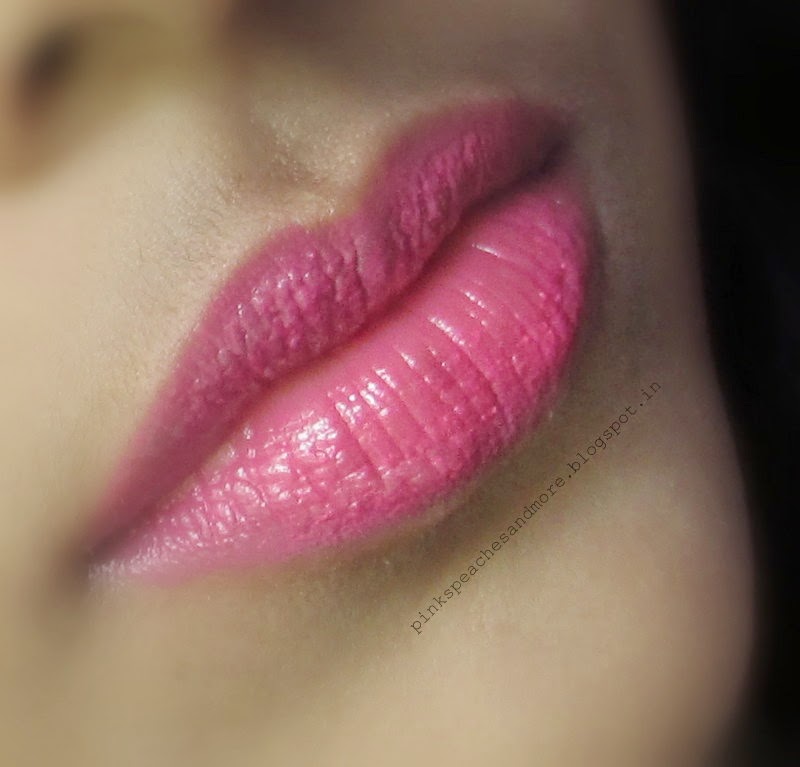
Under Direct Sunlight (Left- Single Swipe, Right- Multiple Swipes)

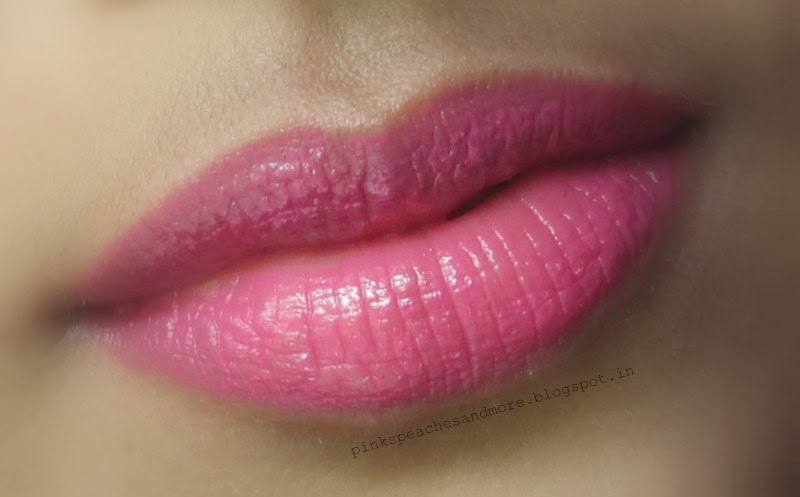
In my room (Left- Single swipe, Right- Multiple swipes)
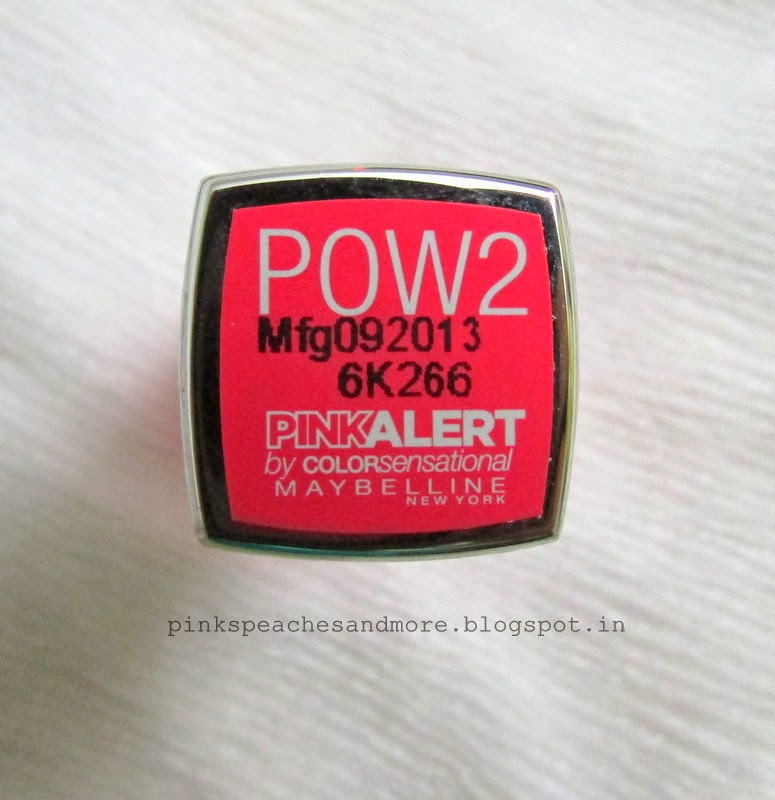
Shade- Maybelline has launched 5 shades of these balms- Raspberry, Mixed Berry, Cherry, Peach and Orange. I received the one is the shade Peach. It’s a pale peachy shade as the name suggests. Sadly, the shade doesn’t suit me at all. It’s way too pale for my skin tone. 
Texture/ Pigmentation/ Wear Time- The texture of this balms are really good. It’s not waxy or sticky and glides on smoothly. Maybelline has successfully maintained their quality of lip balms with these new ones too. I really like the formula of this new Candy Wow balms. They are claimed to be formulated with Vitamin E which protects the lips from drying.
As I mentioned earlier, the one I received is in the shade peach and is decently pigmented. You can’t expect it to be as pigmented as a lipstick, even the least pigmented ones but the colour pay-off is surely a tad bit more than the other coloured lip balms, even better than Maybelline’s Electro Pop ones. Another great thing is that the balm pigments the lips uniformly from start to end.
I am quite happy with the staying power. It stays for almost 3 to 3.5 hours on my lips without any heavy meals. The colour stays upto 2 to 3 hours but the hydration lasts for a longer period.  
Ups-
  • Cute, attractive packaging.
  • Smells really nice like fruits/candies. 
  • Quite pigmented for a lip balm.
  • Glides on smoothly.
  • Enriched with Vitamin E.
  • Keeps lips hydrated and nourished for a decent period of time. 
  • Helps heal dehydrated lips.
  • Makes lips look visibly healthier. 
  • Survives light snacks and drinks. 
Downs-
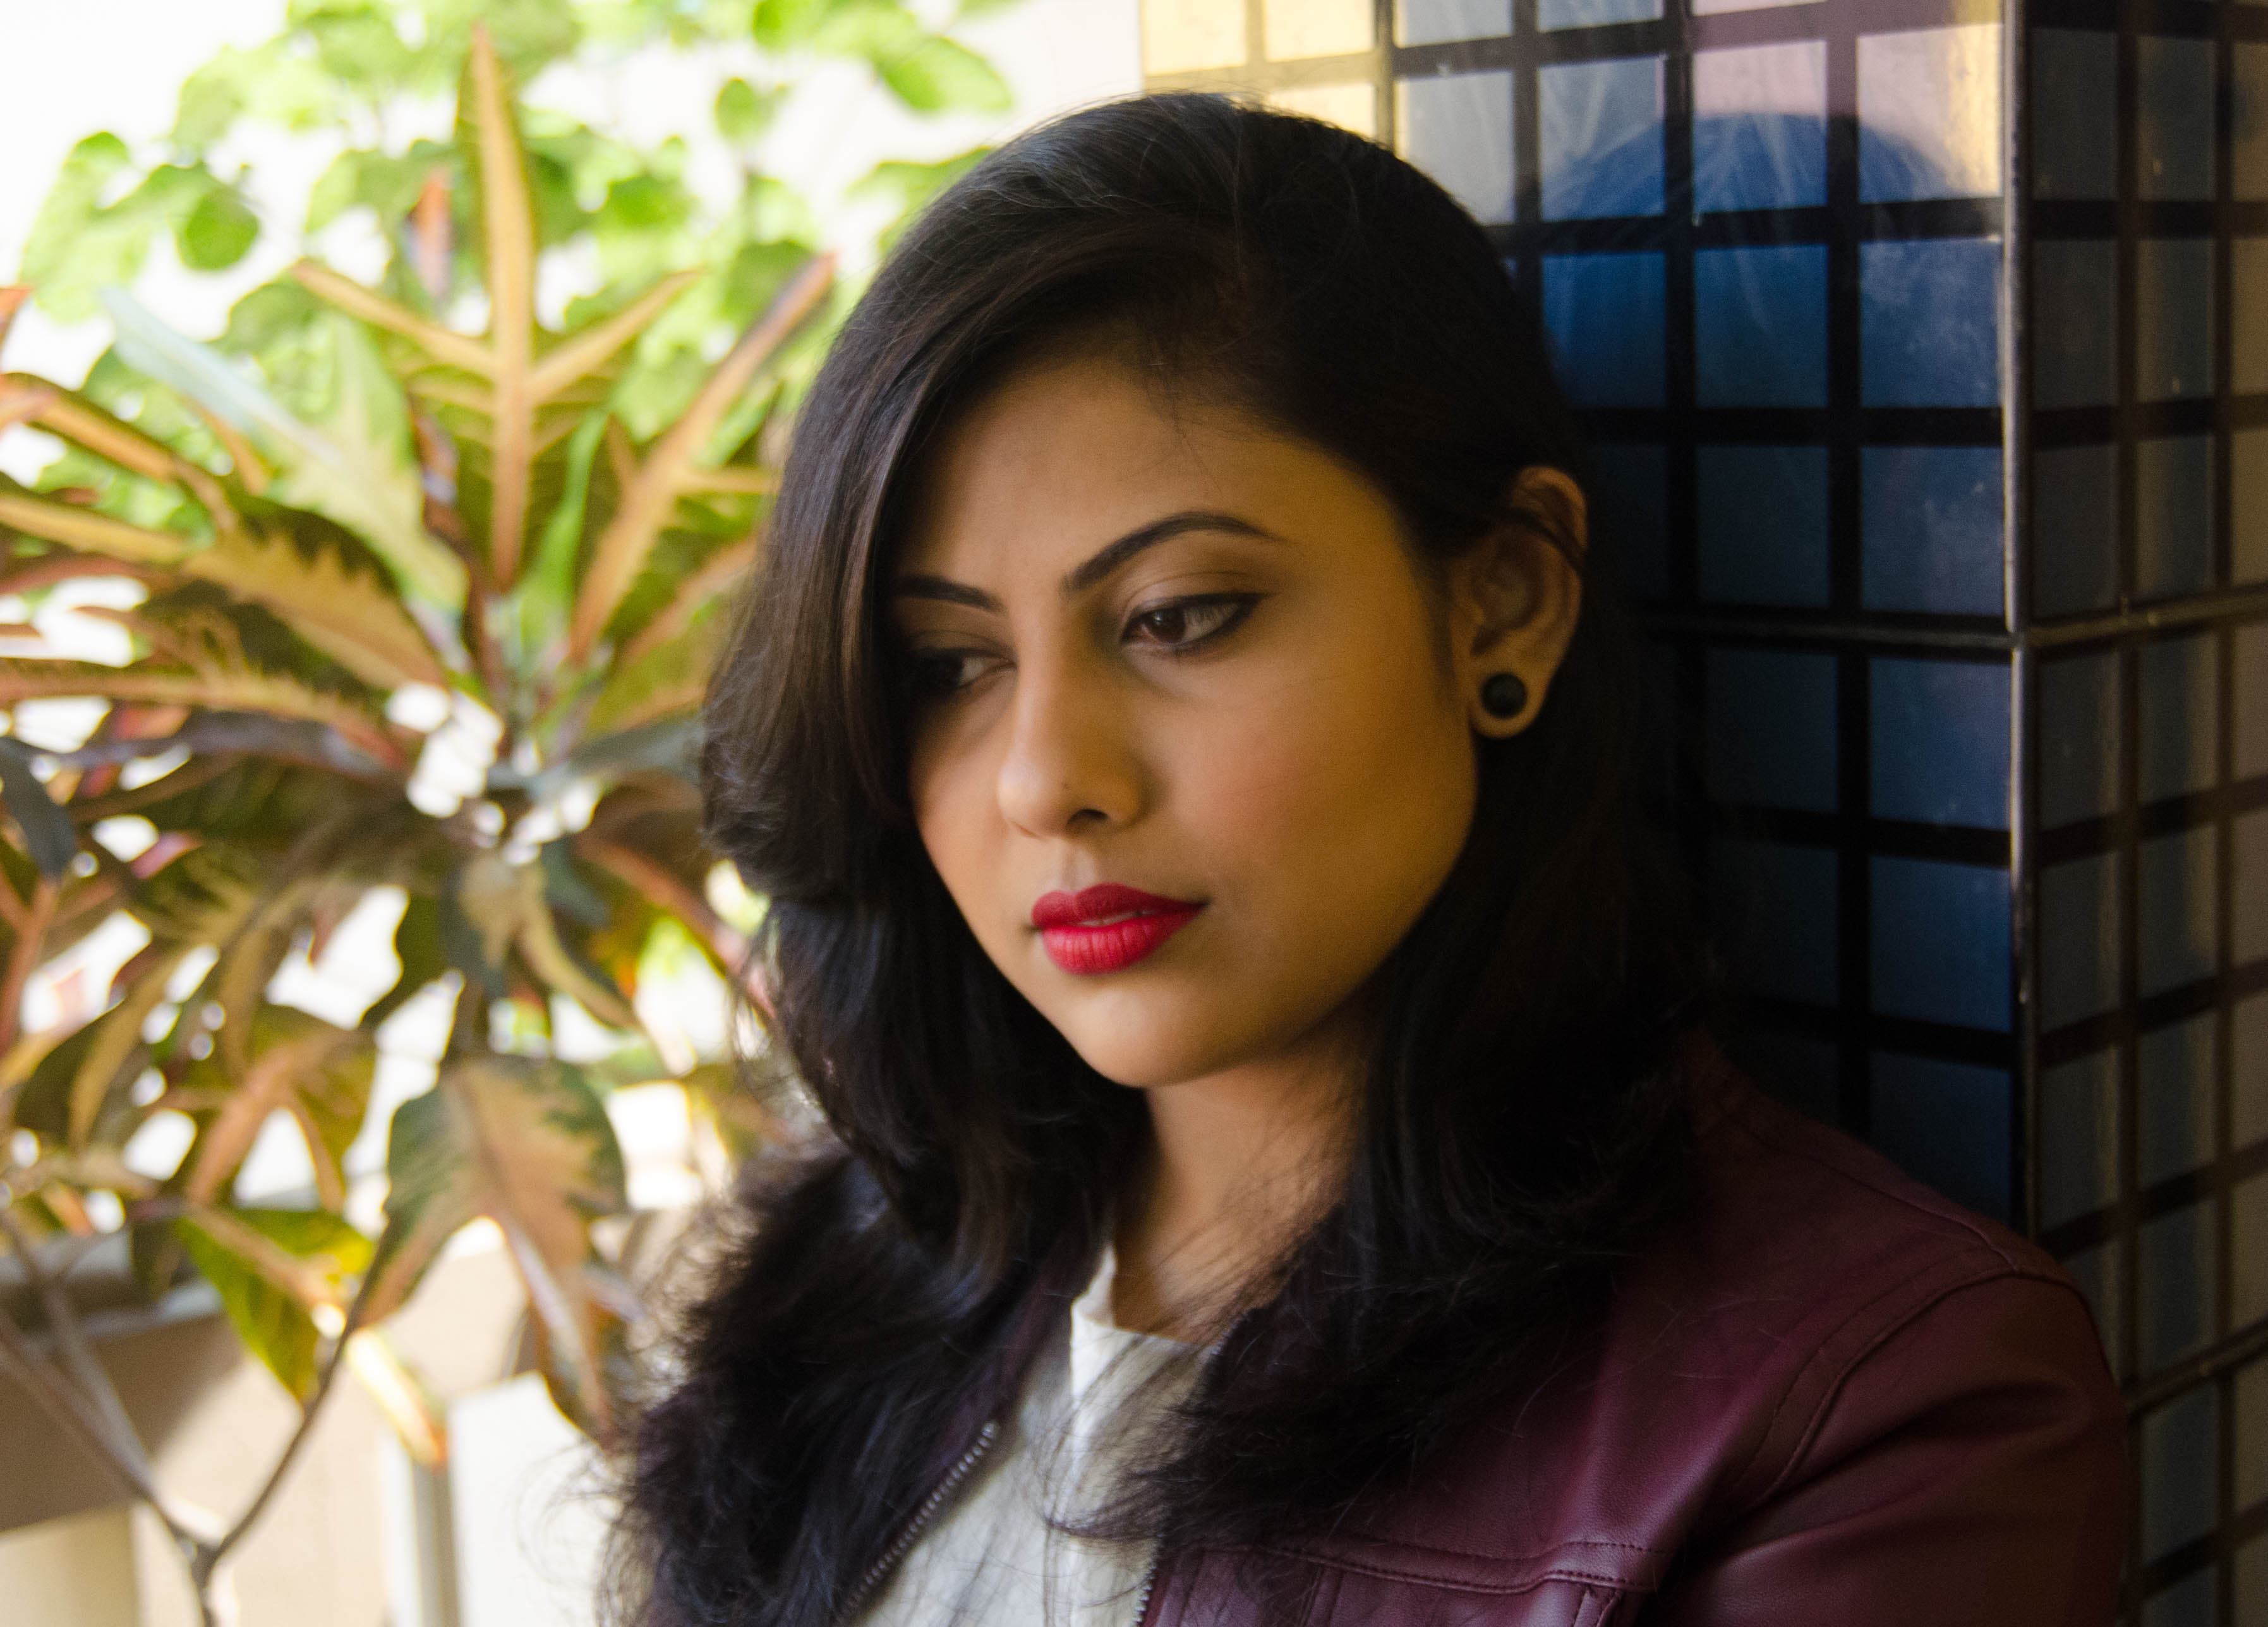
This particular shade does not suit me. I think this shade is good for anyone who has a fairer skin tone. It looks really pale on me. 
Overall, I would not say that it is an exceptional product in terms of quality but the packaging is definitely a standout. The chubby stick/crayon packaging is all over the market, trending day by day. So, I won’t be surprised if people go for them even if they have to pay more for the same quality they get in the original Baby Lips. I am impressed with the Maybelline Baby Lips Candy Wow bacause the packaging looks really cute and most importantly because they are meant to hydrate your lips for over a longer period of time and they are true to their claims. They do nourish the lips very well and make them look visibly healthier.. I really love fruity smells in my lip balms but if you don’t then you should stay away from these. You should get them if you like to switch your regular lip balms with the one with a cute, funky packaging. I would probably repurchase it again but in different shades. I would like to try Raspberry and Orange next. 
I hope you liked this post. If you did then please do share this post with your friends and family  through your social media platforms. I will love to hear from you guys about this post. You can also add me on Snapchat to ask me questions. I can show you more swatches in different lightings on Snapchat. My username is ‘sayantinee‘. The next post will be up very soon. Till then, be happy & keep smiling! 
So, what do you think about the Maybelline Baby Lips Candy Wow?
Disclaimer- PR sample but unbiased opinion.
Maybelline White Superfresh 12hr Whitening+Perfecting Compact| Review, Swatch, Price
Hey guys, today I am back with another review. Today, I will be reviewing the newly launched pressed powder by Maybelline, which is the Maybelline White Superfresh 12hr Whitening+Brightening Compact. Ah, a mouthful!
If you follow me on Instagram and Facebook then you might have seen a photo of this compact I shared and told you that I was trying it out. After trying that for almost half a month, I am finally ready with my review.

Maybelline recently launched their White Superfresh compacts that they claim to keep you fair and fresh for 12 hours. The compact comes in three shades- Pearl (for Light to Medium complexion), Shell (for Medium complexion) and Coral (for Medium to Dark complexion). When I was asked to chose my shade, I was a bit confused so I chose Shell which is the medium shade. I was not sure about it because I don’t really like my compacts to be lighter than my skin tone. Let’s get into the review now-
Price- Rs 150/- (for 8 grams of product)

Maybelline White Superfresh 12hr Whitening+Perfecting Compact| Review, Swatch, Price

Maybelline White Superfresh 12hr Whitening+Perfecting Compact| Review, Swatch, Price


Packaging- The Maybelline White Superfresh compact comes in a cute white plastic packaging. It comes with a regular white puff and a mirror which comes in handy during touch ups. There is nothing extraordinary about the packaging.

Texture/Coverage/Staying Power- This compact has a very smooth finish to it. The powder is finely milled and does not look chalky. It settles into a powdery finish which you won’t like if you have very dry skin or uneven skin. It does not bother me because I have a combination skin type and I don’t use my compacts for coverage, I just lightly dust it to set my base makeup. 

Maybelline White Superfresh 12hr Whitening+Perfecting Compact| Review, Swatch, Price
Swatch
Maybelline White Superfresh 12hr Whitening+Perfecting Compact| Review, Swatch, Price
Blended

The White Superfresh compact gives a sheer to light coverage which again is okay for me as I already told you that I don’t use my compacts for coverage. It doesn’t give a good coverage but it definitely makes your skin look brighter. It instantly brightens up the entire face which gives an illusion of fairer skin tone. The presence of a mineral called Perlite in the compact causes that instant radiance to the skin. 

Coming to the staying power, I won’t say it lasted on me for 12 hours but it definitely lasted on me for 6-7 hours. For the oil-control part, I applied it at 8:30 am and went to the university, at around 12pm I felt a little oiliness around the t-zone so I touched up very lightly. I checked again around 3pm and observed some shine around my nose and forehead. I must state that I have normal to dry skin during this time of the year and combination skin during the rest of the year. I don’t think this compact would last on me for that long during summer. I would love to see how many hours it stays on me in summer. The brightening effect definitely lasts for a longer period of time. 
The company also claims that this compact contains UV filters that helps protect the skin for sun-damage. 
Ups-

  • Lightweight.
  • Doesn’t feel chalky.
  • Doesn’t look cake-y when applied.
  • Instantly brightens up the face.
  • Helps control sebum for at least 6-7 hours with touch ups. (varies)
  • Have UV filters.
  • Cute, travel-friendly packaging.
  • Comes with a puff and a mirror.
  • Inexpensive.
  • Easily available.

Downs-

  • Coverage could have been better.D
  • Does not stay for 12 hours as the brand claims.
  • Limited shade range.
Overall, I am impressed with the product because it brightens up my face instantly and effectively and also because it keeps oiliness at bay for a decent time. I don’t about others but I don’t really need my compacts to stay on me for 12 hours on a daily basis. I would suggest you to try this compact once. I am sure you will like it. 


Have you used the Maybelline White Superfresh 12hr Whitening+Perfecting Compact yet? 
For how long does it stay on you?

I hope you found my review helpful. Feel free to ask me anything in the comments. See you in my next post. Till then, be safe & keep smiling!
Disclaimer: PR sample but unbiased opinion. 
Hi all, tomorrow is Valentine’s Day, a special day for all those who are in love. Though I don’t believe that one needs a specific day to express or celebrate love, I don’t even criticize the mood of Valentine’s. It has a certain flavor to it. No matter if you are single or taken, you can enjoy Valentine’s Day in your own way. For those who have a special plan tomorrow and haven’t decided what makeup should be done, here I have a simple, easy and quick makeup-look for you.
My boyfriend and I usually do not go out on Valentine’s Day (we have another special day), but if we ever plan one in future I would like to go for a soft and natural look (you know men, they love bare faces!) with subtle lipstick. That is my kind of a Valentine’s makeup. I have created this look for day time, you can always transform it to a night time glam look just by switching some things up. I’d tell you in the end. Keep on reading.
Products Used-

(Eyes)
  • E.L.F. Eye-lid Primer
  • Too Faced Chocolate Bar Palette
  • Maybelline Colossal Liner
  • Maybelline Hyper Curl Mascara


(Face)
  • Elisha Coy Always Nuddy CC Cream
  • Lotus Herbals Ecostay Foundation
  • Maybelline Dream Lumi Touch Highlighting Concealer
  • Lakme 9 to 5 Flawless Matte Complexion Compact
  • Accessorize Bronzing Block- Shade 3


(Lips)
  • LAQA & CO. Fat Lip Pencil in Jammy Bastard

This time, I have started with my eyes before doing my face. Here are the steps to achieve the eye look-
Step 1: Start with filling in with your brows. Use any technique you are comfortable with- pencils, powders or creams. You can’t afford to try new techniques on such an occasion.

Step 2: Apply some eye lid primer. It will help your eye-shadows stay longer and exact.

Step3: Take some dark brown eye-shadow in a fluffy brush/blending brush and apply it right onto the outer corner of your eyes and drag it along the crease. I have used ‘Semi-Sweet’ from the Too Faced Chocolate Bar Palette. [P.S.Your crease is where your eyelid folds.]


Step 4: Blend, blend and blend. Blending is the key. The more you blend the softer it looks.

Step 5: After you are satisfied with the blending, take some lighter shimmery shade in a flat shader brush and apply in right on to the middle of your eyelids. I have used a peach-y shade called ‘Marzipan’ from the Chocolate Bar Palette. [P.S.Shimmers help in reflecting light. If you’ve planned a candle-lit dinner, shimmery or metallic eye-shadows are must. It doesn’t have to be truckloads of shimmer, just a little hint would do. Subtle shimmers can be used even for daytime looks.]


Step 6: Apply a highlighting colour, close to your skin tone, on the brow bones. I have used the shade ‘White Chocolate‘ from the Chocolate Bar Palette.


Step 7: With an angled brush, apply the same dark brown shade along your lower lash line.

Step 8: Apply the same highlighting colour on the inner corners of your eyes. It would make them look bigger. 

Step 9: Apply a liquid liner as close to your lash line as possible. You might not go for a full-fledged winged eye-liner but a little flick at the corners would definitely make your bae fall for you once again.


Step 10: Curl your lashes and apply generous coats of mascara. Remember, mascara is the elixir of a neutral look.
Soft & Coral Valentine’s Day Makeup Look| Step by Step Tutorial

For the face, I have just applied foundation and concealer. Applied some coral blush starting from the apple of my cheeks slightly dragging the brush diagonally along the cheek bones. For my lips, I have applied a coral lip tint which gives the look a softer finish. This look is perfect for both day and night time but if you want to go for a more glam look you can transform this look by applying a kohl on the waterline, slightly smudging it and by swapping this lip colour with a red lipstick.
Soft & Coral Valentine’s Day Makeup Look| Step by Step Tutorial

Soft & Coral Valentine’s Day Makeup Look| Step by Step Tutorial
Just as I said earlier, Valentine’s Day is all about you. Being you is most important. Makeup can help you look better but you are what you are inside. That cannot be changed. If you don’t like makeup, be a rebel- rock your distressed jeans and loose tees, ditch the lipstick, be a tomboy. It doesn’t matter until you are yourself. Happy Valentine’s Day.

I hope you liked the look. Do comment and share your views with me. If you recreate this look, do share them with me. Tag me in your photos on Instagram and I’d repost some of your looks. Keep then stay safe and keep smiling.

 photo CDC9FF6FF5EC04AD8EE1C7D59049EBD7_zpsec8626b0.png
Hello my lovelies! Recently I bought the Glitter Mania nail paint by Maybelline which is their recent launch after the Color Show range.  After a lot of thinking and re-thinking, I got myself the shade Pink Champagne which I adore.
Now, let’s get into my views and thoughts on this product-
Maybelline Glitter Mania is said to be the first ever textured nail paint in India. It’s not like the ordinary nail paints you find in markets. When you apply the nail paint on your nails it goes opaque with the first swatch.  Then the second coat brings out the bling and you notice that your nails are feeling a bit different. They have that textured feeling and you won’t believe that it’s just a nail-paint. In my opinion, it indeed is not just a nail-paint, it’s much more than that. Once you use, it’ll change your notion about glitter nail polishes.
I, myself, am literally blown away by the Glitter Mania polish and I’ve just used one from this range. It has a bunch of gorgeous shades to choose from-
  • All that Glitters
  • Pink Champagne
  • Matinee Mauve
  • Starry Night
  • Paparazzi Purple
  • Red Carpet
  • Bling on the Blue
  • Dazzling Diva


Product category- Nail paint
Brand- Maybelline
Price- 125 INR

Pink Champagne is a brilliant soft pink shade with a chockfull of silver glitter chunks of different sizes. The glitters have been brilliantly created with superb light reflecting feature which makes your nails catch the limelight all the time you go out. It gives a sandy texture to the nails I am super impressed with its drying formula. It dries out super quick and gives you a matte finish other than the glitter effect. The nail polish goes opaque in a single quote and with the second quote it becomes perfect. The longevity is another thing about this nail paint that I loved. I removed it from my nails on the 7th day from the application and until then it was intact on my nails. No chipping! The third picture I took with my cell phone cam, it was taken just before the removal process. Pardon me for the poor lighting. Let’s see the pictures-

Ups-
  • Beautiful shade.
  • Packed with pretty chunks of glitter.
  • Dries up quickly.
  • Lasts for a long time.
  • Doesn’t chip.

Downs-
  • Removing is a pain.

What I Have to Say is-Maybelline Color Show Glitter Mania nail paints are worth a try. It’s very reasonably price compared for the amazing quality. I loved the textured nails very much. Though I was afraid of the falling out of the glitters for the first two days, but that fear was gone after I tried to rub my nails with a cotton ball. Not a single particle fall off the nails. The only thing I disliked was the removal process. I had a hard time removing the nail paint from my nails. You have to rub each of your nails for quite a long time, after that your nails will be perfectly clean.
My rating- 4.8/5
Those who haven’t tried these beauties, I highly recommend you to try the shades. You won’t be disappointed. Those who love neutral nail paints can go for Pink Champagne. I, myself, am going to buy a few of the other shades very soon.
Thanks for reading. Stay fit and fabulous!
Have you entered my GIVEAWAY yet? If not then enter soon it’s going to be ending on 3rdof July. All the best!

 photo CDC9FF6FF5EC04AD8EE1C7D59049EBD7_zpsec8626b0.png

Recently Maybelline launched the Pink Alert lipsticks from their Colorsensational range. The Pink Alert range consists of four pretty shades of Pink, POW1, POW2, POW3 and POW4. Among all these, I thought the shade POW2 will suit me the best. I was a little late to buy it, but better late than never!

So, today I am here to review POW2 for you all.

Maybelline ColorSensational Pink Alert Lipstick- POW 2

Product Category: Lipstick

Brand: Maybelline 

Price: 375 INR for 3.9 gms


Packaging: Maybelline Pink Alertlipsticks come in cute pink packaging wrapped in a plastic wrap that proclaims the words “Pink Alert”. When the plastic wrap is removed from the product, it leaves the packaging with no label or description on it. The packaging is the usual Colorsensational packaging that Maybelline is manufacturing for years. Just the color is different.


Maybelline ColorSensational Pink Alert Lipstick- POW 2
Shade: POW 2 from Pink Alert range has a distinctive bright pink shade with a blue undertone. This shade is suitable for almost all Indian skin tones. I have a wheatish skin tone and it brightens up my whole face instantly. 

Maybelline ColorSensational Pink Alert Lipstick- POW 2

Maybelline ColorSensational Pink Alert Lipstick- POW 2

Product- Texture, Pigmentation & Staying Power: The product is very creamy itself. You don’t need to apply a lip balm before applying the lipstick. The creaminess results in a smooth application. Maybelline claims it to be the honey nectar which provides the creaminess in the lipstick. This product gives your lips a great even coverage. Now you don’t have to worry about concealing your pigmented lips before applying a pink lippie. The only con I have found out is that it somehow accentuates the darkness around the lips if you have any. POW 2 stays on your lips for a good 4-5 hours and leaves a pretty hint of pink behind even after you wipe it off. I went for a movie applying it followed by a lunch and after all these my lips weren’t bare at all. 

Ups:
  • Nice bright shade to jazz up your summer look. 
  • Cute packaging. 
  • Nicely pigmented.
  • Decent staying power.
  • Reasonably priced.


Downs:

  • Transfers a bit. 
  • Slightly accentuates the pigmentation/darkness around the lips. 
Swatches
Maybelline ColorSensational Pink Alert Lipstick- POW 2 Lip swatch

Maybelline ColorSensational Pink Alert Lipstick- POW 2 Lip swatch

Maybelline ColorSensational Pink Alert Lipstick- POW 2 Lip swatch

Maybelline ColorSensational Pink Alert Lipstick- POW 2 Lip swatch
Do I recommend it?
Of course, yes! If you want to have a good quality pink lipstick within budget, you must buy this. 

My Rating: This lippie can obviously get an 8 out of 10!

Hello everybody, I am here with a haul post as promised in my last post (Hope you’ve already read it, if not then please do it nowJ). This is going to be my second haul post here. But the difference is, all the products I am going to show you here, have bought with my own moneyJ. This post will be much more refined than the last. Between 4th – 12thMarch, I was in a shopping mood. I needed some skincare items and some makeup products too. I bought from four different websites because I didn’t find all the required products in one single website. Websites that I bought from are- Nykaa, Medplusbeauty.com, Snapdeal and Beautykafe.com.

I got some skin and hair care products from medplusbeauty.com and Snapdeal, and  some lipsticks and nail paints from Nykaa and BeautyKafe.com.

Let’s have a look on what I got in March-
~Medplusbeauty Haul~


1. Herbal Essences Hello Hydration Shampoo.
2. Maybelline Baby Lips Color in Rose Addict.

~Snapdeal Haul~


3. Inatur Pomegranate Scrub.

~Nykaa Haul~


4. Fab India Orange and Cinnamon Face and Body Gel Scrub.

5. Maybelline Lip Polish in Glam 13.

6. Maybelline Pink Alert Lipstick in POW 2. 


~BeautyKafe.com Haul~


7. Colorbar Exclusive Nail Color- 15

8. Maybelline Color Show nail paints in Tenacious Teal and Coral Craze.

I am using a few products from this list and the skincare products are almost ready to be reviewed. If everything goes well, I will post the reviews next week. I hope you liked this post. Please feel free to share your views. Thanks for being here.  I will be back with a new post very soon 🙂

 photo CDC9FF6FF5EC04AD8EE1C7D59049EBD7_zpsec8626b0.png
Hello all! Today I have come up with a Valentine’s Day special eye look which is very simple to achieve and very wearable too. I am a totally no-eyeshadow girl. I mostly apply kajal on my upper and lower lash line and step out just like that. But, it’s Valentine’s Day, so the makeup needs to be special, isn’t it? I chose to create an easy-peasy look for the occasion as you don’t want to spend a lot of time in your eye-makeup. 
** I have done the makeup on my right eye only. I was too lazy that day so couldn’t do makeup on both my eyes. Excuse me for that. 
Now, without wasting time, let’s see the pictures-


~Things I used for this look~

1. MUA Undressed Palette.

2. Maybelline Lasting Drama Gel Liner in Black.
3. Florelle True Khol Pencil
4. Maybelline The Hyper Curl Volume Express Mascara.


Brushes & Tools-


5. Vega Angular Blender Brush.
6. ELF Essential Eye Crease Brush.
7. Kryolan Art Brush no. 3810.
8. Colorbar Emphaseyes Eye Blending Brush.
9. ELF Studio Small Angle Brush (my favourite for applying gel liners).
10. Vega Eyelash Curler.

~Eye-shadows Used in this Look~

Shade 1
Shade 9
Shade 2
Shade 10

Shade 3

~How to Achieve the Look~


Before I start creating the look, I lightly fill in my brows with a darker matte brown eye-shadow from the palette and shape it with a spooley brush. 

  • Step 1– Prep your eyes by applying a base for your shadow. If you have darker eyelids, you need to cover up the pigmentation by applying a concealer before the base. 

  • Step 2– Take shade 1 from the palette and apply it all over your eyelids up to the brow-bone using a fluffy brush. Here I have used the Colorbar Blending brush. This step is intended to cancel out any discolouration that you are still left with. This step is completely optional. 

  • Step 3– Take shade 2 and pat it over your lids with a flat eye-shader brush all the way to your crease area. I have used the Vega angular brush for the purpose.

  • Step 4– Next take shade 9 from the palette which is a beautiful pinky-brown shadow and apply it over the lid. You may apply it with a damped brush. That will make the colour more gorgeous. But, as I tried to create a soft and subtle look, I didn’t do that. 

  • Step 5– Take some of shade 10 in a crease brush and apply it on to your crease area.

  • Step 6– To blend in the harsh lines, take some of the light brown shadow, i.e. shade 3, in a blending brush and start blending everything in a back and forth motion. 

  • Step 7– Apply some more shade 1 on the brow-bone for highlighting. 

  • Step 8– Take shade 2 again and apply in on the inner-corners of the eyes to brighten them up. Also this creates an illusion of wide eyes. 

  • Step 9– As the eye look was very simple and subtle, I decided to go for a winger liner to add a little oomph to the look 😉 I chose gel liner over liquid liner to maintain the subtlety of the look. If you feel creating a wing is difficult for you then just do it as you like Jthere are no strict rules. 

  • Step 10– Apply kajal on your lower waterline leaving the inner ⅓ of the lower lash line and smudge it out a bit. Work it out on the outer corners and join the upper and lower lash-line with the kajal. Add some of shade 2 on to that unfilled ⅓ part. This will make your eyes look bigger. 

  • Step 11– Apply two coats of mascara to both top and bottom lashes.  

  • Step 12– Last step, dip your powder brush in to your compact/loose powder and brush off the fallouts under your eyes.

Voila! That’s it guys. I hope I have made myself clear while explaining the steps. Now a few words before I sign off. Valentine’s Day is all about love. If you have love for something or someone you will achieve it in anyway. You don’t need makeup to impress anyone. It’s your inner beauty and your self confidence that makes you stand out from the crowd. Make-up is just a way to enhance your beauty a little more.  This particular look has no rules. You don’t need the particular products I’ve used here. You can your anything similar to the products I’ve used. At the end of the day, what really matters is your happiness. I think, that will be enough for your loved ones.

Happy Valentine’s Day!

Those who are single, you don’t need to worry. You can also go for this look too. You don’t need any reason to look beautiful, right?

P.S.– I was always hesitant of posting eye-looks. I wasn’t sure of my ability to bring out a new look myself. But, I have got a grip on that and finally decided to share a look with you all. It’s my first time posting eye makeup looks. Also, my first ever eye makeup tutorial. I know there must be some flaws. I would like to get suggestions from you guys. Good night lovelies

P.P.S.- Excuse my eyebrows :p

Hello lovelies, I hope you’re doing great this year. This year has started off really well and I hope the goodness pursues. This post is a monthly favourites post. This will be my first ‘favourites’ post and henceforth I will be doing similar posts for every month.

Today I am going to share with you guys the products I loved using in January. So here they are-

~Skincare Products~


1. I Love… Strawberries & Milkshake Body Butter: A few months back I won a giveaway at Shubha’s blog, Blue Velvet Addict and this product, with some other goodies, came as a prize. I was using my Vaseline body lotion then but I was really getting eager to try out the body butter as soon as possible. I started using it in January. I love, love, love this product!! I don’t know if I have succeeded in make you understand how deeply I am in love with this or not, but I meant each word that I just scribbled. It smells like strawberry and cream and kind of strawberry smoothie, whatever it is, it has a divine smell. I like to apply it on my hands after bath. It makes my skin supple throughout the day and makes me smell like dessert 😛

2. Naked Potion Lotion: The moment I received it in my January Fab Bag, I started using it. I have not used it throughout January but still it is my favourite for this month. In case you guys are wondering, Naked is an organic skincare line by supermodel Lisa Haydon. The Potion Lotion is actually a face moisturizer which makes my face nourished, healthy and also it makes my skin look beautifully dewy. What I loved about the cream is the not-so-thick not-so-light perfect texture, the visible effects and its natural ingredients. It has a weird smell which initially made me a little irritated but now I like the natural, non-chemical smell. As it’s very moisturizing, I have to use it up within this winter because I might not be able to use it in the summers as I have a very oily t-zone which makes my entire face greasy L I am planning to do an entire blog-post on this product.


3. Lotus Herbals 3-in-1 Matte Look Daily Sunblock: This product is my all time favourite. I am sure everyone among you knows about this product quite well. This is my favourite because- (a) It has a matte formula which is hard to find in a sunscreen (b) It smells good, (c) It is super inexpensive. Also it has SPF 40 and UVA and UVB protection as well. I will keep purchasing it always.

~Haircare Products~


4. Pre-Botanix Anti-dandruff Shampoo and Conditioner by Raaga Professional: Since my hair is super oily and full of dandruff throughout the winter, I needed an extremely good shampoo to get rid of the flaky scalp. This shampoo and conditioner duo was actually recommended by my hair-stylist. I have been using this from the first week of January. I use it every 2ndday and it claims to show you visible difference with 4 weeks. Well, for that matter, it’s my 3rd week with the product and I can see the lack of flakes in my hair. This shampoo doesn’t damage your hair and the conditioner is just the best. You don’t need to have dandruff problem to use the conditioner, you can use it with any shampoo. It makes your hair soft and touchable. I don’t know where else it’s available in India; I bought it from my salon friend. I recommend the Pro-Botanix Anti Dandruff shampoo if you’ve stubborn dandruff like I have.
~Makeup Products~


5. Maybelline The Hyper Curl Volume Express Mascara: This has been my HG mascara ever since I started using it! This mascara has everything you need for your lashes. It stretches, lengthens, curls and gives an amazing effect to your eyes.


6. Maybelline Super Stay 14hr Lipstick- Eternal Rose: Since I am into blod lippies for this month, this has been my favourite. It is a lovely rosy pink colour which suits me a lot. It just brightens up my face. Only one down point for this lipstick could be its drying tendency. Otherwise everything is great with it. It’s matte, it’s bold and it’s pretty!


7. Maybelline Eyestudio Lasting Drama Gel EyeLiner: This is my first time trying out a gel liner. I needed one and felt to try the Maybelline one first. Reason- its reasonable price. I have loved this so much that I keep this on the top of my vanity table so that I can grab it anytime. This is my favourite go to eyeliner now.


8. Revlon Colorstay Eyeliner: I was too much into eye makeup products this January. Recently I ran out of my Maybelline Colossal Kajal and I went on shopping to buy the most raved Loreal Kajal Magique. But sadly, the nearby departmental store didn’t have that in stock. So, I opted for the one that was available there. It was the Revlon Colorstay Eyeliner. I have used it before and I love this product so much. I love applying it on both upper and lower lash line. It has an intense black colour and it glides on very well. 


9. Kryolan Dermacolor Camouflage Crème: If you are following my blog, you guys must have seen my review about this product. I have loved this product since I purchased it. This is my HG product to camouflage my wretched dark circles. I apply it underneath my eyes and top it up with my concealer and I am ready to go. This product is worth being in the ‘Favourites’ list.
Read my review here.

So, this is pretty much it. I think I’ve discussed about all the products. These products were my favourites for the month of January. Some of them might become my all time favourites. I hope you’ll have enjoyed reading my post. See you in my next post 🙂

Maybelline Color Sensational range is one of my favorites now. And, what I like for regular use is 205 Nearly There. It’s a great color to wear whether it’s day or night. It’s such a cute pinkish nude color. I actually not fond of nudes and naturals, I love pinks, mauves, berries and such vibrant color. But after using this I am shocked to see that nudes can also look cute.
So, let’s review this.

Without Flash
With Flash
With Flash – Applied 2-3 times

Brand- Maybelline
Type- Lipcolor
Price- 375 INR

With Flash

Without Flash

Pros:
1. It has a nice smell.
2. Moisturizes your lips for long.
3. Glides on your lips easily.

Cons:
Color doesn’t come out in a single application.

Pin It