Hey guys, thanks for coming to the second day of the Fall Party. Today, I am going to share a daytime makeup look with you all which is perfect for fall/autumn. This makeup look is perfect for the days you want to look a bit more special without any hassle. This quick and simple everyday makeup look will be perfect for autumn and winter days. So, let’s get into the details now-
1. Face- As I do not like foundations in daytime, I opted for my Lakme CC Cream. I applied my MeMeMe Concealer on the problem areas like under the eyes, around my nose and mouth. I used my Maybelline Dream Lumi Touch Highlighting Concealer over the concealer and a little bit down the bridge of my nose, on my forehead and chin to highlight those areas. Then, I set my under-eye area with the Lotree Rosa Davurica Powder Pact that I received in my Wishbox Cosmic Bloom (Read Here) and used my Lakme 9 to 5 Flawless Matte Complexion Compact for the rest of my face and neck.
For blush, I used my NYX powder blush in Espresso. I did a little bit of contouring with the Sleek Face Contour Kit. I am still learning the art of contouring, so, please pardon me for any mistake.
2. Eyes- First of all, I primed my eyes with the ELF Eyelid Primer. The I applied the NYX Jumbo Eye Pencil in Milk to the entire eyelid up to the crease. Then I took some burnt orange type of shade from (I am very bad at describing colours) my BH Cosmetics Day & Night palette and swiped it across my crease, taking it slightly up towards the brow bone. Then, I took a matte beige shade from the same palette and applied it to the entire eyelid with a patting motion (this gives the maximum coverage and pigmentation). I blended the two colours very well to eliminate any harsh line. I also applied some matte brown eye shadow along the lower lash line to intensify the look.
I lined my upper lash line with the Maybelline The Colossal Liquid Liner creating a wing at the end. For mascara, I opted for the Maybelline Hyper Curl mascara.
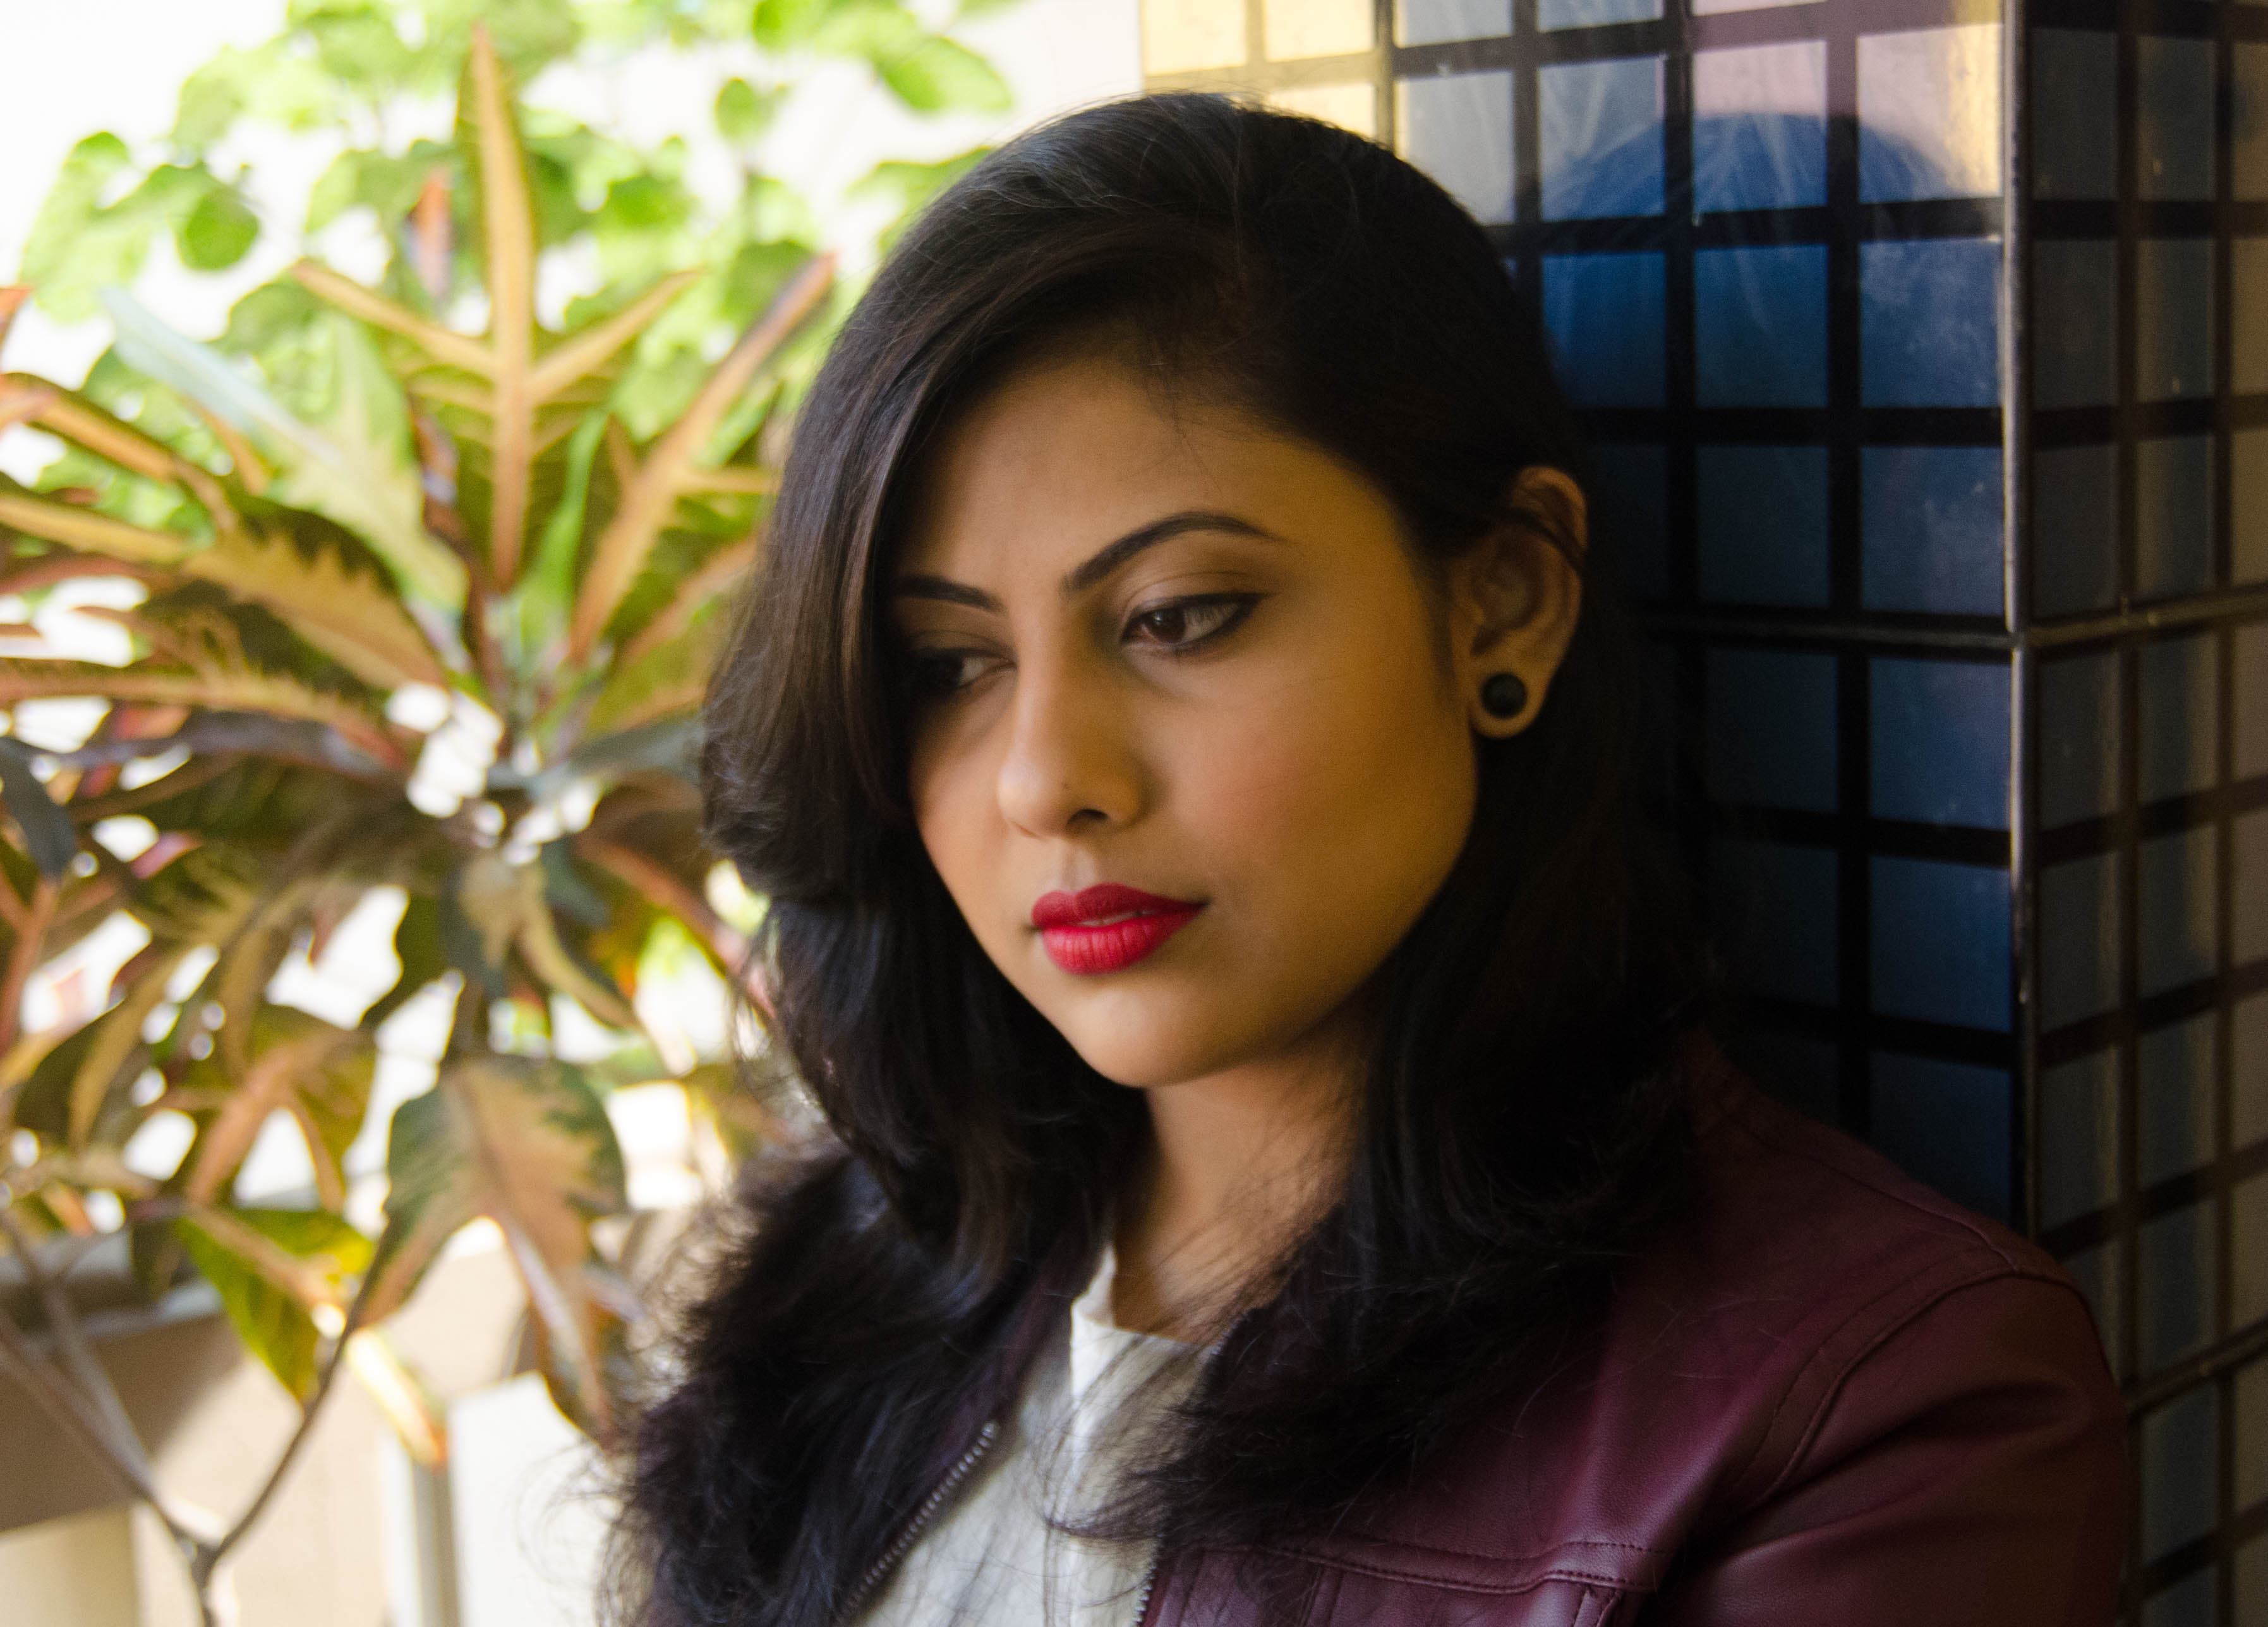
3. Lips- For the lips, I chose a bright reddish colour to brighten up the face and at the same time keeping it wearable. I have the Estee Lauder Pure Color Envy Sculpting lipstick in Envious. I got the sample with my Sephora purchase (Read Here).
That’s all, guys! I hope you liked the post. I kept the look pretty simple. It is easy and really quick! So, you can try this out even if you are not a pro. With this post, I wrap the the second day of the Fall Party. Share the posts as much as you can to make this a hit! See you tomorrow with a new post. Till then, be safe & keep smiling!
Hello everyone, how are you doing? Today I have come up with a number of tips on how to look best in photographs. I hope you enjoy this post. Let’s start-
Makeup for photography is entirely different from the makeup we do for normal days. The flash not only brightens up your face but also it takes away the natural colours and shadows from your face. Plus, the millions of pixels in a photograph emphasizes even the pettiest flaw in your makeup. Today, I am sharing some tips with you so that you can look your best in the photographs and I am sure it will lessen your post-processing time.
First thing first, you need to prepare your face pretty well before putting on your makeup. Make sure you cleanse and moisturize your face nicely. You would not want your camera to emphasize those rebellious dry patches on your cheeks, chin or around your mouth. Don’t forget your lips!
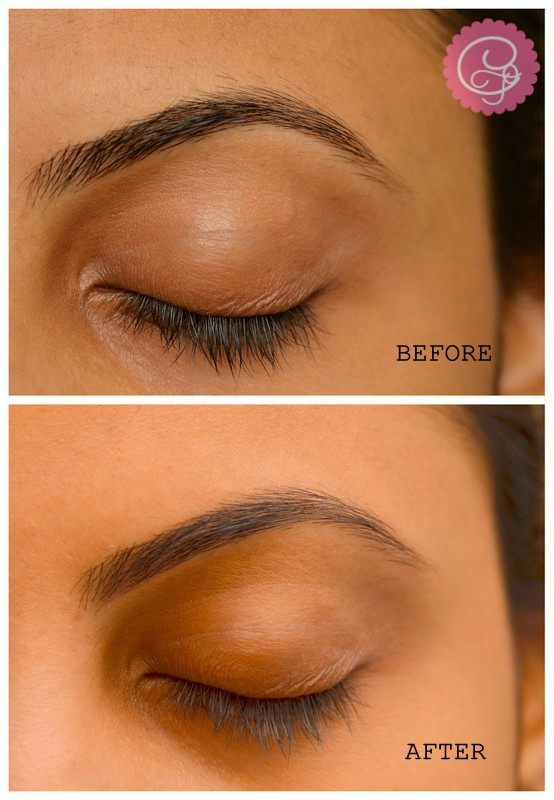
1. Define Your Brows: Flash photography can emphasize sparse eyebrows. It can even wash out those brows that look quite thick in reality. So, make sure you define your eyebrows with an eyebrow pencil or powder or any brow defining gel. Finish it off with applying some clear brow gel or clear mascara on top of it to keep it in place.
Used a deep brown eye-shadow to fill in my brows
2. Choose the Right Foundation: Foundation helps to even out your skin tone giving you the perfect canvas to work on. Do not choose a foundation that is way lighter than your skin tone. It would not make your look fair rather it would make your skin appear as a mask in the photographs. Nobody want that, right?
Used Lakme CC Cream as a base/foundation
3. Never Forget to Conceal: You must not skip the step of concealing your under-eye area and your blemishes or breakouts. Let’s admit it, everyone wants to look perfect on photographs. Your dark circles might ruin your whole makeup. Plus, concealer helps brighten up your face.
4. Contour Your Face: Contouring is not only for making your face look slimmer. It actually brings back the structure to your face that your foundation takes away. It gives a depth and definition to your face that saves your face from looking flat in photographs.
5. Tight-lining Your Eyes: This is a step that instantly brings changes to your eyes. After lining your eyes line your upper and lower waterline. By lining your upper waterline you can fill in the gaps that show through your lashes, especially you have scarce eyelashes. It will make your lashes thicker. I love doing this step.
Used Maybelline Colossal Kajal to tightline my eyes
6. Focus on Your Lips: No matter which lip shade you choose, make sure you line your lips before putting on any lip colour. If you have thinner upper lip, make sure to overdraw it so that it looks fuller on camera. Apply some concealer around the outline of your lips to make everything neat.
Lipstick- MAC Plumful, Lip-liner- Maybelline Midnight Plum
I hope this post helps you to get your best photograph. If you have any more tips then share them with me in the comments below. Thanks for reading!
This post is inspired by Rewardme’s post- 5 Easy Ways to Perfect Mobile Makeup. Find it here.
I am participating in the ‘Ready For Rewards’ activity for Rewardme in association with BlogAdda.
Hey all! How are you? If you follow me on Facebook or Instagam you might know that I lost my maternal grandfather a few weeks ago. Blogging took a backseat since then as I was totally busy in attending his funeral and other rituals. After spending almost a month at my maternal grandparents’ home, I am finally back. I promise to blog more often from now. Now, let’s talk about this post. A fellow blogger and friend, Shreoshe from Bong Beauty Palette, asked me to collaborate with her in an activity called ‘Twice As Nice’ by Garnier. I readily agreed to her proposal because of two things that flashed in my mind at that time. First, I had never done a collaboration post with anyone before and second, the name Twice As Nice impressed me a lot.
We decided to combine the topics we mostly talk about in our blogs, like, she mostly reviews skincare items and my blog is full of makeup items reviews and tutorials. So, we are going to talk about how makeup and skincare works together to make you beautiful and how they are twice as nice!
Shreoshe from Bong Beauty Palette
Shreoshe will tell you how daily skincare is must to make your skin happy and healthy forever. This is what she has to say-
“
As the temperature rises high in summer, our skin has to face the harsh sunlight every day. Adding to that our skin feels oily, sweaty and thus attracts a lot of dirt in summer, not to forget the suntan and blemishes that joins in! Here are some handy tips to keep your skin healthy and radiant during summer:
Keep yourself hydrated. Drink 8-10 glasses of water each day and carry water bottle while you go out.
Use sunscreen before going out in the morning. Apply the sunscreen at least 30 minutes before you leave the house.
Use natural toner at home like cucumber juice, store it in fridge and use it whenever your skin feels dull or tired.
Cleanse your face twice a day with a good face wash that will remove dirt and oil effectively.
To get rid of tan, mix gram flour with yogurt and apply the paste all over the tanned area. Wash it off after 20 minutes.
Use shower gels and bath salts to get a glowing skin.
Have a good sleep to reduce stress.
”
Making Your Skin Happy| The #TwiceAsNice Project with Garnier
Now after the very important skincare regime, you need some more pampering. Let’s allow your makeup products to take that responsibility. I will show you how to do a very easy, fresh and effortless makeup for this summer. Follow the five easy steps to achieve the look that I created-
Prepare your base with any BB cream/ tinted moisturizer and concealer you like. Don’t forget to apply a matte and sweat-proof compact on top of that.
To add a natural flush to your cheeks apply some pink/coral blush to the apples of your cheeks.
Tightline your eyes with a black kohl. If you have very oily lower waterline like I do then skip tightlining your lower waterline.
Curl your lashes and apply a good amount of mascara.
Apply your favourite summery pink lipstick.
·
·
~My Take on the Garnier Pure Active Duo~
The Garnier Pure Active duo is basically a face-wash and a scrub, a combo that is #TwiceAsNice. We all know that scrubbing your face at least twice a week is very good for our skin as it removes all the dirt and dead-cells that tend to clog our pores and causes breakouts. The Garnier Pure Active Exfoliating Face Scrub is a creamy scrub filled with apricot seed powder. The scrubbing particles are finely milled so that they don’t feel harsh on your skin. This mild scrub gently scours away all the impurities from your skin without making it dry.
Garnier Pure Active Exfoliating Scrub
Garnier Pure Active Neem Purifying Face Wash
The Garnier Pure Active Neem Purifying Face Wash is rich in all the benefits of Neem as you can tell. It’s a gel based face wash that lathers well but doesn’t make your skin feel stretchy or dry after the wash. It removes the extra oiliness from your skin which is best for me in this season. It also deep cleanses your skin to remove all the dirt from your pores. I love the smell of both the products. They have very refreshing, fruity and summery fragrance in them. I love how they make my skin feel soft and fresh. I have been using them for a week now and so far I am impressed by their effectiveness. I can share my final opinion about the duo only after using them for a couple of weeks. The duo is worth trying out. Have you guys tried the Garnier Pure Active duo yet?
I hope you like this #TwiceAsNice post. I would love if you check out Shroeshe’s take on this topic. If you loved this post then don’t forget to share with your friends. I will be back with another post this weekend. Till then be safe and keep smiling!
Hi all, how are you? It feels so relaxing and relieving to come back to blogging after a hectic exam schedule. Though I posted a couple of posts in between the exam dates but there is nothing like blogging freely and regularly. Honestly, I am pretty lethargic when it comes to blogging frequently but I do miss blogging whenever I am away from it. Confusions!!
Sometimes we run out of time before going to a party or an event (It always happens to me) and we don’t even get time to get ready the way we wanted or imagined earlier. We dress up properly, do our makeup, do the hair but always forget about nails. Today, I wanted to share with you guys a quick and easy way to glam up your nails, without any hassle. In this way you can ditch the time-consuming nail arts and save your time and energy. Here is how-
A Little Bit of Glitter| Quick and Easy Glam Nails
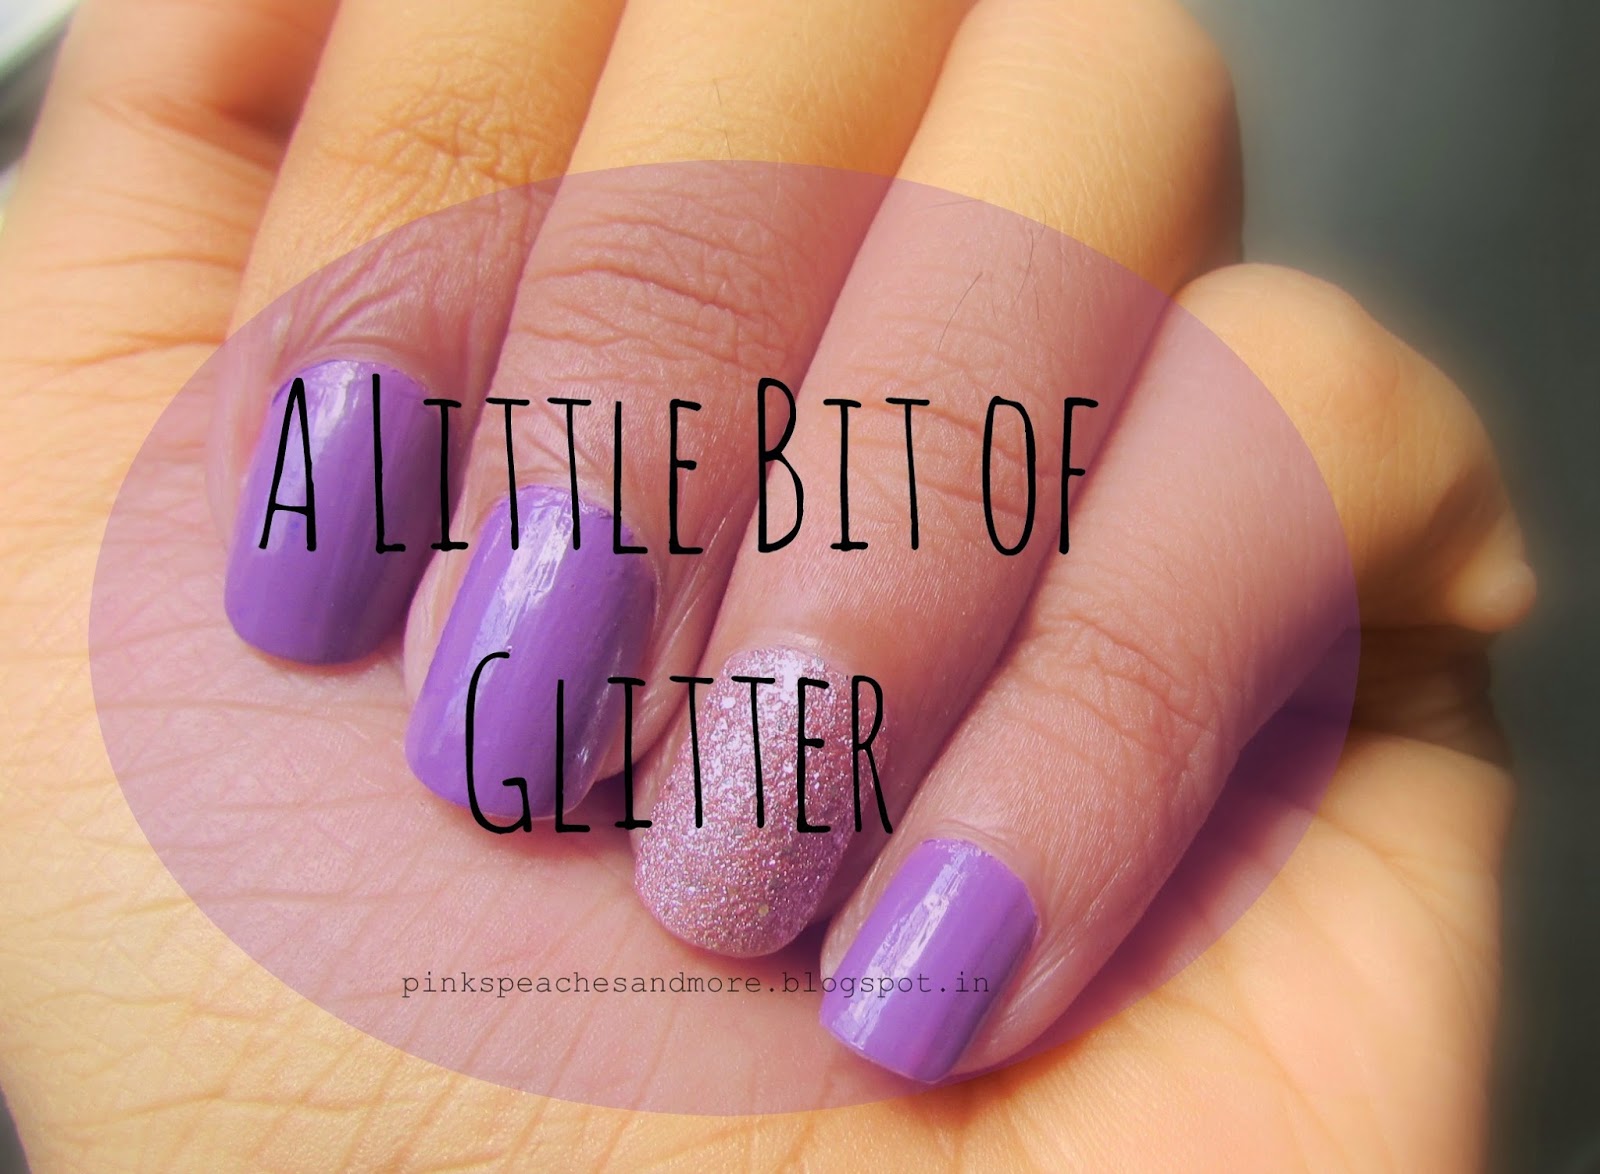
This is a very simple yet gorgeous idea to jazz up your nails. You just need one regular nail polish and a glitter nail polish. I have used Maybelline Color Show nail paints in Lavender Lies and Pink Champagne (Glitter Mania range). Apply the glitter nail paint to any one of your nails (most preferably your Ring finger) and the regular nail polish to the rest of the nails. It’s all about co-coordinating. So be creative, choose the colours wisely and voila!
Do try this with different colours and patterns and don’t forget to share your pictures with me in or Facebook, Twitter or Instagram. I might share/repost/retweet your pictures and have a Nail Party together. That’s it for today, guys. I will be back soon with a new post. Till then be safe and keep smiling!
A Little Bit of Glitter| Quick and Easy Glam Nails
Hi all, how was your day? Mine was a boring one. No one likes to study all day!
Anyways, today I have a very colourful post for you all. It’s March already, the transition time from Spring to Summer. Moreover, tomorrow is Bengal’s version of Holi. So, I thought of creating a look that is soft with a pop of colour. I chose the colours pink, peach and teal for this look. Have a look-
Beauty UK Eyeshadow Palette- Soho (Used the 1st row, 2nd Shade from the left)
Maybelline Colossal Liner
Maybelline Colossal Kajal
Inglot AMC Gel Eyeliner- 87
Maybelline Hyper Curl Mascara
(Lips)
Colorbar Velvet Matte Lipstick- Thrilling Pink
Maybelline High Shine Lip Gloss- Electric Shock
How to Achieve the Look-
Step 1: I started with my face first. I prepped my face with the Lakme CC Cream and then after color correcting my dark circles with the Kryolan Derma Color Camouflage cream, I concealed the under-eyes area and finished it off with a compact powder. Then I used a matte pink blush to the apples of my cheeks slightly dragging it diagonally.
You can apply a highlighter too, but as my skin has started getting very oily, I skipped it.
Step 2: Prep your eyes using a eyelid primer to prevent the eye-shadows from creasing. To make everything simple and short, I have used only one shadow to the lids. I took the peach-y shade from the Beauty UK palette, you can use any peach eye-shadow to achieve this look. After the eye-shadow, I then lined my upper lash-line with a liquid liner as thin as possible. Then, I tight-lined my eyes and applied a few coats of mascara only to the upper lashes. With the help of a stiff angled brush, I then lined my lower lash line with a teal coloured gel/cream eye-liner. This gives a sudden lift to the look.
Step 3: I applied a soft pink matte lipstick and then topped it off with a bright pink gloss. If you want the look to be less glossy, you can always blend the lip colours with the help of your finger.
That’s all, peeps! I hope you liked the look. The whole idea of this post is to share my ideas with you. You can always change the shades to create a whole new look as per your liking. If you ever re-create this look, don’t forget to share your pictures with me. I would like to showcase them on my social media. I will be back again very soon with a new post for you. Till then stay safe and keep smiling! Happy Holi in advance!
Save water, be kind to animals and celebrate the festival of colours safely and sincerely. Lots of love.
Hi all, tomorrow is Valentine’s Day, a special day for all those who are in love. Though I don’t believe that one needs a specific day to express or celebrate love, I don’t even criticize the mood of Valentine’s. It has a certain flavor to it. No matter if you are single or taken, you can enjoy Valentine’s Day in your own way. For those who have a special plan tomorrow and haven’t decided what makeup should be done, here I have a simple, easy and quick makeup-look for you.
My boyfriend and I usually do not go out on Valentine’s Day (we have another special day), but if we ever plan one in future I would like to go for a soft and natural look (you know men, they love bare faces!) with subtle lipstick. That is my kind of a Valentine’s makeup. I have created this look for day time, you can always transform it to a night time glam look just by switching some things up. I’d tell you in the end. Keep on reading.
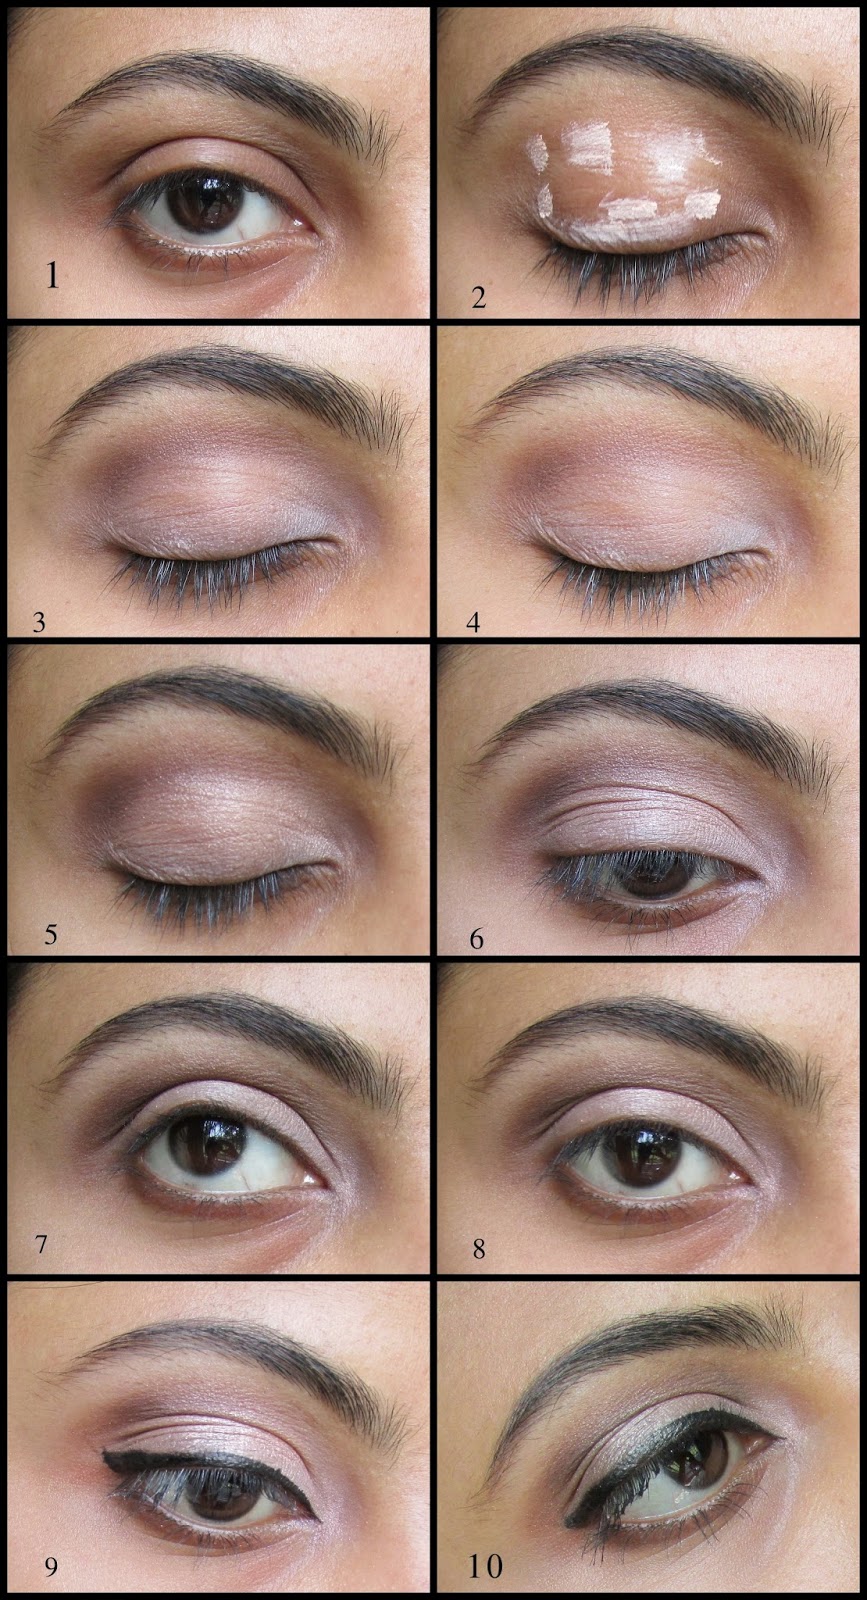
This time, I have started with my eyes before doing my face. Here are the steps to achieve the eye look-
Step 1: Start with filling in with your brows. Use any technique you are comfortable with- pencils, powders or creams. You can’t afford to try new techniques on such an occasion.
Step 2: Apply some eye lid primer. It will help your eye-shadows stay longer and exact.
Step3: Take some dark brown eye-shadow in a fluffy brush/blending brush and apply it right onto the outer corner of your eyes and drag it along the crease. I have used ‘Semi-Sweet’ from the Too Faced Chocolate Bar Palette. [P.S. – Your crease is where your eyelid folds.]
Step 4: Blend, blend and blend. Blending is the key. The more you blend the softer it looks.
Step 5: After you are satisfied with the blending, take some lighter shimmery shade in a flat shader brush and apply in right on to the middle of your eyelids. I have used a peach-y shade called ‘Marzipan’ from the Chocolate Bar Palette. [P.S. – Shimmers help in reflecting light. If you’ve planned a candle-lit dinner, shimmery or metallic eye-shadows are must. It doesn’t have to be truckloads of shimmer, just a little hint would do. Subtle shimmers can be used even for daytime looks.]
Step 6: Apply a highlighting colour, close to your skin tone, on the brow bones. I have used the shade ‘White Chocolate‘ from the Chocolate Bar Palette.
Step 7: With an angled brush, apply the same dark brown shade along your lower lash line.
Step 8: Apply the same highlighting colour on the inner corners of your eyes. It would make them look bigger.
Step 9: Apply a liquid liner as close to your lash line as possible. You might not go for a full-fledged winged eye-liner but a little flick at the corners would definitely make your bae fall for you once again.
Step 10: Curl your lashes and apply generous coats of mascara. Remember, mascara is the elixir of a neutral look.
Soft & Coral Valentine’s Day Makeup Look| Step by Step Tutorial
For the face, I have just applied foundation and concealer. Applied some coral blush starting from the apple of my cheeks slightly dragging the brush diagonally along the cheek bones. For my lips, I have applied a coral lip tint which gives the look a softer finish. This look is perfect for both day and night time but if you want to go for a more glam look you can transform this look by applying a kohl on the waterline, slightly smudging it and by swapping this lip colour with a red lipstick.
Soft & Coral Valentine’s Day Makeup Look| Step by Step Tutorial
Just as I said earlier, Valentine’s Day is all about you. Being you is most important. Makeup can help you look better but you are what you are inside. That cannot be changed. If you don’t like makeup, be a rebel- rock your distressed jeans and loose tees, ditch the lipstick, be a tomboy. It doesn’t matter until you are yourself. Happy Valentine’s Day.
I hope you liked the look. Do comment and share your views with me. If you recreate this look, do share them with me. Tag me in your photos on Instagram and I’d repost some of your looks. Keep then stay safe and keep smiling.
Hello everyone, welcome back to my blog. The New Year has started off pretty well. If you’re new to my blog then please note that Cherry On Tophas turned 2 on the 13th. It’s still unbelievable that I’ve walked that long and reached the second year. I have also a giveaway running on my blog’s FB page where I am giving away one 12pc Soulflower bathset. It will end on 14th February. So, join in soon J
~~~~~~~
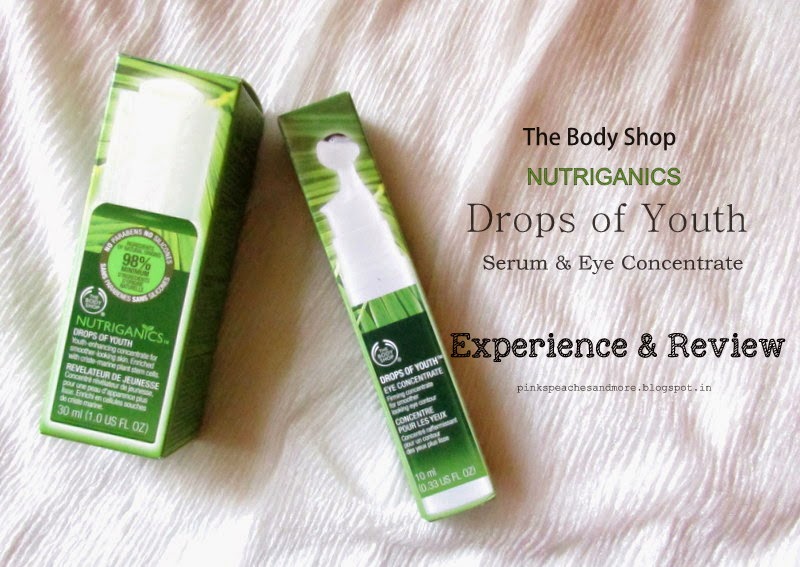
Today I’ve brought to you a review of the TBS Drops of Youth skin serum and eye-concentrate duo from their Nutriganics range. Long back, I was invited to the launch event of these two miraculous products at The Body Shop store, City Center, Kolkata. If you don’t have any idea what it was all about then read the full post here. At that event, we were presented with the products by the brand.
As you can tell by the name the Drops of Youth duo works as anti-ageing treatments. I use the skin serum twice a day after cleaning my face but I use the eye concentrate only in the nights. I have seen that applying the eye concentrate in night gives it more time to sink into the skin and also it helps relaxing the eye area which is very refreshing for the entire body and soul.
Drops of Youth Skin Serum
The Body Shop Nutriganics Drops of Youth Duo| Review
Packaging: The skin serum comes in a glass bottle packaging with a screw lid that actually is a dropper. When you push the top of the lid the fluid gets collected into the dropper and then when you push again it gets dispensed. The dropper is also made of glass which makes the whole thing inappropriate for travelling.
How to use: I use it twice a day after cleaning up my face and neck. I take about 2 drops of it (a little goes a long way) and gently apply it on all over the face. Then I follow it by applying my moisturizer. This product is supposed to be applyed on bare-face after cleansing and toning and before moisturizing.
Consistency: The product is quite dense in consistency but then it is not sticky too. It spreads easily and uniformly on the skin without giving that sticky feeling. It blends effortlessly and sinks into the skin within no time. As it isn’t very thick and viscid it could be used throughout the year without any hassle.
My Experience & Review: I think this is the first time I have been so impressed with a skincare product. When I started using, it seemed to be an average product to me- a serum that works as an anti-ageing agent, but soon I was proved wrong. I have been using it for almost two months (or more) and over the time I have found out that my skin has improved magically. I am blessed with a good skin, I don’t have acne and blemishes but I do have some other minor problems like uneven skin and occasional breakouts. This serum has worked as a magic potion for me as it has eliminated the unevenness making it visibly smooth and soft. The occasional breakouts I used to get during ‘that time of the month’ or after threading my eyebrows no longer appear. I have not brought any changes to my lifestyle or diet so I believe it’s the serum that has prohibited the furtive breakouts from appearing.
The price is slightly on the higher side but believe you me people, it’s worth every penny!
The Body Shop Nutriganics Drops of Youth Duo| Review
Packaging: This product comes in a plastic bottle-type packaging with a pump which has a metallic roller-ball end. It also comes with a semi-transparent plastic cap. The packaging is very sleek and travel-friendly. It can easily fit into a purse or wallet while travelling.
How to use: I use this concentrate only at the night because I have found that it works best when you rest your eyes after the application. In this way, you give some time to the serum to sink into the eye area which results in fresh and awakened eyes the next morning. You have to pump a small amount of product (that you can see dispensing from the roller-ball area) and apply directly underneath he eyes with the help of the roller ball. Don’t tug and pull as you might reverse the operation that the product is supposed to do. After you spread the serum evenly, now you have to use your ring finger and gently pat it until it sinks in entirely.
Consistency: It’s a concentrate so it has to be a little denser in consistency. Again, this product is not sticky and spreads effortlessly. It doesn’t leave the eye area dehydrated post application.
My Experience & Review: I have been noticing some fine lines under my eyes and you know that it is not a delightful sight for a woman. I started using this hoping that it’d fade away the nefarious lines beneath my eyes, but it did nothing like that. The fluid is very cooling and it instantly removes any sort of tiredness from the eyes making them fresh and awakened. The metallic roller-ball applicator works best as the metal soothes the eye area and provides the cooling sensation that is most required after a hectic day. For me, it works as a potion that soothes my eyes, makes them look awakened, eliminates the puffiness and takes the fatigue away. It doesn’t fade dark circles, doesn’t work on fine lines and unlike the company claims it doesn’t make the eye area look firm instantly but with continue use, it makes the eye-area look firmer over some time. The key ingredient is the stem cells of the Edelweiss flower that grows in the Alpine region in the adverse conditions and considered as natural anti-ageing agent.
My overall experience with this eye concentrate is pretty good. It’s a product by the liaison of nature and science which leaves me in no distrust that it will work best for me. If you want an eye-concentrate that is supposed to eliminate dark circles and fine lines then you should stay away from it.
The Body Shop Nutriganics Drops of Youth Duo| Review
Overall, I have been loving both the products a lot, especially the skin serum. 30ml of products goes for a really long time. I have been using it for two months and a few days and I guess it would last me for another two months at least. The eye-concentrate is also a decent product for soothing your fatigued eyes. If I ever plan to repurchase any of them, it would surely be the skin serum. I highly recommend the serum. If you buy it, it would be a smart and fruitful investment. I hope you liked the post. I would be more than just happy if you find this post helpful. See you again soon. Till then stay safe and keep smiling!
Hi all! It’s been a long time since my first and so far last eye makeup tutorial which was posted in the month of February. As the festival of lights and glamour a.k.a Diwali is around the corner, I thought of doing another makeup tutorial for you, theme being the lights and sparkles of Diwali. You must agree with me that nothing comes in mind except for golden eye-makeup when it comes to Indian festive makeup look.
Here is my look inspired by the glitz and glam of the most glamorous Indian festival. Hope you enjoy it. Please read this post till the end for the disclaimer. Now, let’s get into the post-
Products Used-
(Face)
Ponds’ BB Cream
Maybelline Dream Lumi Touch Concealer
Lakme 9 to 5 Flawless Matte Complexion Compact
L’Oreal True Match Blush in Rosy Cheeks
(Eyes)
ELF Eyelid Primer
Maybelline Color Tattoo in Bold Gold
MUA Glamour Nights Palette (Golden and Black)
MUA Undressed Palette (Shade 1)
Maybelline Colossal Kajal
MUA Eyeliner (White)
Maybelline The Volume Express Mascara
(Brows)
MUA Glamour Nights Palette (Black)
(Lips)
Colorbar Velvet Matte Lipstick- Oh My Magenta
Essence XXXL Shine Lipgloss- True Love
(Brushes & Tools)
Real Techniques Expert Face Brush
Faces Eye Shader Brush
ELF Small Angled Brush
Colorbar Emphaseyes Blending Brush
ELF Crease Brush
Faces Eyelash Curler
Gone Gold | Simple and Easy Festive Makeup Tutorial (Step by Step)
Step 1: Prep your face with your favourite foundation and concealer and set it with a compact or loose powder.
Step 2: Fill in your brows with a black or deep brown eye shadow or eyebrow powder understanding your skin-tone. [Tip: Use an angled brush to fill in your eye-brows. It works precisely on the arches.]
Step 3: Prime your eyelids with any eyelid primer. I have used my favourite ELF eyelid primer. This step is mandatory in order to make your eye makeup last longer no matter how long you let yourself on the dance-floor.
Step 4: Now, apply the Maybelline Color Tattoo in Bold Gold all over your lids, leaving the crease area. This will act as a base and will give your eye shadows something to stick to. [Tip: Apply the product with your finger. It will allow you to work smooth and it will distribute the product evenly on the lids.]
Step 5: Apply a golden eye shadow that best matches your skin all over the lids with the help of a good shader brush. Here you can also use your fingers to apply the eye shadow.
Gone Gold | Simple and Easy Festive Makeup Tutorial (Step by Step)
Step 6: Take a crease brush and apply a little bit of any matte black eye shadow and dab it on the outer ‘v’ of your eyes. Don’t overdo it. We just want a subtle hint of black to eliminate the flatness of the eye look and add a little definition.
Step 7: Blend it very well with a fluffy blending brush. [Tip: When you are using a black eye-shadow, make sure you blend it extra carefully. Don’t drag it to the entire lid.]
Step 8: Tightline the upper waterline with a jet black kohl. I have used the Maybelline Colossal Kajal as it lasts long. Curl your lashes and apply multiple coats of mascara. Make sure you apply generous coats of mascara on top and bottom lashes as we are not using any eyeliner to define the eyes. In this case, mascara will do it. Apply a flesh-tone shade to the brow bones. [Tip: Use a long-wear and water-resistant eye-pencil for tightlining the eyes. It won’t transfer and won’t smear the eye with black kohl.]
Step 9: Apply white kohl on your lower waterline. With the help of the same angled brush and black eye-shadow you used for the eyebrows and trace along your lower lash line, leaving the inner corners of your eyes. [Tip: Applying white liner on the lower waterline creates the illusion of bigger eyes.]
Step 10: Final look.
Gone Gold | Simple and Easy Festive Makeup Tutorial (Step by Step)
You can use your choice of products, it’s not mandatory to use what I used.
~Finished look~
Gone Gold | Simple and Easy Festive Makeup Tutorial (Step by Step)
Disclaimer:
1. Makeup is not what I think is extremely important in our lives, nor that I preach that everyone should use makeup. Some like makeup and some don’t. It’s just like some people love dressing up and some love to be in their pajamas most of the time (Even I belong to the latter category :P). So, there is nothing wrong in doing makeup and nothing wrong in not doing it as well. One should not be judged in terms of their preferences.
2. I am not a makeup guru, nor that am I claiming myself a makeup expert. It’s just what I tried on myself and wanted to share with all of you. There are many expert makeup artists and bloggers who are way better than me. I do not compare myself to them as I feel I have a long way to walk before I reach that level. Please do not judge me.
The title of the post makes me the ‘official Gone Girl fanatic’. LOL 😛
I hope you liked the look and the tutorial. Feel free to comment below. Show your love, write down your queries and expert advices. Love you all. Till next time. Bye J
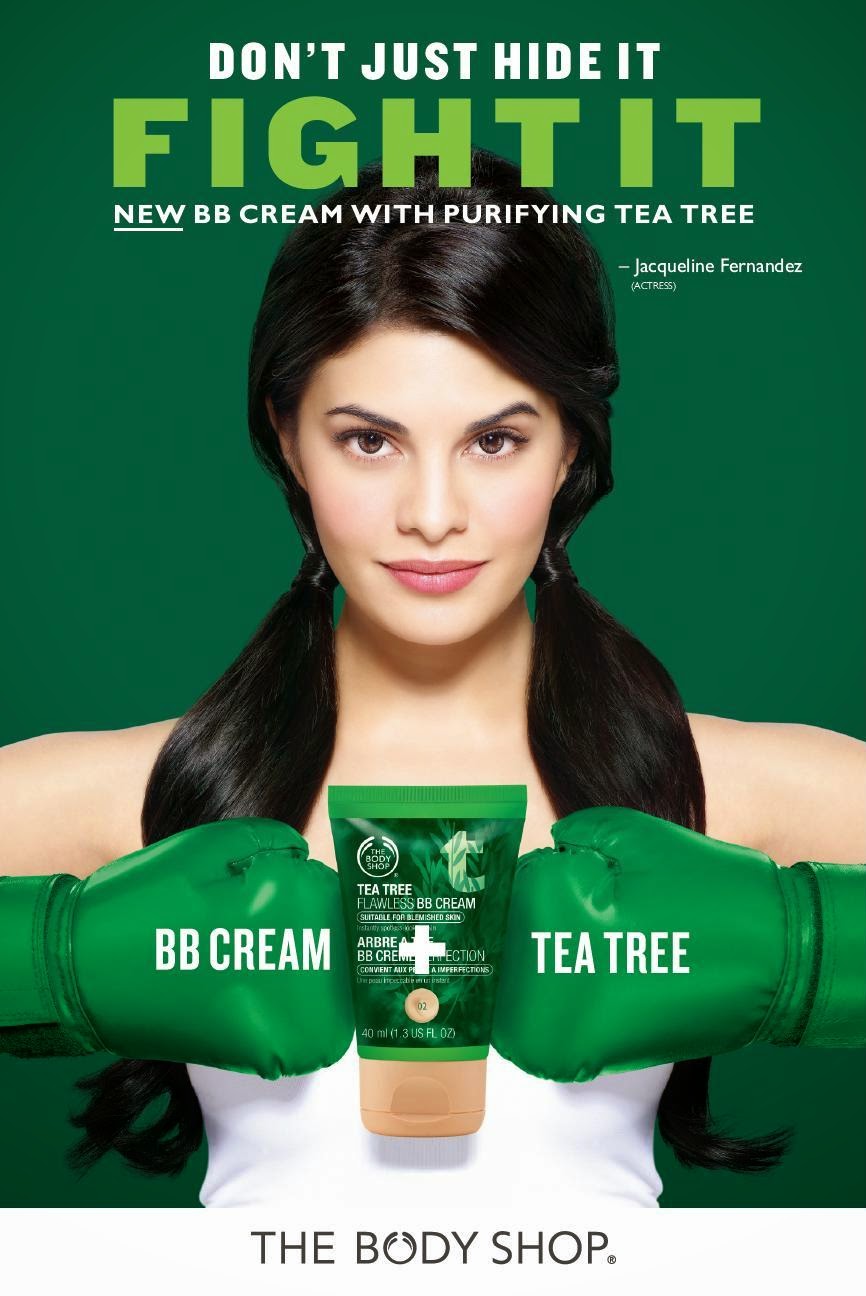
We all know how having troublesome skin on the outside can make you feel on the inside. But keeping blemished skin make-up free sometimes just doesn’t feel like an option.
Tackle blemished skin the right way with NEW Tea Tree Flawless BB Cream from The Body Shop. Powered by purifying Community Fair Trade Tea Tree Oil from Kenya, the lightweight cream not only perfects your complexion, it fights the look of blemishes.
Use in the morning or grab and go for daytime emergencies with this complexion-perfecting dual action cream! Discover the right shade for you with three shades to choose from – 01 Light, 02 Medium and 03 Dark – that blend seamlessly into skin.
Available in a 40 ml tube priced at Rs 1095.
The Power of Tea Tree
First used by Australian Aborigines, tea tree oil has been known for centuries for its natural antibacterial, skin healing properties.
Sourced from the foothills of Mount Kenya, the Community Fair Trade organic tea tree is handpicked and steam-distilled within 12 hours of harvest to preserve the oil’s natural purifying antibacterial properties.
Clearer Looking Skin In 3 Days
YOUR TEA TREE REGIME
1. CLEANSE/EXFOLIATE
Gently cleanse skin daily with Tea Tree Cool & Creamy Wash. Exfoliate with Tea Tree Squeaky-Clean Scrub once or twice a week to unclog pores and smoothes skin.
2. TONE
After cleansing, remove remaining traces of make-up and impurities with TEA TREE SKIN CLEARING TONER (Rs 795).
3. MOISTURISE
Rehydrate skin with TEA TREE SKIN CLEARING LOTION (Rs 995), a light non oily lotion with shine control for a matte finish.
4. PRIME
Use TEA TREE PORE MINIMISER (Rs 1495) before BB cream to reduce pore size and smoothes, prime and mattify skin.
5. PERFECT
Apply TEA TREE FLAWLESS BB CREAM (Rs 1095) all over face and blend using fingertips for instantly spotless-looking skin, or take it on-the-go to dab on emergency spots.
HERO: TARGET
A handy size for your handbag, dab TEA TREE OIL (Rs 695) onto problem areas for targeted tea tree action.
For more details on the range please click the link below:
We believe true beauty comes from the heart. For us, beauty is much more than a pretty face.
We make our products with love and care. We source some of the finest raw ingredients from the four corners of the globe. We harness the skills of artisan farmers and add our expertise to create effective products that are wonderful to use.
We trade fairly so communities benefit as well as you. We never test on animals, and all our products are 100% vegetarian. We campaign with passion on issues close to our heart, because activism is in our blood. We always keep people, animals and the planet in mind. So when you shop with us, you are choosing…
Hello all! I hope you all are doing great because summer has started to fade out and monsoon has come! In Bengal, it’s raining most of the time, sometimes in torrents and sometimes it is drizzling only. Talking about monsoon, I remember that my hair acts extremely bad during monsoon. I have very week roots resulting in severe hair-fall and during monsoons it becomes excessive. Every time I comb my hair I feel like all my hair has come to my hand. It’s not only bad to see, but also it’s very depressing. But this monsoon, something unusual has happened. Keep reading to know more-
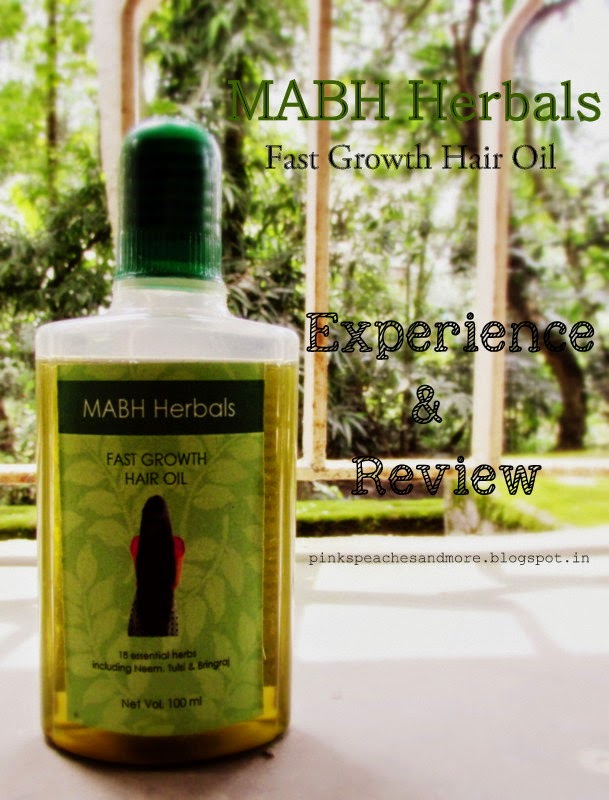
I think it was the month of June, when I received a hair-oil from Lancy (She is the maker and manufacturer of this oil. Lancy has a beautiful blog named Makeup And Beauty Home). I had also posted a picture on Instagram. She wanted me to review it. I usually worry about trying any new skincare of haircare product, for I always think ‘what if it breaks me out noxiously or what if it makes me bald?’ But when I google-searched the MABH Herbals Fast Growth Hair Oil, I found a lot of positive reviews about me. I also searched on Lancy’s blog and got to know that this hair oil is absolutely herbal devoid of any chemical substance. Moreover, it was written on the packaging that it is meant to be speed up hair growth and control hair-fall, what more I would have asked for?
Pamper Your Hair with MABH Fast Growth Hair Oil| Review
As soon as the product reached me I decided to try it for a month or more before delivering my final thoughts. I have been using it for one and a half months now and I think I am now enough experienced to give my ‘expert opinion’ 😉 During the entire testing period, I used it every alternate night just before going to sleep as I love to apply oils in this way only. I applied it onto my scalp by gently massaging it to the scalp. I wiped the rest of the oil that was on my hands on the top portion of my hair. I then covered my hair with a soft cotton cloth so that I don’t stain my pillow covers.
Product Category– Hair oil
Brand– MABH Herbals Price– 400/-
What it Claims: A unique combination of natural herbs and essential oils present in the MABH Fast Growth Hair Oil penetrates deeper into your scalp to provide rich nourishment. It also improves blood circulation, thus resulting in faster hair growth. It also takes care of dandruff, premature graying and rough hair. Our product makes your hair shinier and manageable from the first use itself; it stops hair fall within weeks of regular usage and helps you grow longer beautiful hair!
Pamper Your Hair with MABH Fast Growth Hair Oil| Review
My Experience: I have already said here that I have severe hail-fall problem along with terrible dandruff problem. I am not a person who oils her hair religiously, but this time it has opened my eyes. I can’t tell you how smooth my hair feels after every use. This oil isn’t at all greasy. I have used many herbal oils but they always left my hair with some kind of a tacky feeling, which is irritating. It has a strong fragrance which is quite often found in most of the herbal hair oils. I somewhat don’t like the fragrance. I think it can be disturbing for people who are not fond of strong fragrances like me. The scent fades away with shampooing but a little bit does linger for a little time after one wash. The oil is very light-weight, that’s a good thing for me as I prefer my hair-oils to be very, very light. I feel it didn’t do anything for my dandruff, it is the same as it was before. I won’t say it has arrested the hair-fall, but it has definitely reduced it. Also, it didn’t help in regaining hair, neither did it claim that. So, what is actually did to my hair is- it nourished it from the roots to the tips, my hair became manageable. It eliminated the frizz from the hair making it shiny and smooth. It reduced the hair-fall miraculously. I can’t say if it made the hair grow faster because I have hair that grows really fast naturally. So, I’d skip commenting on this part.
All I Have to Say is– I have been using this hair oil and can vouch on the fact that it does make your hair touchably smooth. So far it has worked great for me- it has made my hair soft and shiny, manageable and has lessened my hair fall to some extent. It is a bit pricey compared to other hair oils available in the market, but I can say that I am loving this hair-oil for more than one reasons and I am sure you won’t regret buying and using it yourselves.
My Rating– 3.8/5
I will be back soon with another new post (you can expect a haul next week). Till then take care and stay beautiful J