Category

makeup

Category

Hi, guys! Hope you all are doing good. Today’s post is going to be my everyday makeup bag essentials- things that I carry in my makeup bag whenever I am out of the door. Packaging your makeup bag is quite a task. You need to stop yourself from overpacking as your makeup bag should fit in your handbag that is already overstuffed with sweat block wipes, sunglass casesand umbrellas.

I have a certain policy for my everyday makeup bag. First of all, things that I would carry inside my makeup bag has to be my absolute favourites. I don’t carry experimental products in my bag. Secondly, my makeup bag must have fewer products but there should be a balance of makeup and skincare. Lastly, my makeup bag contents barely change. Maybe I replace the lipsticks depending on my mood or the compact depending on the season, but that’s it. I don’t carry a lot of products in my bag and these products are always the same.

One tip to not overpack your everyday makeup bag is to understand the difference between what you need and what you want. 

Kama Ayurveda Pure Vetiver Water

My Everyday Makeup Bag Essentials | Cherry On Top

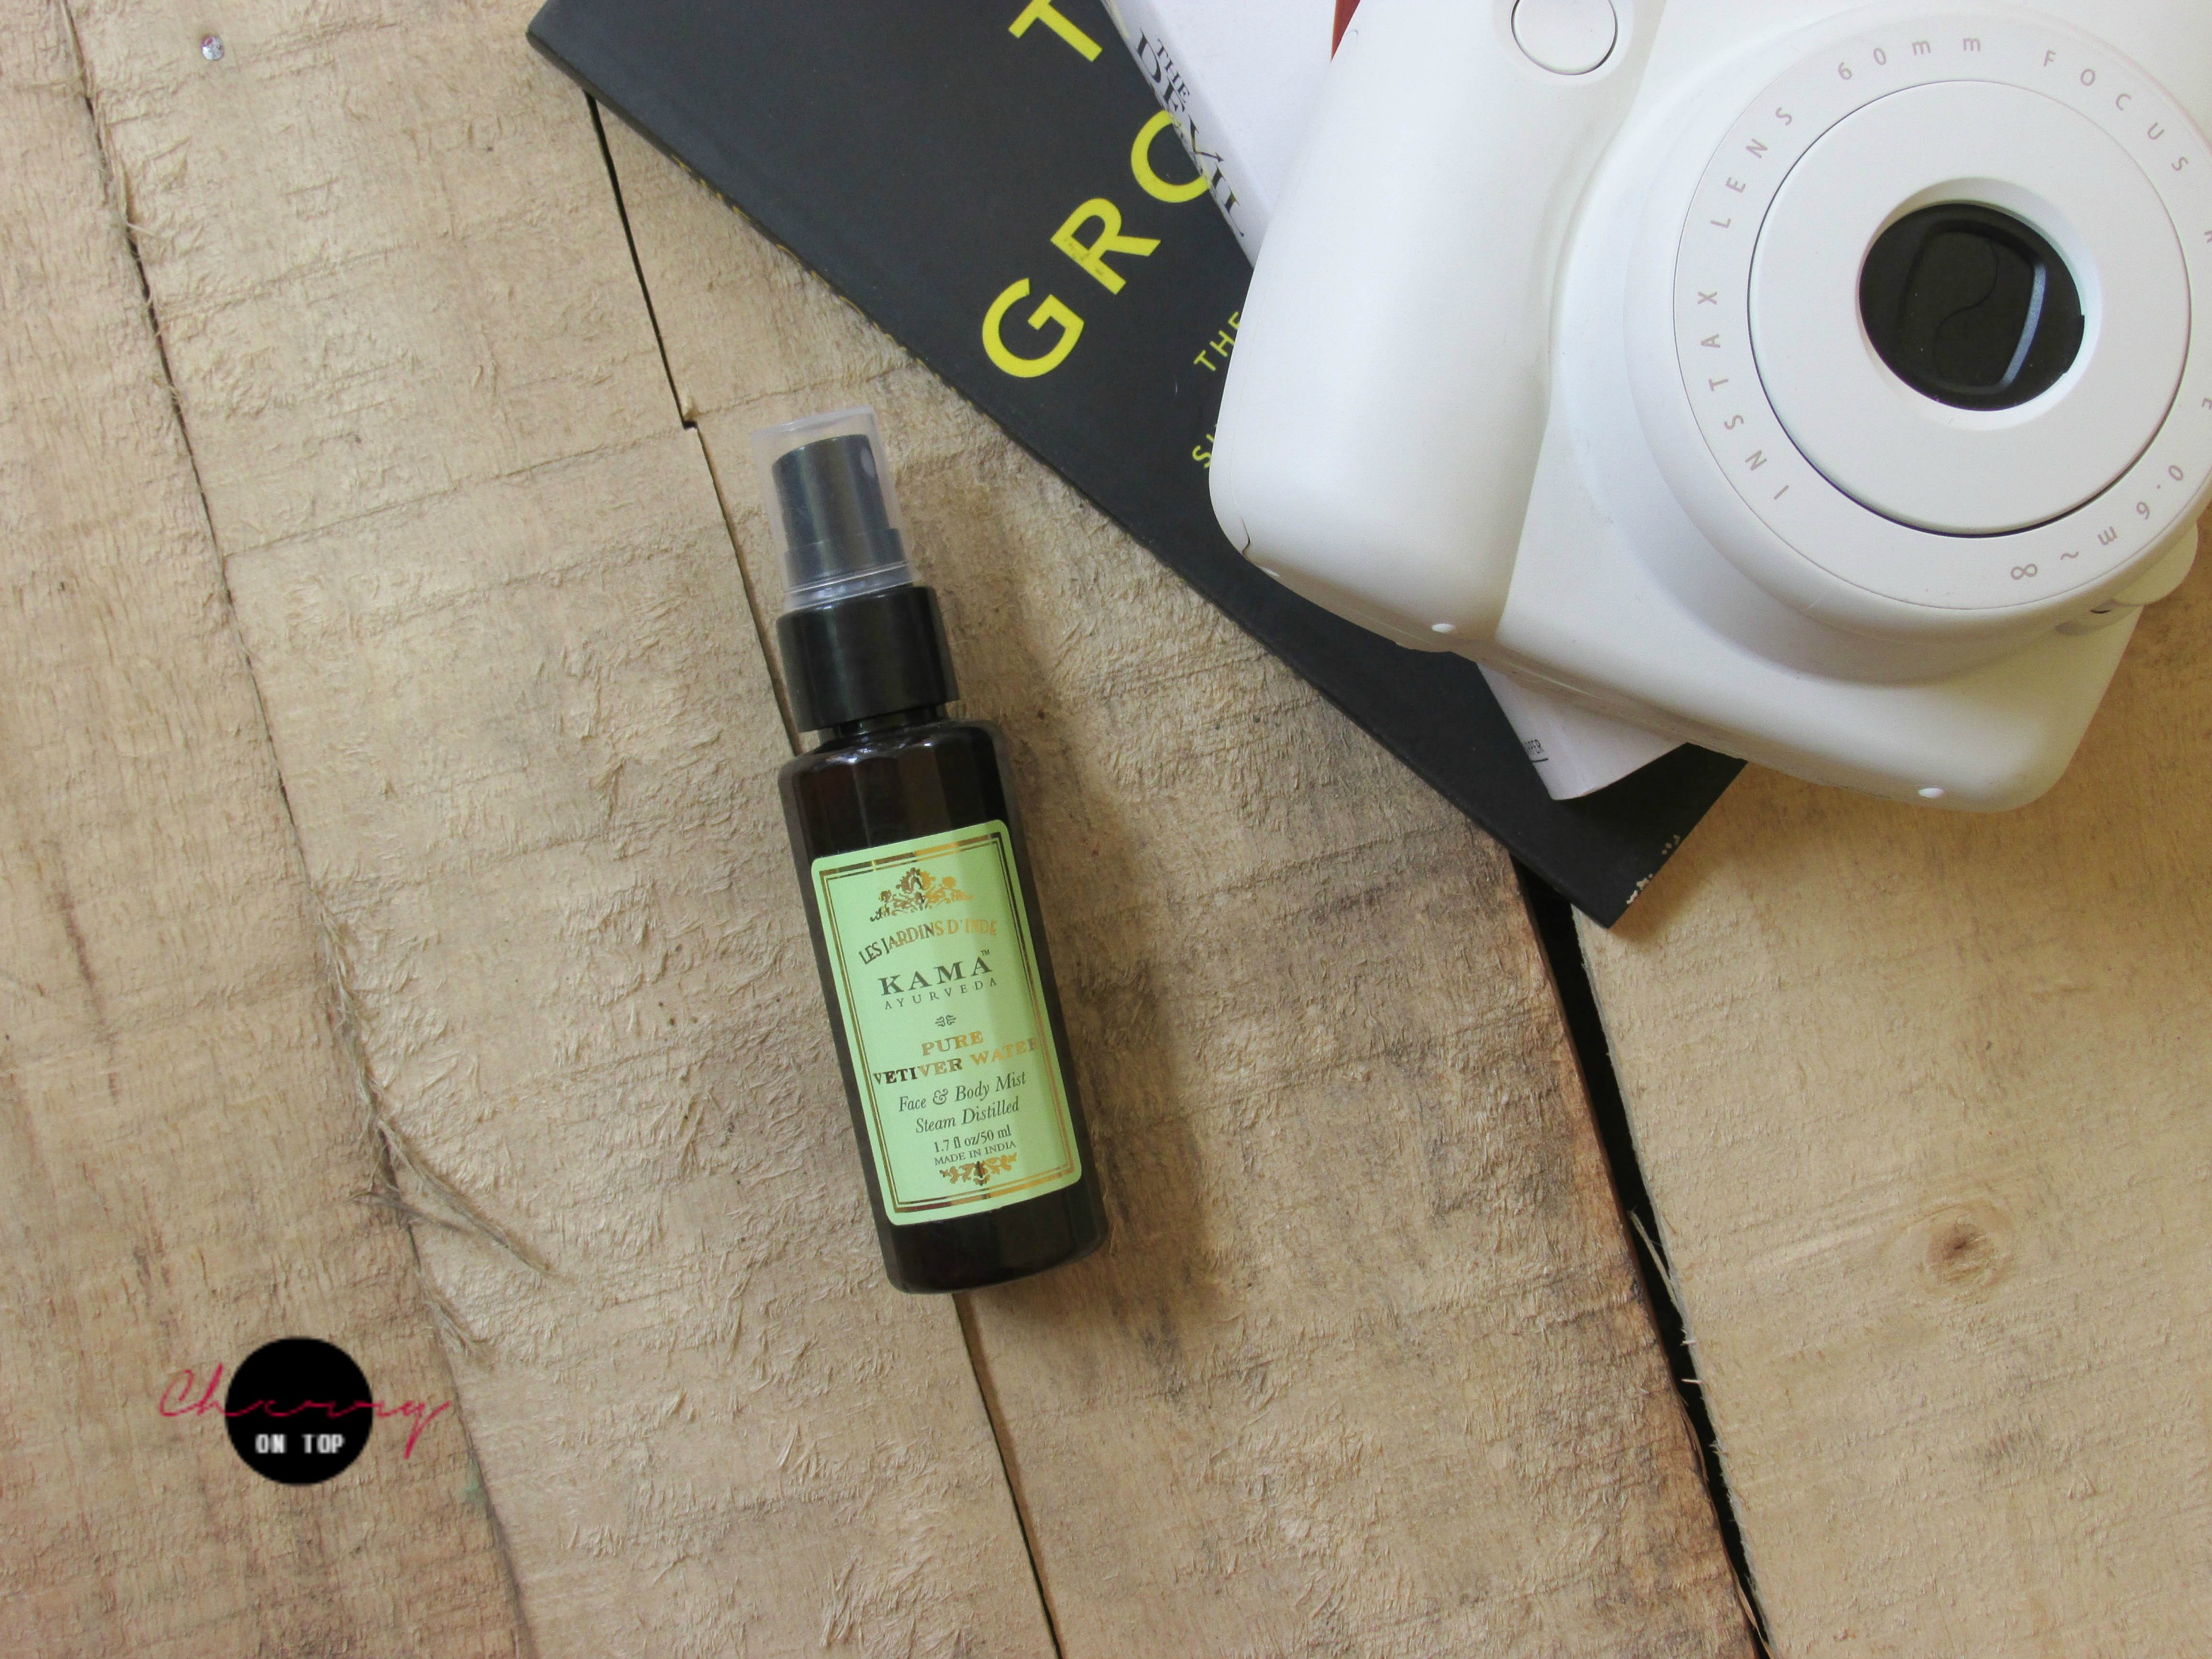
If you follow me on Snapchat (sayantinee), you must have seen me unboxing the goodie bag I received at the Nykaa Beauty Bar event. This tiny bottle of toning water comes in handy when you are out in the sun. I always keep a bottle of mist with me during summers. These mists have multipurpose usage. You can use them as toner, to freshen up your face or to prevent your foundation from caking up. I’ll share more about it in another post.

Maybelline Baby Lips Spiced Up Berry Sherbet

My Everyday Makeup Bag Essentials | Cherry On Top

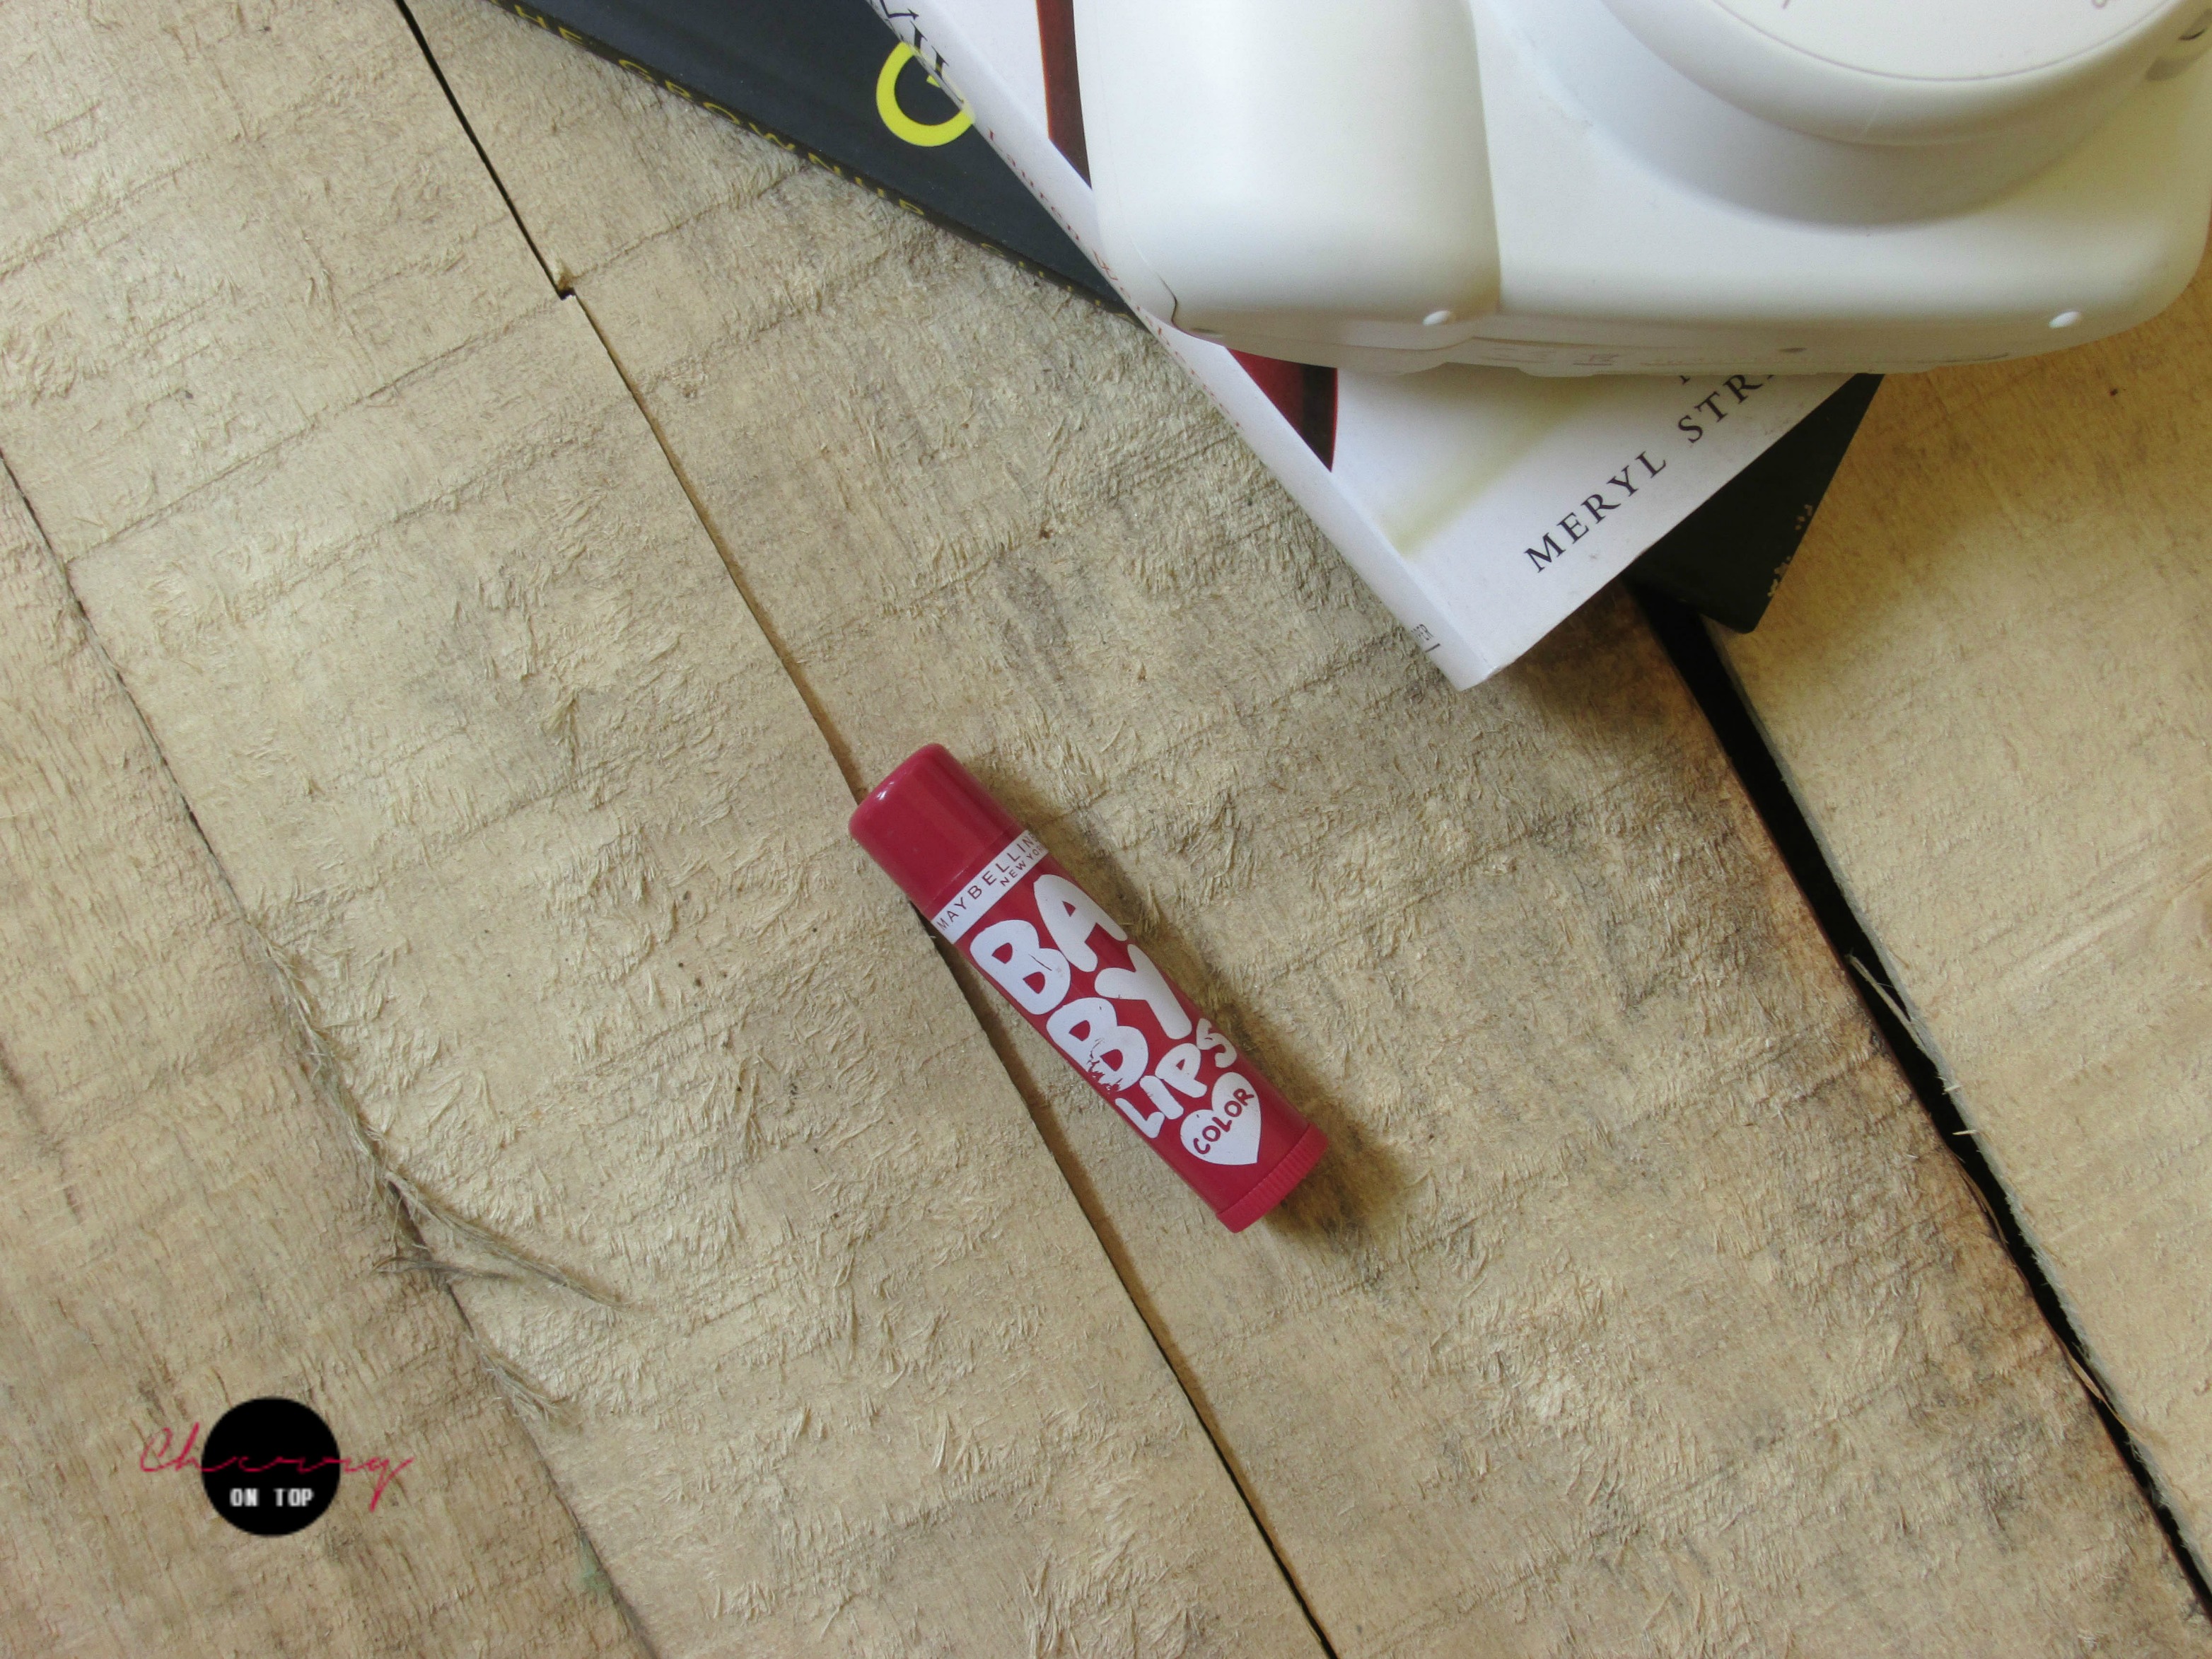
I need to carry a lip balm in my everyday makeup bag and when I say ‘need’, I mean it. I cannot do without a lip balm. My lips get chapped every now and then and I cannot tolerate that feeling. When I am on the go, I like to use this lip balm in particular because I wear lipstick and a tinted lip balm is easier to use onto tinted lips. The bonus is this lip balm has SPF 20 so I am sorted for the summer!

Maybelline White Superfresh Compact

My Everyday Makeup Bag Essentials | Cherry On Top

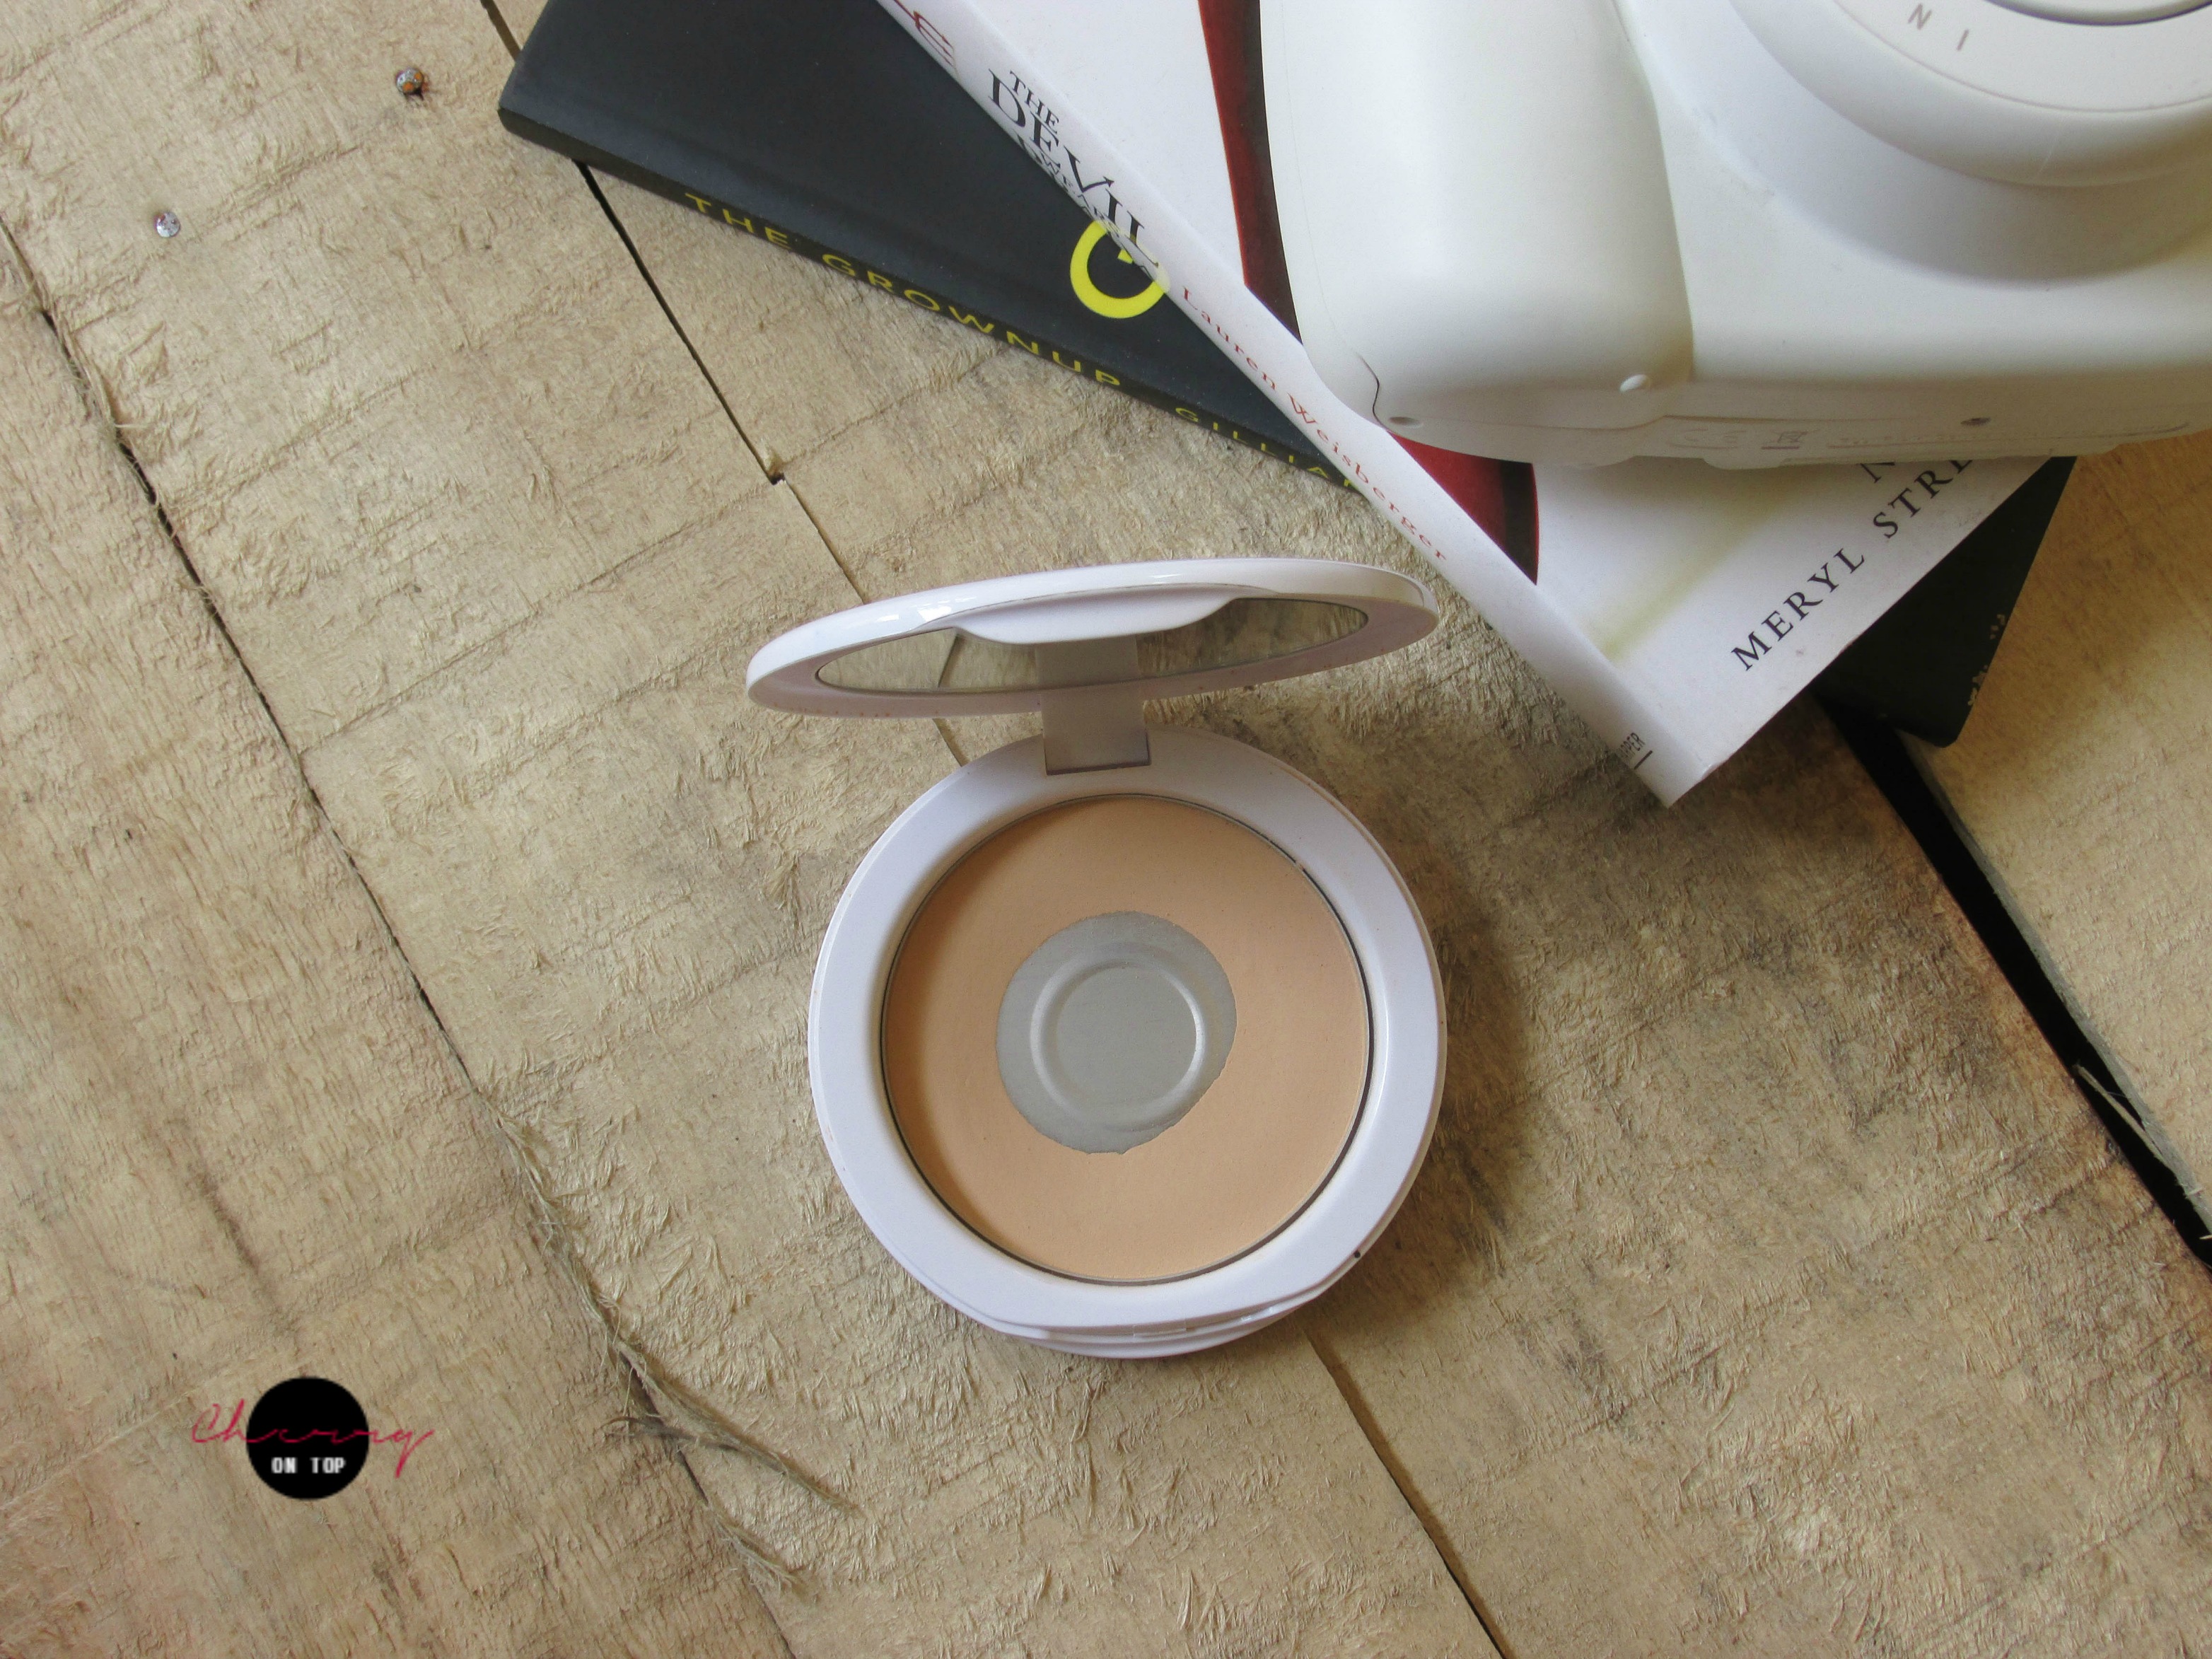
A compact is a must in your makeup bag because duh, touch ups! During summers, we feel the need of touching up a bit too often. Our face feels sweaty, looks patchy and if you haven’t applied waterproof foundation then it might slip and slide. I never forget my compact so that I don’t experience the gross stuff. The Maybelline White Superfresh 12H Whitening+Perfecting compact is my favourite during summers is because it keeps my face oil-free for almost 4 hours and sometimes longer than that and it gives out a fresh, bright look to my skin. You can see I have hit the pan. Yay!

Real Techniques Expert Face Brush

My Everyday Makeup Bag Essentials | Cherry On Top

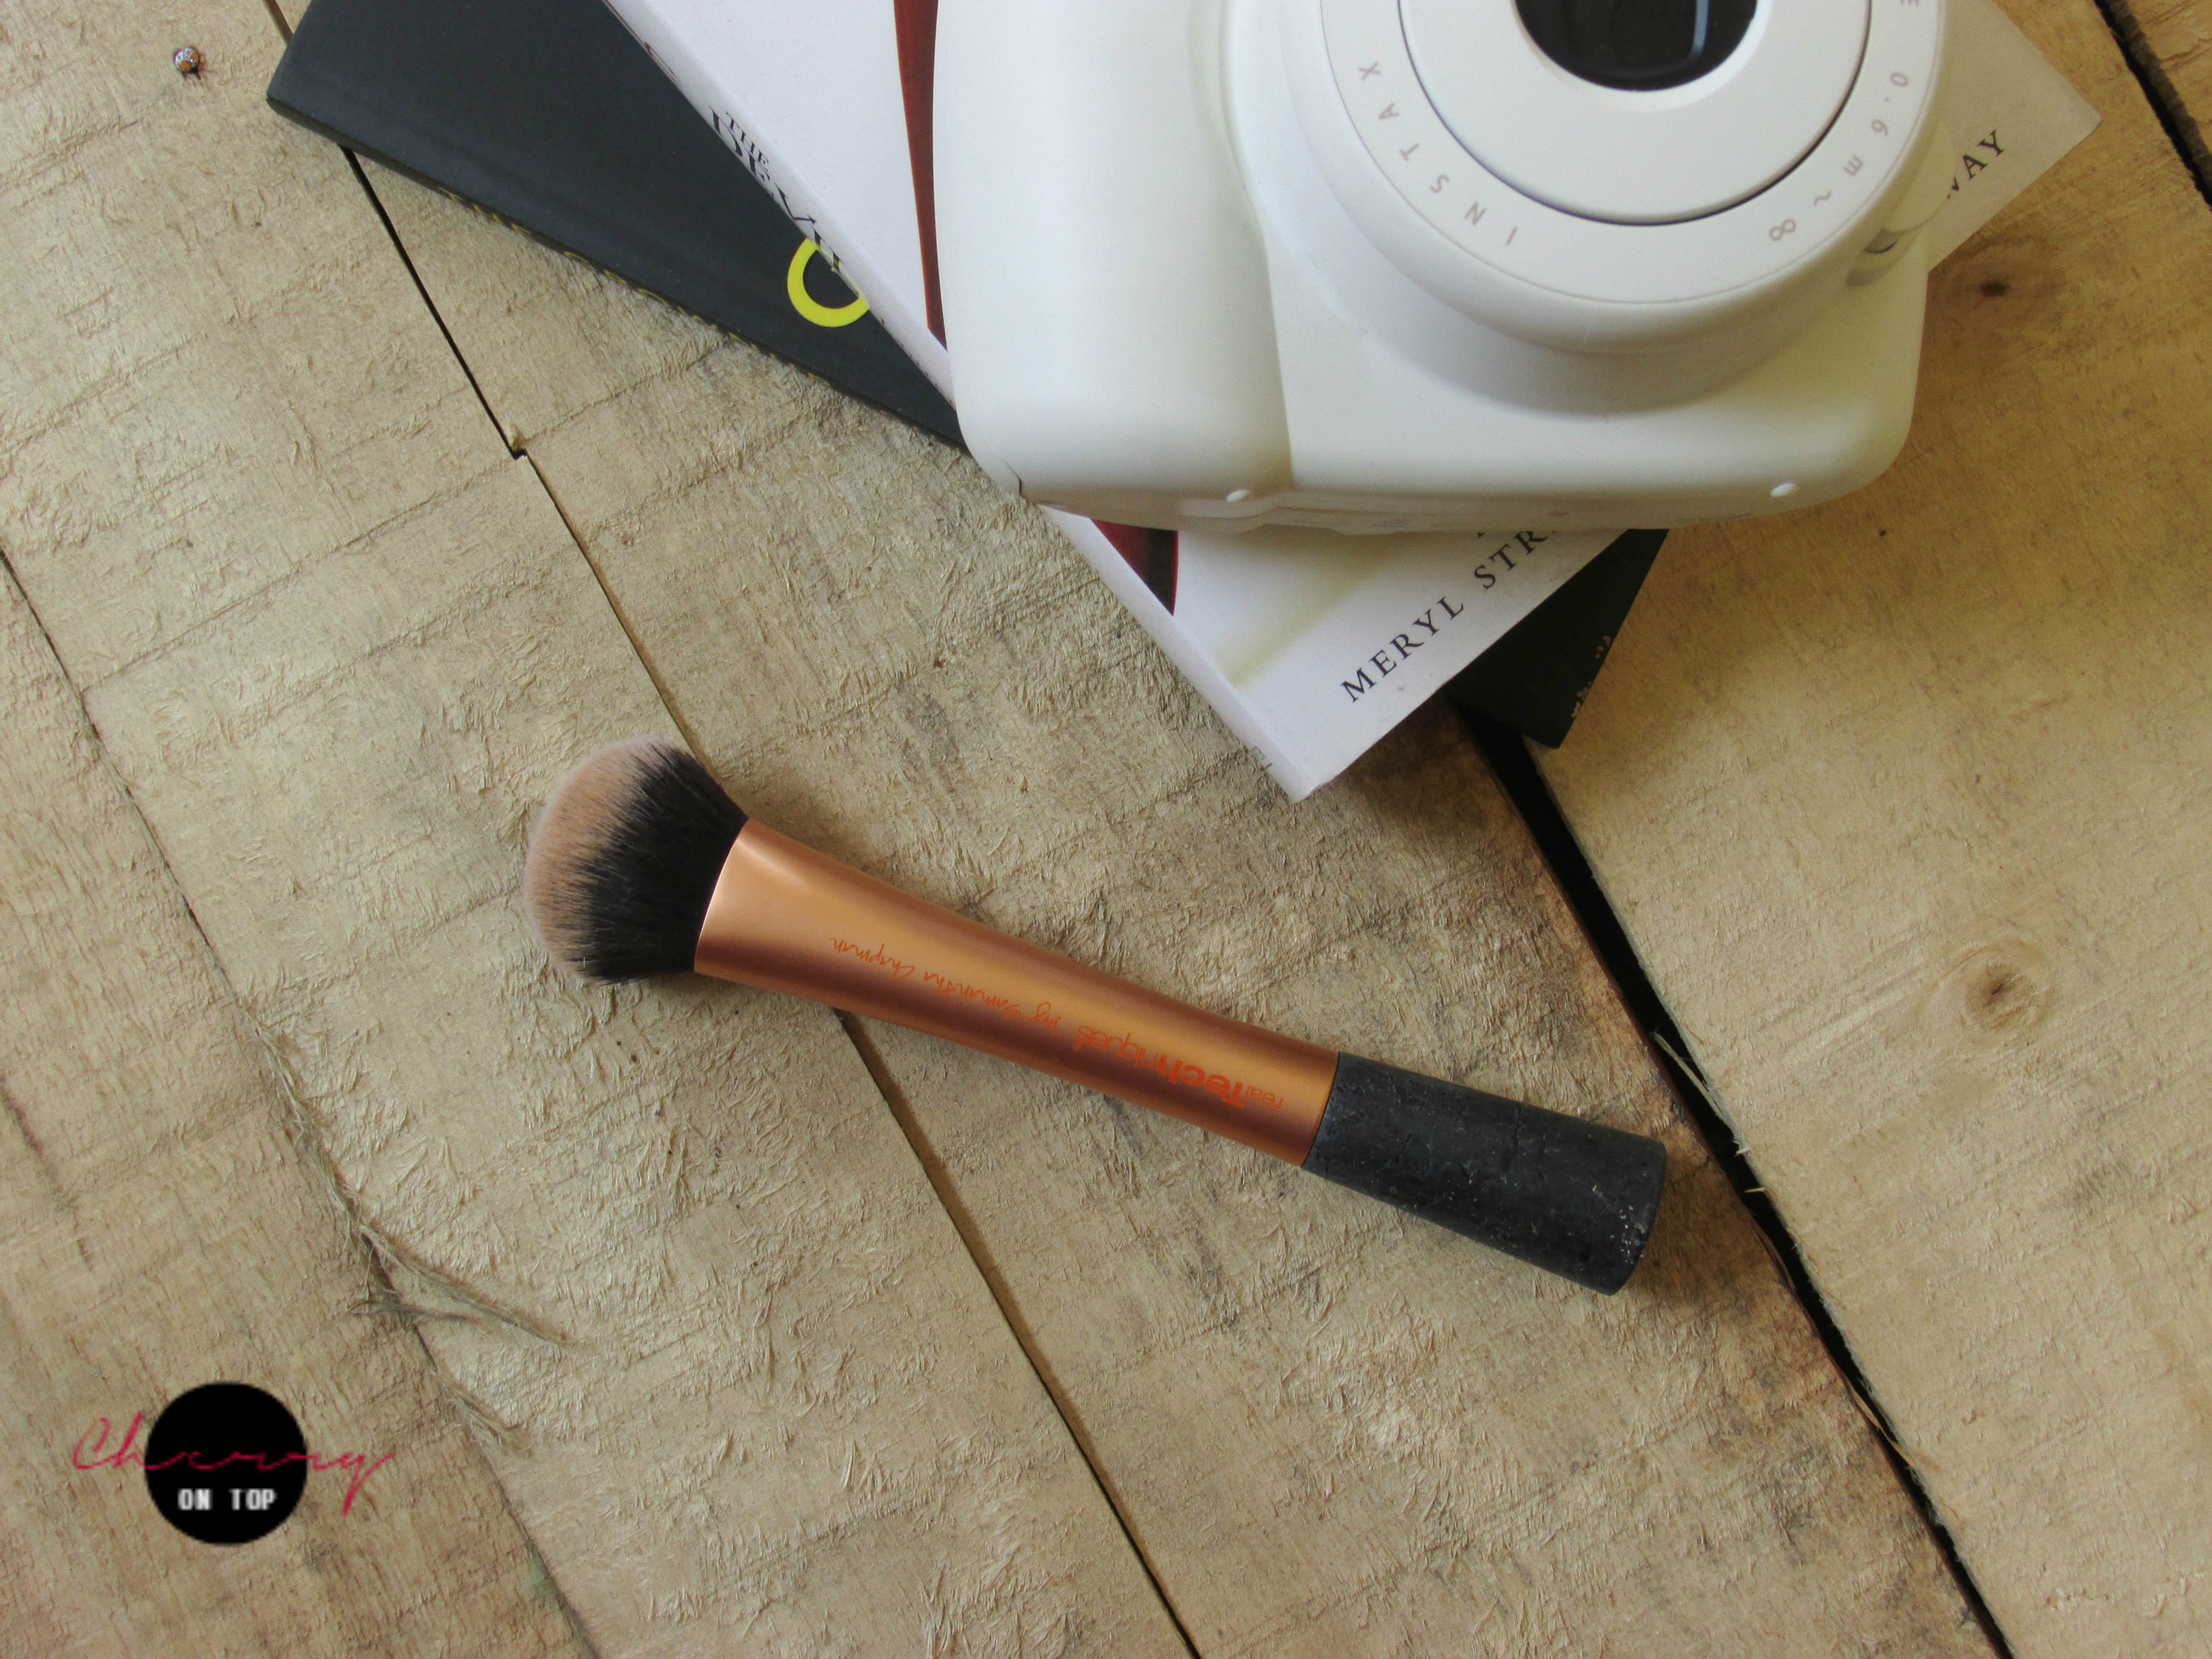
I generally do not carry makeup brushes with me but I have been carrying this Expert Face Brush by Real Techniques that I got long ago since I lost the puff that comes with my Maybelline compact. This brush can be used for anything! I just use it for touch ups while I am on the go.

LA Girl Pro Conceal HD Concealer

My Everyday Makeup Bag Essentials | Cherry On Top

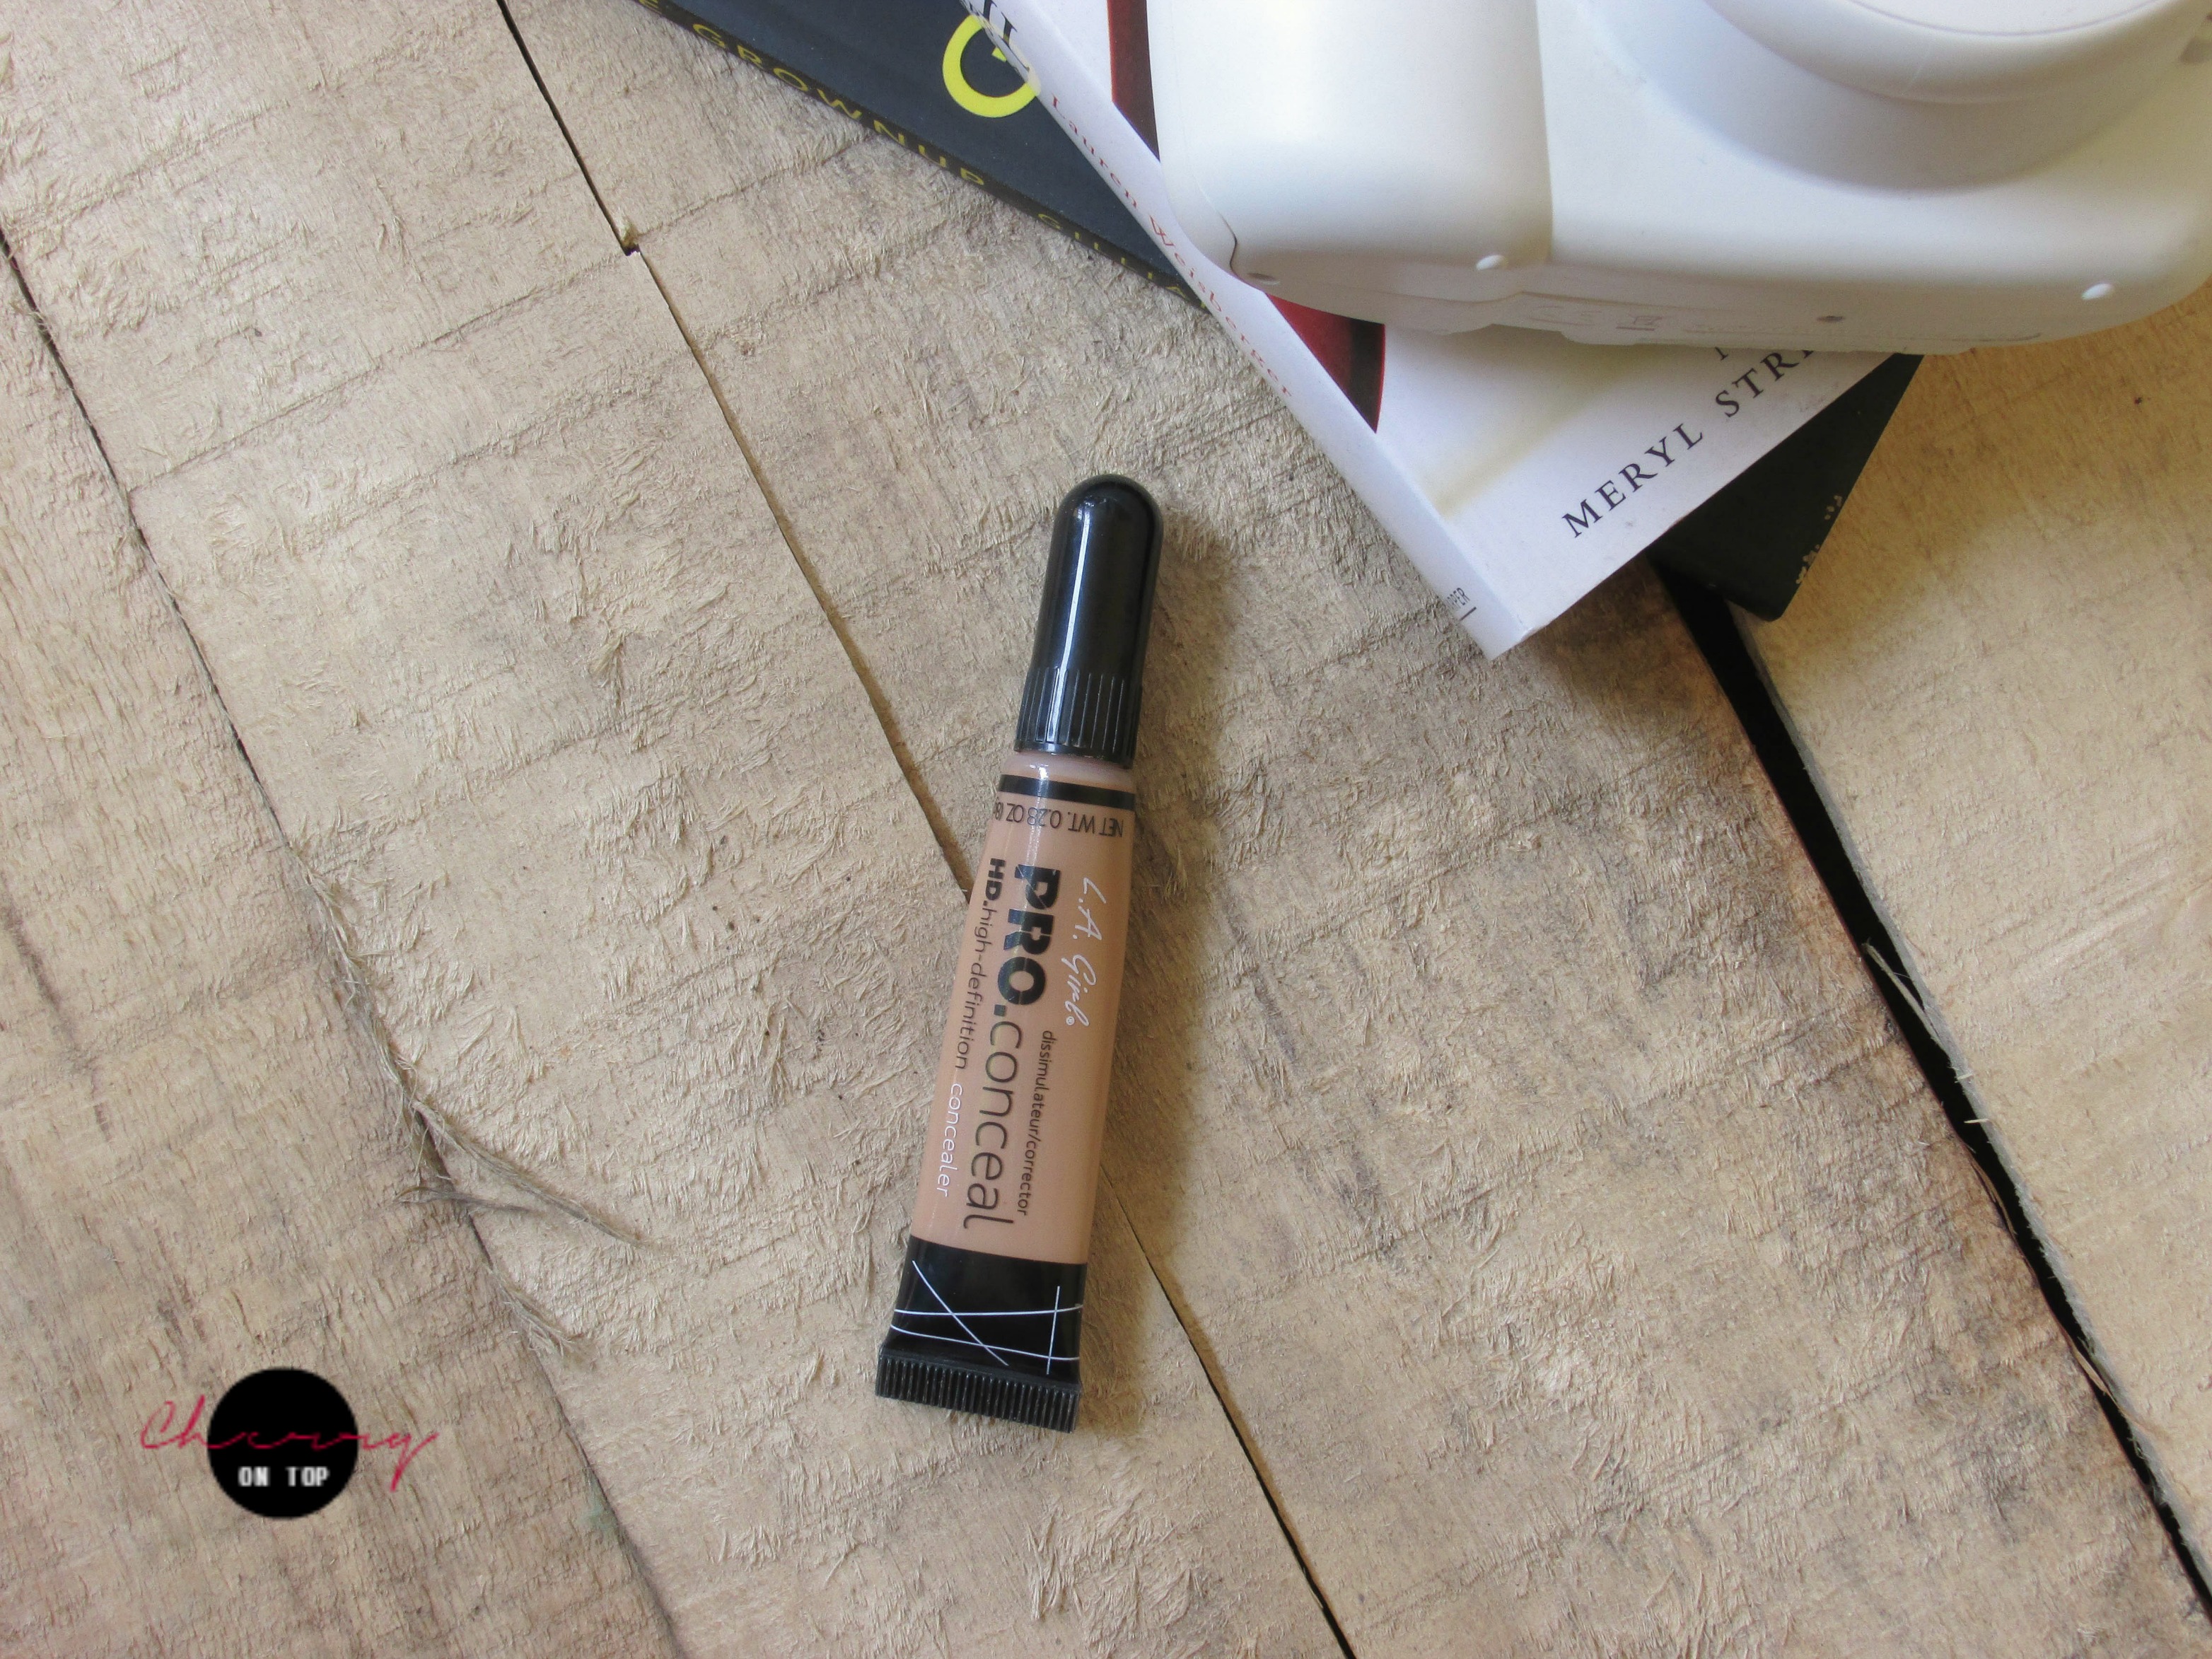
This is my holy grail concealer at the moment. I love how it comes with a brush-tip applicator. I am in the shade medium beige which is a bit dark for my skin tone. I use to before my foundation just to correct my under eyes and it does a very good job. I carry it in case I need it. Although I might not need it, anyhoo I want to feel secure!

Plum NaturStudio All-Day-wear Kohl Kajal

My Everyday Makeup Bag Essentials | Cherry On Top

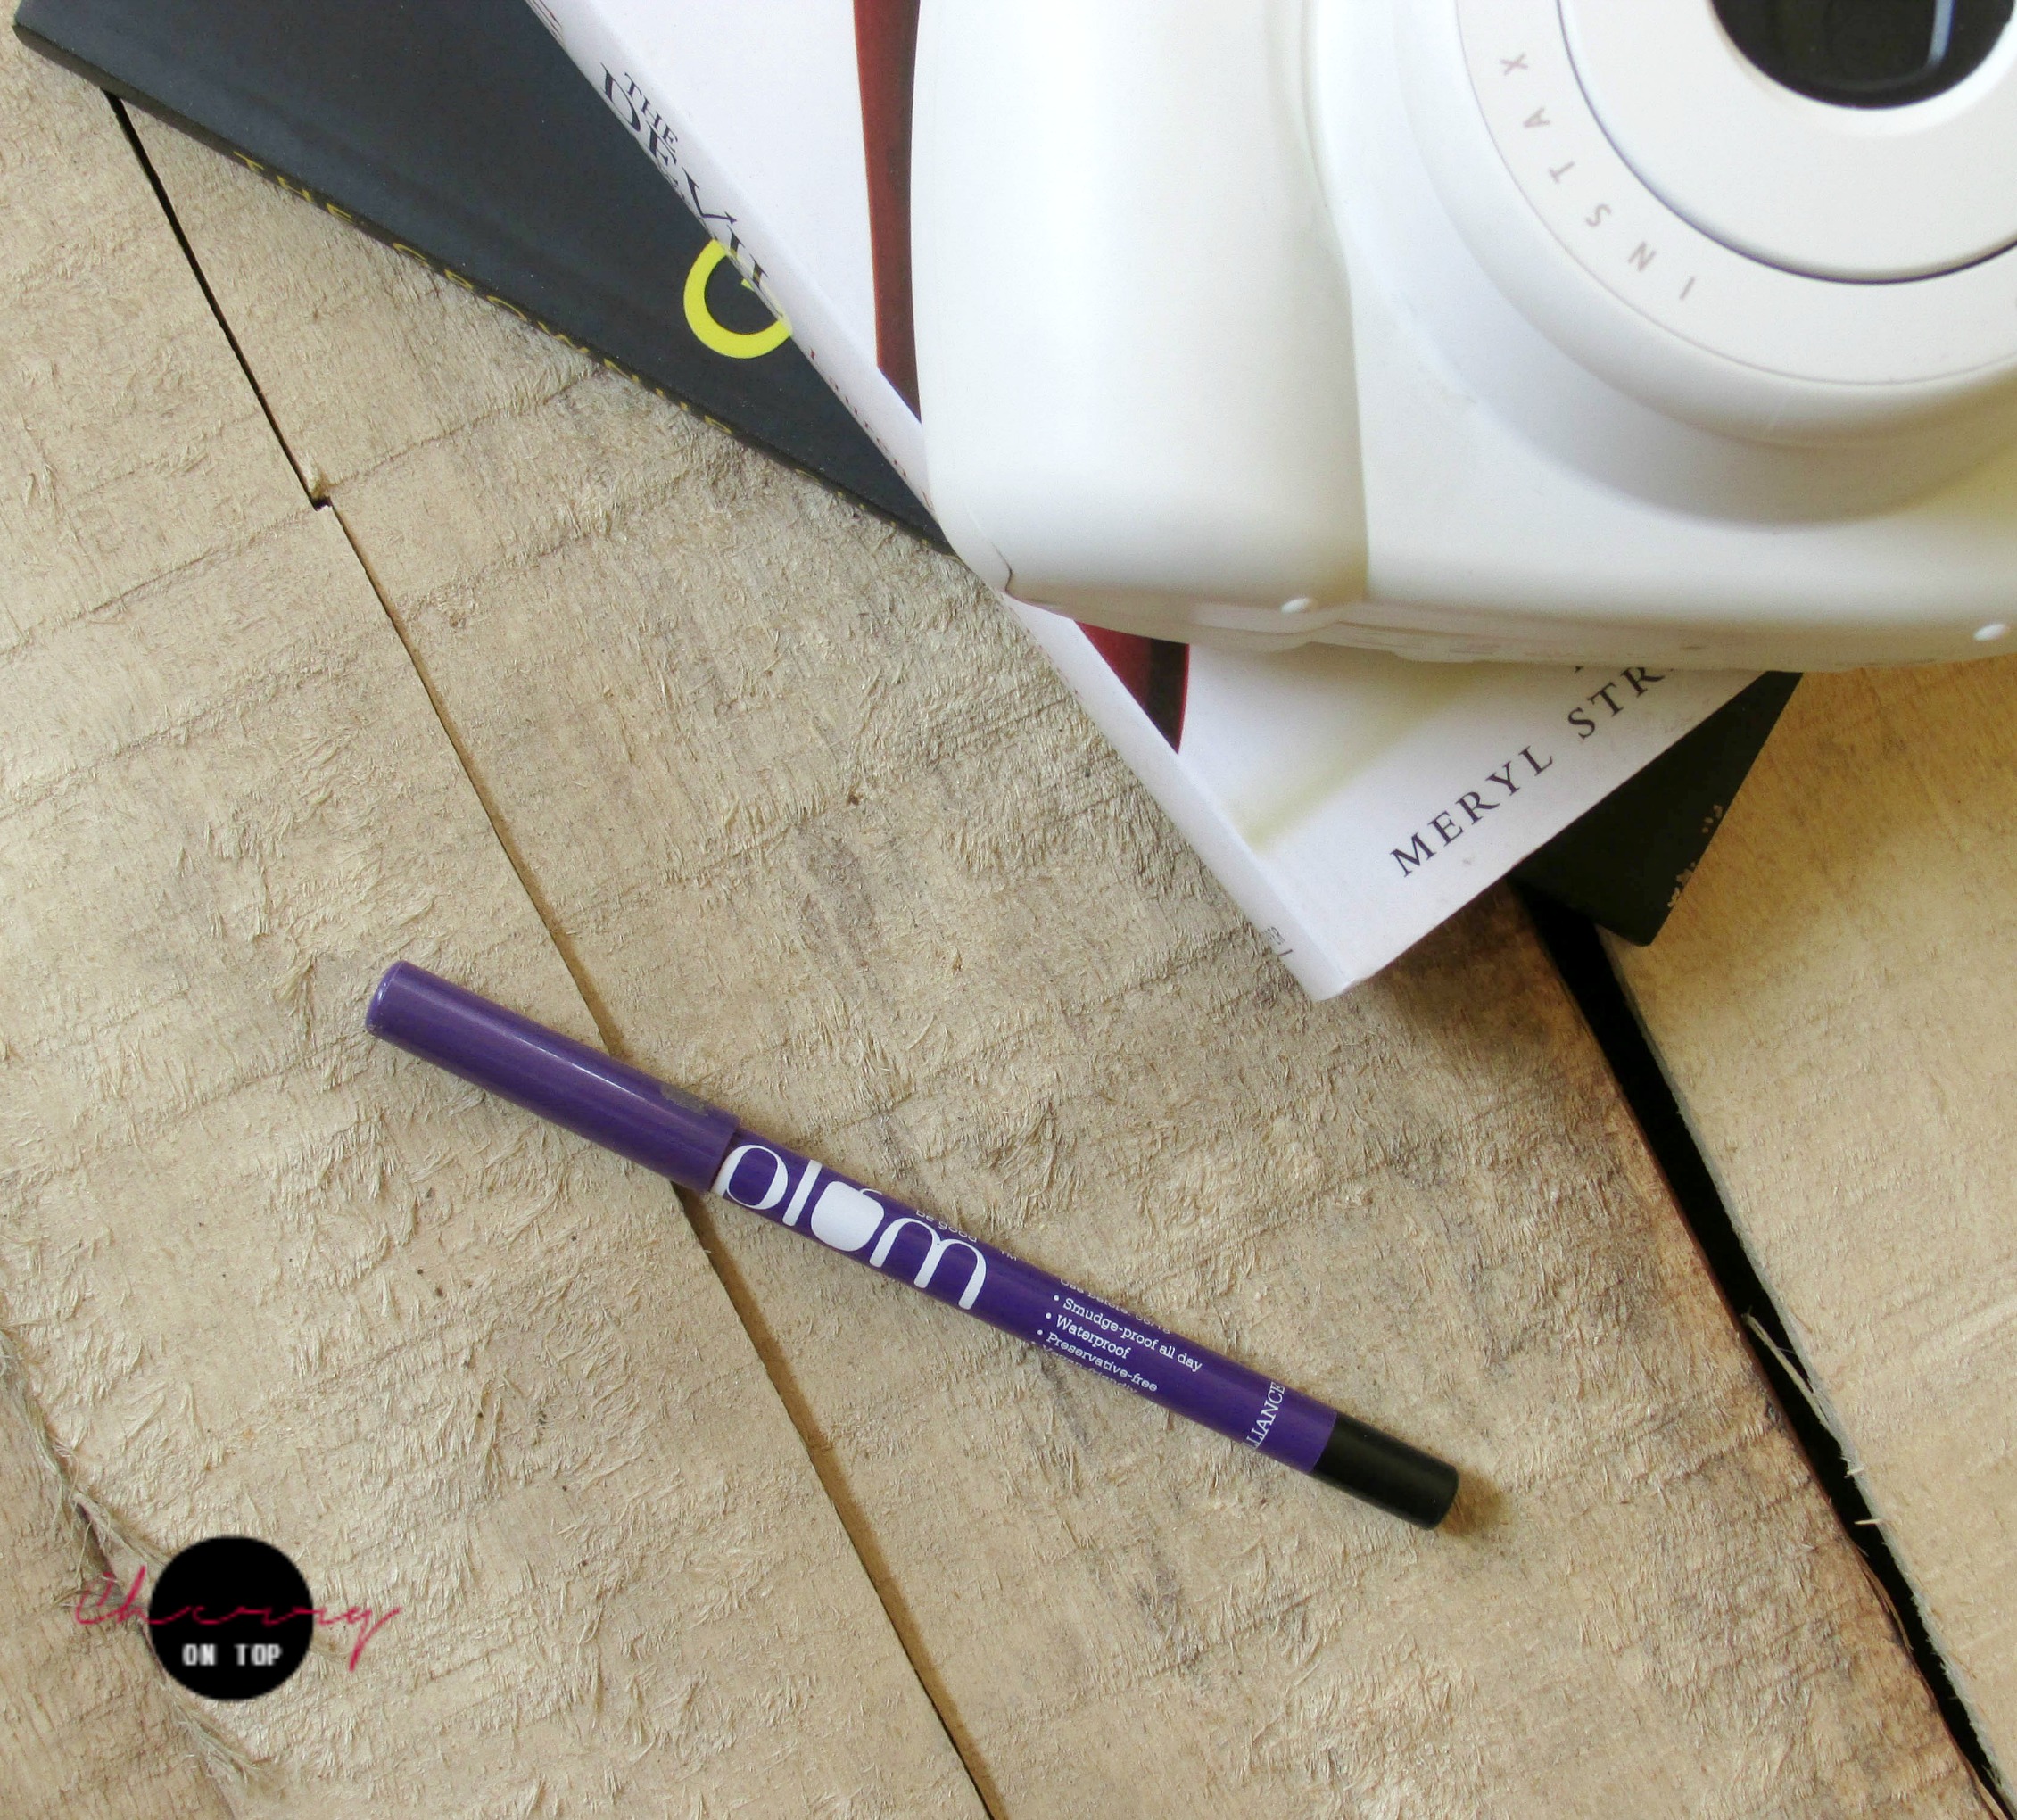
This kajal is LOVE! The intense jet black colour, high pigmentation and long lasting power have made it the numero uno eyeliner in my stash. I love its texture. It smoothly glides on the eyes. I have a full-fledged review on this on my blog.

 Plum Natur Studio All-Day-Wear Kohl Kajal Review & Swatches

Wet n Wild Megalast Lip Colour

My Everyday Makeup Bag Essentials | Cherry On Top

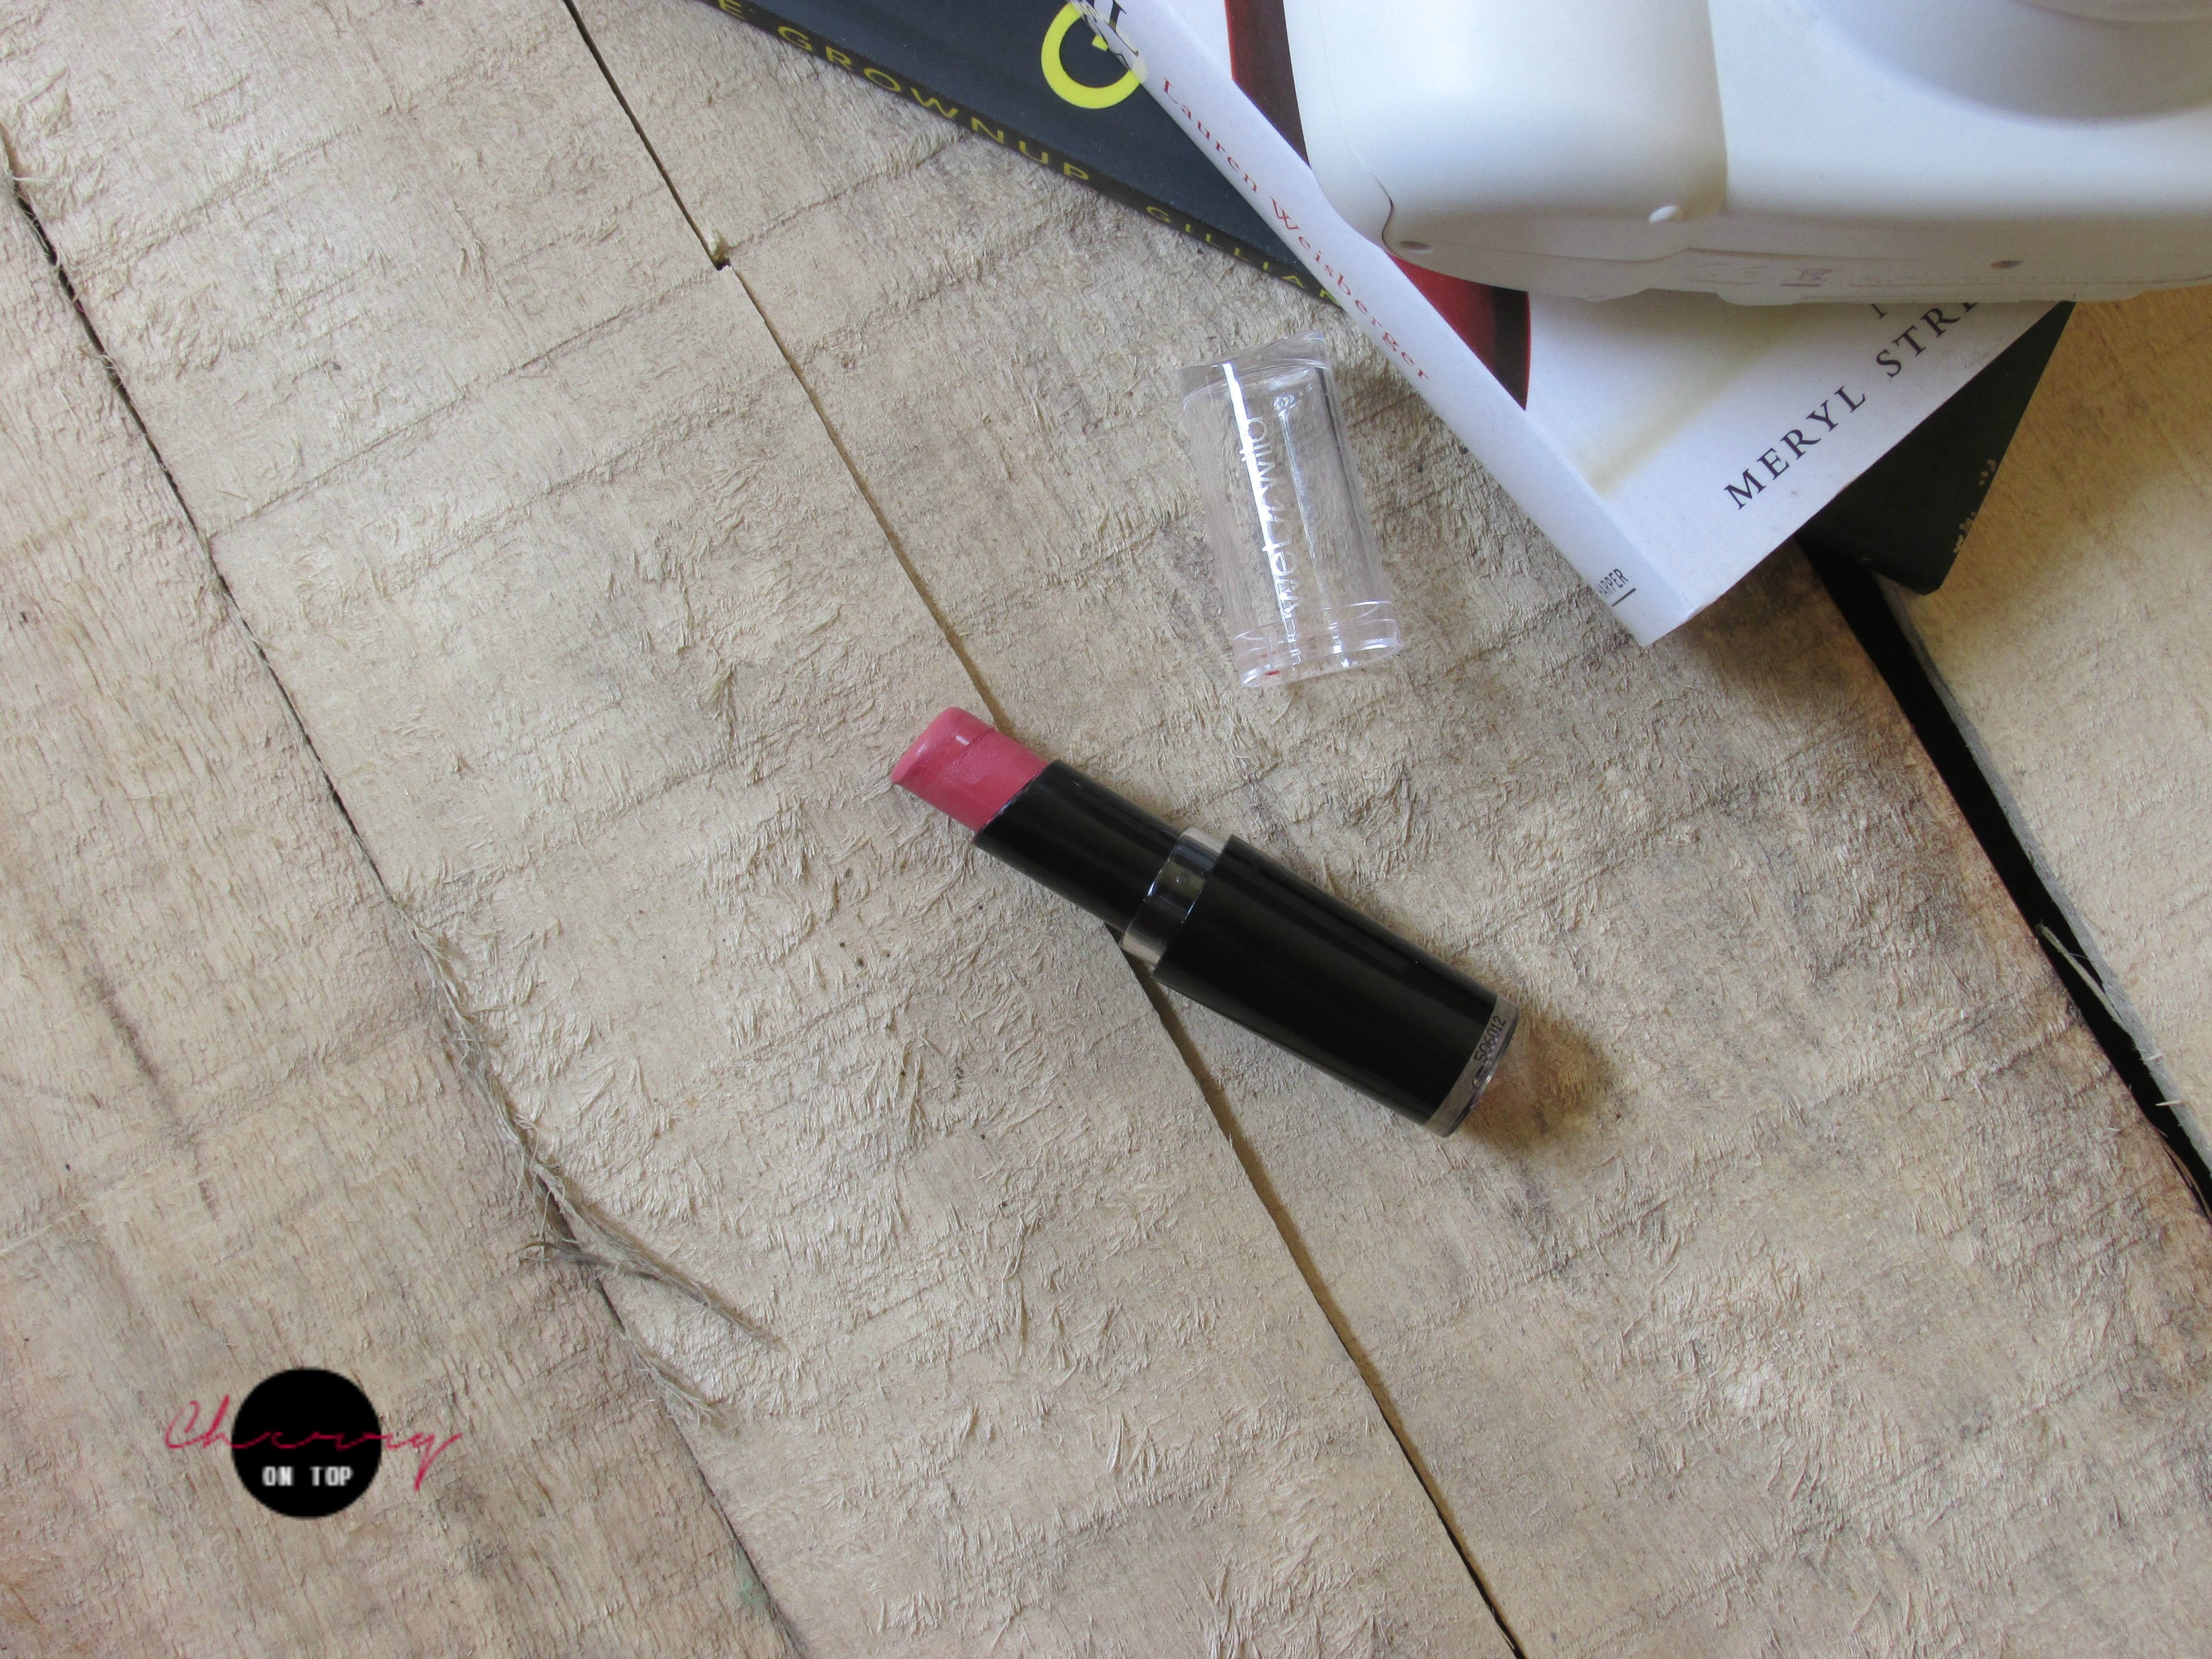
This is the one lipstick that I reach for almost every day. This is in the shade Rose Bud. This is a rosy pink shade with a hint of mauve in it. The tone is a bit muted which makes it perfect for every day, especially for daytime wear. On days I am not wearing this, I am wearing ColourPop’s Calypso which is a nude shade from their Ultra Satin range. But mostly, you will find this Wet n Wild lipstick in my everyday makeup bag.

Dual Compact Mirror

My Everyday Makeup Bag Essentials | Cherry On Top

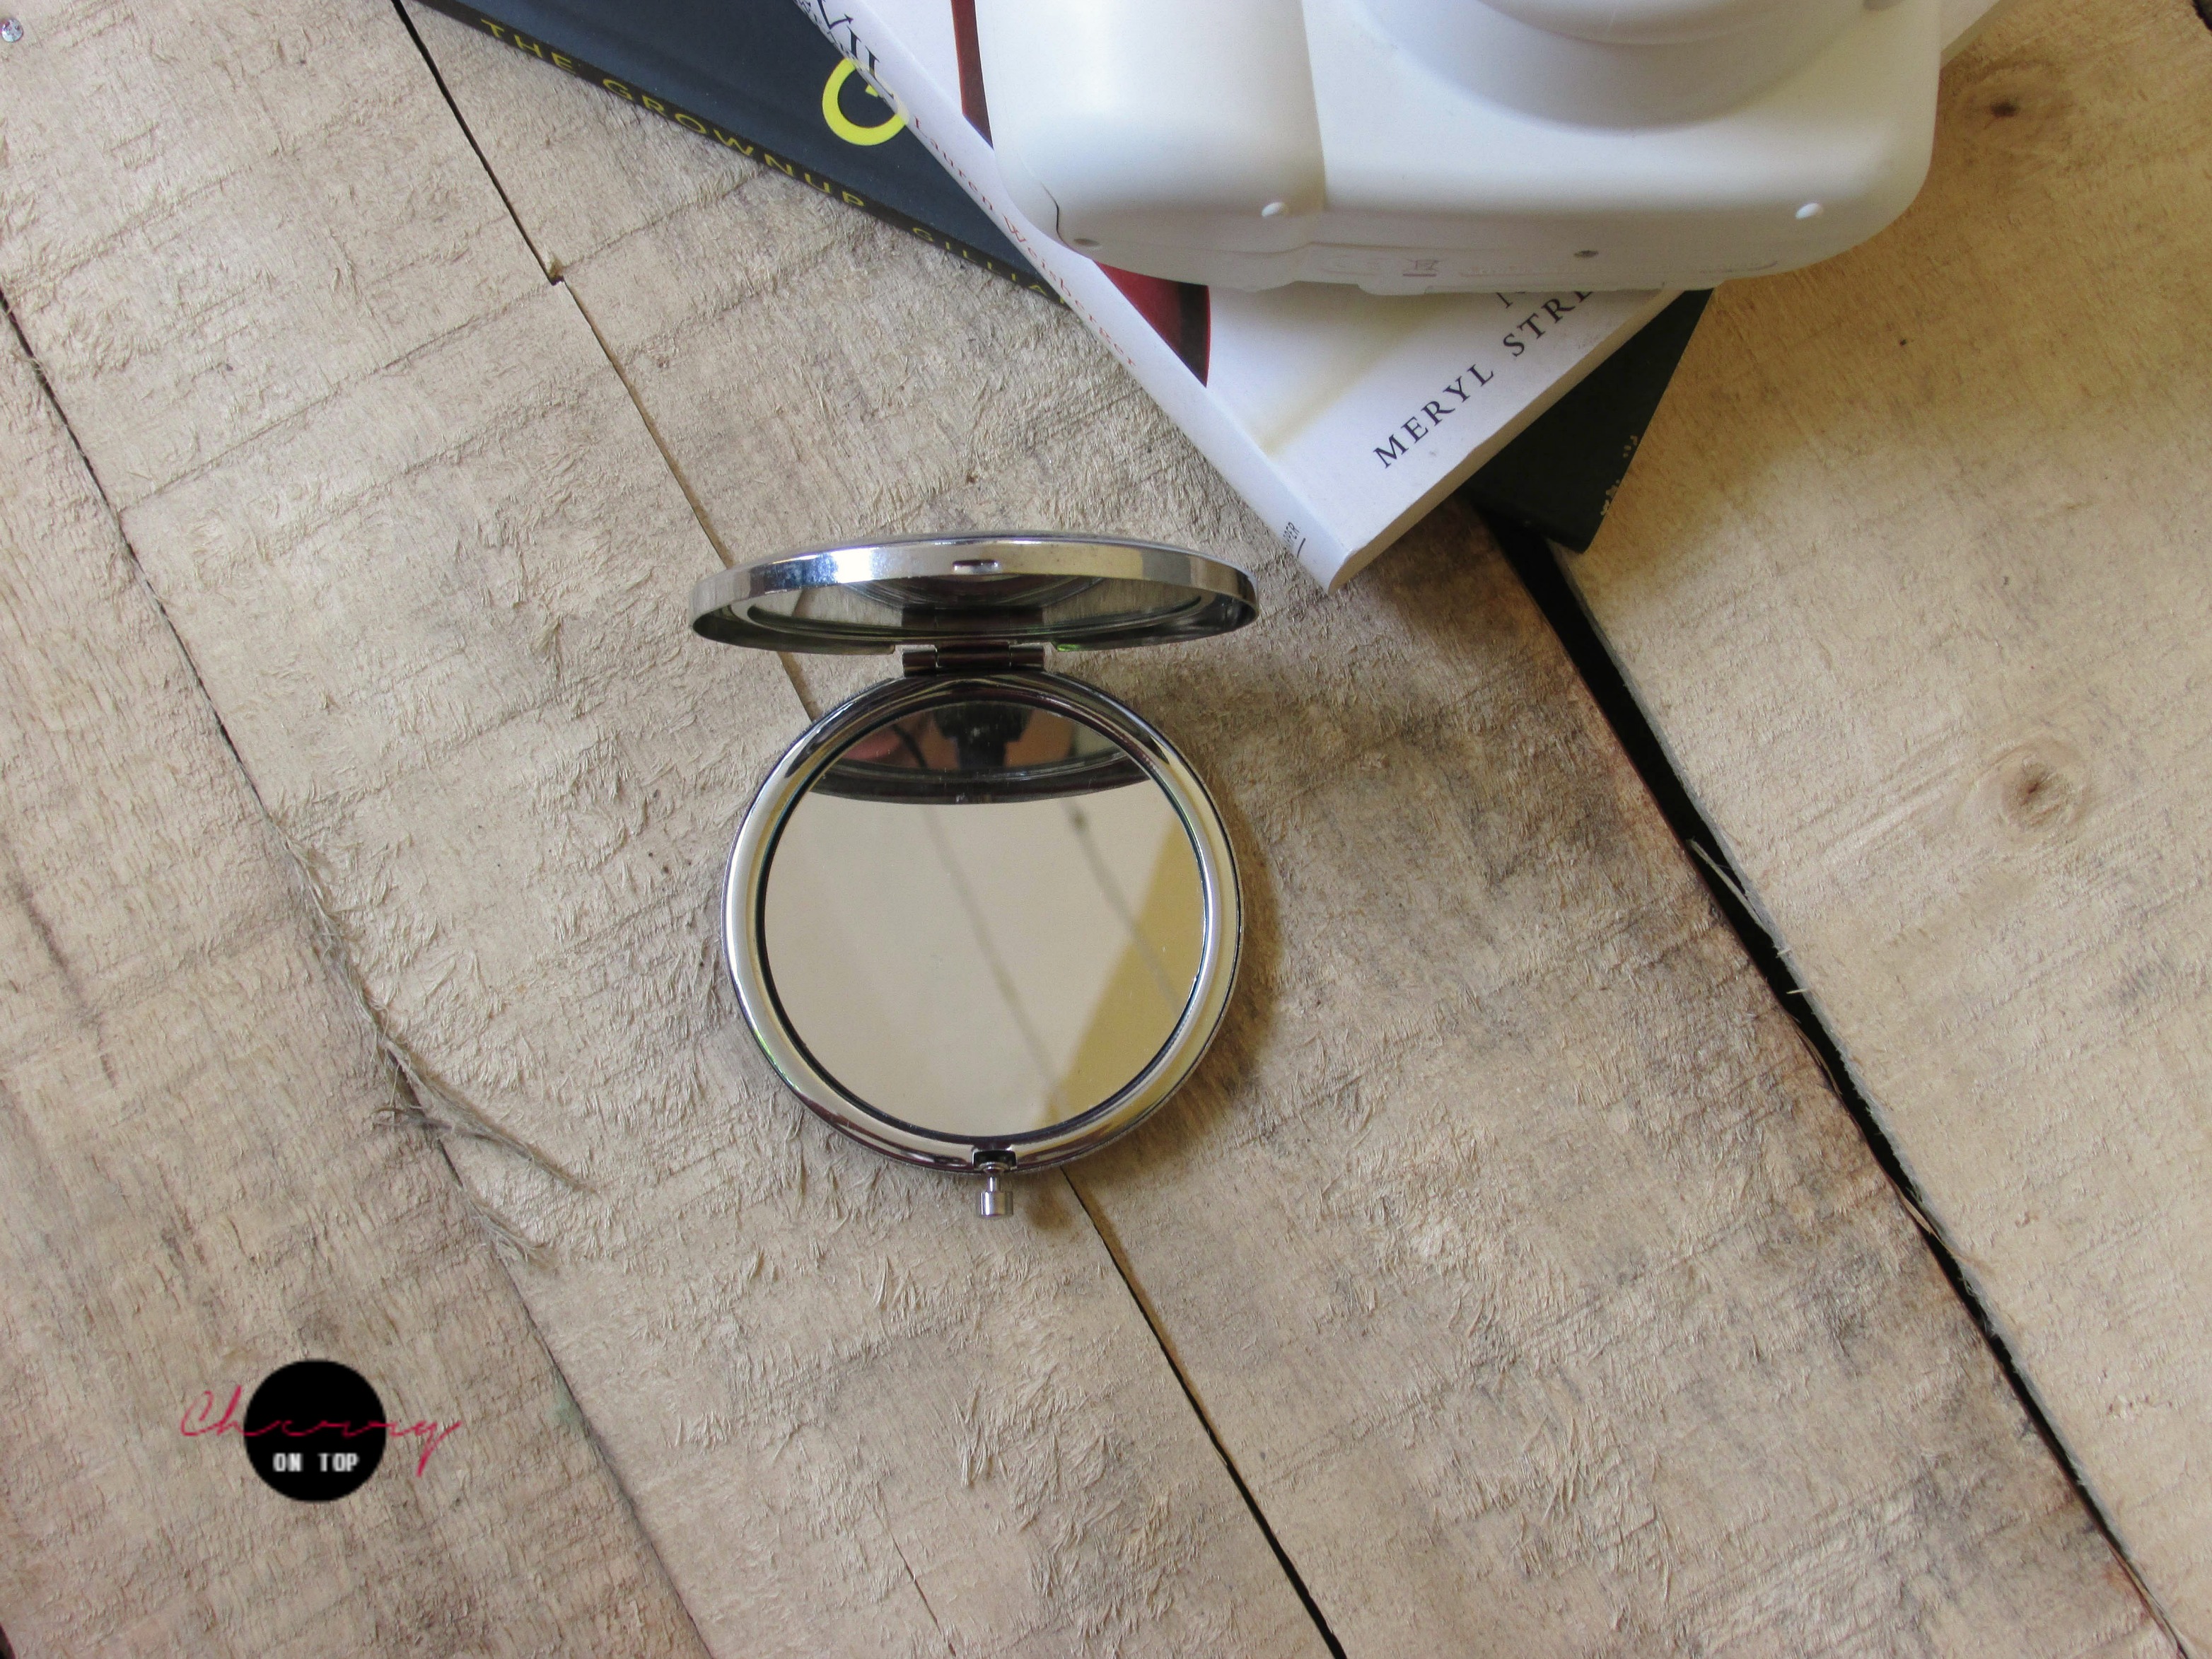
I never ever forget to carry this mirror with me. Amit got me this from Siliguri. I love it because it’s handy, takes little space, has a magnified mirror on one side and it’s always good to carry a mirror in your purse.

What do you carry in your everyday makeup bag?


That was it for today’s post. I hope you found this post helpful. Make sure to share it with your family and friends if you did. Pour in your thoughts in the comments. Your comments encourage me a lot! Do subscribe to our Newsletter so that you get notified whenever there is a new post on the blog. Will talk to you in my next post. Till then, be safe & keep smiling! Follow me on Facebook, Twitter or Instagram for regular updates. Add me on Snapchat for more fun and a sneak-peek of my life.


Hello people, today I am back with the makeup look that I promised to share with you. Remember my last post where I announced my Association with Revlon? If you haven’t read that post then let me explain it a bit. Revlon and I have associated to present to you a perfect neutral, no-makeup makeup look. Revlon provided the makeup expertise for the 61st Britannia Filmfare Pre-Awards Party, 2016. They showed some really stunning Eye and Lip makeup. The most important part of any look is the base makeup that acts as a canvas. My job is to re-create a pretty basic makeup look that is appropriate for you if-
  • you are not much into makeup but you want to have a flawless look for office/work.
  • you are a beginner and you don’t want to experiment with dramatic makeup looks.
  • you want a quick and easy everyday minimal makeup look.
I was given a specimen picture and told to recreate that look. I have already shown you that picture. Here it is-
Revlon named this look Dare to Bare which I think is totally justified because neutral makeup is not a matter of joke. Creating a perfect neutral makeup look is really a tough job. You have to apply makeup and still you don’t want to look as if you have applied any makeup. It is not as easy as it seems. For me, it was not as challenging as it might have been only because I am a neutral makeup person. I prefer going for very subtle makeup, using neutral colours to my eyes and looking as effortless as possible.
Here is a breakdown of the look-
Step 1- Prepare your skin with Revlon Photoready Airbrush Effect Makeup and highlight the face using Revlon Photoready Skinlights Face Illuminator in Peach Light.
Step 2- Apply Revlon Powder Blush in Naughty Nude shade contour towards the hairline of the cheek and then apply Revlon Photoready Skinlights Face Illuminator Peach Light on the apples of the cheeks, ensure to blend it well.
Step 3- Use Revlon Highlighting Palette Peach Glow as a highlighter, shadow and to contour the eyes, not forgetting the inner corners of the eyes.
Step 4- Fill the lips with Revlon Ultra HD Lip Lacquer in Sunstone.
Step 5- To complete the look paint the nails with Revlon Colorstay Gel Envy Nail Paint in Lady Look.
This is how I recreated the look-

How I Achieved This Look-

  • I started off with applying Revlon Skinlights Face Illuminator in Bare Lights on the high points of my face like the apples of my cheeks, forehead, the bridge of my nose and a little bit on my brow bones, chin, and cupid’s bow.
  • Next, I applied a thin layer of the Revlon Photoready Airbrush Effect Foundation in the shade Natural Beige and blended it very well with my fingers first and then with a damp beauty sponge. Then I applied a concealer to camouflage the undereye dark circles and other imperfections on my skin.
  • Next, I applied Revlon Photoready Compact in Light/Medium to set my makeup.
  • Then I contoured my face very lightly using the darkest shade from the Revlon Highlighting Palette in Peach Glow and I applied the first two shades from the same palette as my blush-cum-highlight.
  • For my eyes, I did nothing crazy. I applied the darkest shade from the same highlighting palette to deepen my crease and then applied the last shade to all over my eyelids. Then I lined my upper lash line with a liquid eyeliner and the lower waterline and lash line with a kohl pencil. I finished off the eye makeup with applying generous coats of a voluminous mascara.
  • Finally, I applied Revlon HD Lip Lacquer in the shade Sunstone.
I loved using all these products by Revlon to come up with this look for you guys. I think the Photoready range by Revlon is not only for ramp-ready makeup but they can also be incorporated in our day-to-day makeup. I hope you liked the look that I recreated. I will soon be reviewing all the products mentioned in this post. Till then, be safe & keep smiling!
 
Disclaimer- Revlon was too kind to send across the products for me to recreate the look as well as review them for you. Thank you, Revlon! 

Hello all, if you remember I had posted a picture of me with Ajoy Sengupta, the National Makeup Artist and Training Head for Givenchy India. If you don’t follow me on Instagram yet, then here is the picture (do follow me on Instagram ^_^)

A photo posted by Sayantini Bhattacharya ♥ (@cherryontopblog) on pm


So, last week I got an opportunity to meet Ajoy at the South City Mall, Kolkata and get a makeover done by him. I couldn’t be happier! On meeting we greeted each other then he went on introducing me to the Givenchy cosmetics. That was my first time to a Givenchy counter. I was head over heels in love with the cosmetics waiting there for me. Ajoy showed me some of their classics and also some of the new launches and both of the categories were absolutely to die for. I got to see and touch their Le Rouge lipsticks, the ones with gorgeous black leather packaging for the first time. Here are some pictures of the products-

My Givenchy Makeover: Bronze Smoky Eyes & Bold Lips by Ajoy Sengupta|cherryontopblog.com

My Givenchy Makeover: Bronze Smoky Eyes & Bold Lips by Ajoy Sengupta|cherryontopblog.com

After we had discussed about the products and the brand, we headed straight to the makeover session. We decided on to go for a neutral yet gorgeous Christmas Party Look with neutral eyes and bold lips. My favourite! 
He started off by cleansing my face in order to remove any trace of makeup from my face. Then he went on to apply a serum to my face. He said serum works better than moisturizers because they sink into your skin quickly and effortlessly. Thus it gives a natural look to the makeup you put on afterwards. Then he applied another product from their Hydra-Sparkling range which hydrated my skin and gave it a glow instantly. My skin was so soft, supple and radiant after the skincare session. [All products will be listed at the end of this post.]
Coming to the makeup part, he began with priming my face so that the makeup stays for the longer period of time. Then he went off straight to the eyes as we were going to work with shimmery shades and it was obvious that there might be some fall-outs. First, he applied a black kohl pencil as close to my lash-line as possible and also between the eyelashes to give it a smokiness. Instead to drawing a proper line, he chose to smudge it a bit while proceeding towards the inner corner of my eyes. Then he went on to apply a dark brown shade from one of their Prisme Quatour eyeshadow quads to the outer corner of the eyes and blended it inwards leaving the inner portion nude . Then he took a shimmery orange shade on the inner corners outwards till about half way across the lids. Keeping it nude with no dark color helps to keep the light/ bright color and intensity/pop of color. Then from another quad he took a pale gold eye shadow and applied it to the inner corners of my eyes to give it some pop of colour and at the same time it gave an illusion of wider eyes. He chose a pencil liner over a liquid liner to line my eyes. We opted for a brown eyeliner as it seemed to look more natural. Then he went to the chocolate brown shade again and went over that liner and smudged it a bit creating a diffused wing at the end. With the same dark brown shade he lined the outer half of my lower lash line and for the inner half he used the same pale gold shade. As there was a lot of shimmer going on on the eyelids he decided to choose a matte compact powder to define my brow-bone area. He finished it off with applying a few coats of mascara. He also defined my brows. The finished look was so beautiful and that too using a few products. Here is a closer look to the eye makeup before mascara-
My Givenchy Makeover: Bronze Smoky Eyes & Bold Lips by Ajoy Sengupta|cherryontopblog.com
After the eyes, he started doing my base makeup. He started with applied a foundation to the center of my face- forehead, nose, cheeks and chin then began blending it well to the rest of the face. Then he applied a dust of loose powder to set the makeup, a bronzer to define my cheek bones and give a bit of structure to my face and finally he finished off with a bit of blush on to the apples of my cheek to give some flush to my face. For lipstick, I chose to wear something other than red so I ended up choosing a bright coral shade as it was matching my outfit. Here is the finished look-
My Givenchy Makeover: Bronze Smoky Eyes & Bold Lips by Ajoy Sengupta|cherryontopblog.com

My Givenchy Makeover: Bronze Smoky Eyes & Bold Lips by Ajoy Sengupta|cherryontopblog.com


List of Products Used-
Face-
Hydra sparkling Sap Serum 
Hydra sparkling Radiance Booster 
Acti’Mine Primer – mango 
Photo’Perfexion Fluid Foundation #6
Eyes-
Prisme Quatour Braise 8 ( orange and brown) 
Prisme Quatour Impertinence 4 ( dull gold) 

Magic Khol Eye Liner Pencil (black and brown)

Noir Couture 4 in 1 Mascara

Lips-
Lip pencil #3/ #4 
Le Rouge Lipstick #305 Rouge Égérie (orange coral) 

Things that I learnt from Ajoy Sengupta-
  • Let your moisturizer sink in to your skin before you start your makeup.
  • A hydrating serum is always better than a moisturizer because it sinks in to the skin very well.
  • Start applying the foundation from the center of your face as the light hits the center first.
  • Lining the lower lash line completely would make you eyes appear smaller. Instead, line it half way through with darker colour and add lighter colours towards the inner corners.
  • Applying light shimmery shades to the inner corners would make your eyes appear winder.
  • Don’t skip contouring your face as it gives a depth and definition to your face, especially if you are going to be clicked. 
  • Lastly, do not skip your skincare regime. A properly maintained skin is the best canvas for any makeup.  
I will try following these tips and incorporate a lot of his techniques to my makeup routine. It was really a fun time learning about makeup with Ajoy. This makeup look is also suitable for New Year’s Eve. 
My Givenchy Makeover: Bronze Smoky Eyes & Bold Lips by Ajoy Sengupta|cherryontopblog.com

Did you know?
Givenchy, founded in 1952, was the first brand to introduce eye-shadow quads to the makeup industry. 
Today is the 31st guys, New Year is a few hours far. I wish all of you a very happy and prosperous 2016. Be safe & keep smiling!

Maybelline White Superfresh 12hr Whitening+Perfecting Compact| Review, Swatch, Price
Hey guys, today I am back with another review. Today, I will be reviewing the newly launched pressed powder by Maybelline, which is the Maybelline White Superfresh 12hr Whitening+Brightening Compact. Ah, a mouthful!
If you follow me on Instagram and Facebook then you might have seen a photo of this compact I shared and told you that I was trying it out. After trying that for almost half a month, I am finally ready with my review.

Maybelline recently launched their White Superfresh compacts that they claim to keep you fair and fresh for 12 hours. The compact comes in three shades- Pearl (for Light to Medium complexion), Shell (for Medium complexion) and Coral (for Medium to Dark complexion). When I was asked to chose my shade, I was a bit confused so I chose Shell which is the medium shade. I was not sure about it because I don’t really like my compacts to be lighter than my skin tone. Let’s get into the review now-
Price- Rs 150/- (for 8 grams of product)

Maybelline White Superfresh 12hr Whitening+Perfecting Compact| Review, Swatch, Price

Maybelline White Superfresh 12hr Whitening+Perfecting Compact| Review, Swatch, Price


Packaging- The Maybelline White Superfresh compact comes in a cute white plastic packaging. It comes with a regular white puff and a mirror which comes in handy during touch ups. There is nothing extraordinary about the packaging.

Texture/Coverage/Staying Power- This compact has a very smooth finish to it. The powder is finely milled and does not look chalky. It settles into a powdery finish which you won’t like if you have very dry skin or uneven skin. It does not bother me because I have a combination skin type and I don’t use my compacts for coverage, I just lightly dust it to set my base makeup. 

Maybelline White Superfresh 12hr Whitening+Perfecting Compact| Review, Swatch, Price
Swatch
Maybelline White Superfresh 12hr Whitening+Perfecting Compact| Review, Swatch, Price
Blended

The White Superfresh compact gives a sheer to light coverage which again is okay for me as I already told you that I don’t use my compacts for coverage. It doesn’t give a good coverage but it definitely makes your skin look brighter. It instantly brightens up the entire face which gives an illusion of fairer skin tone. The presence of a mineral called Perlite in the compact causes that instant radiance to the skin. 

Coming to the staying power, I won’t say it lasted on me for 12 hours but it definitely lasted on me for 6-7 hours. For the oil-control part, I applied it at 8:30 am and went to the university, at around 12pm I felt a little oiliness around the t-zone so I touched up very lightly. I checked again around 3pm and observed some shine around my nose and forehead. I must state that I have normal to dry skin during this time of the year and combination skin during the rest of the year. I don’t think this compact would last on me for that long during summer. I would love to see how many hours it stays on me in summer. The brightening effect definitely lasts for a longer period of time. 
The company also claims that this compact contains UV filters that helps protect the skin for sun-damage. 
Ups-

  • Lightweight.
  • Doesn’t feel chalky.
  • Doesn’t look cake-y when applied.
  • Instantly brightens up the face.
  • Helps control sebum for at least 6-7 hours with touch ups. (varies)
  • Have UV filters.
  • Cute, travel-friendly packaging.
  • Comes with a puff and a mirror.
  • Inexpensive.
  • Easily available.

Downs-

  • Coverage could have been better.D
  • Does not stay for 12 hours as the brand claims.
  • Limited shade range.
Overall, I am impressed with the product because it brightens up my face instantly and effectively and also because it keeps oiliness at bay for a decent time. I don’t about others but I don’t really need my compacts to stay on me for 12 hours on a daily basis. I would suggest you to try this compact once. I am sure you will like it. 


Have you used the Maybelline White Superfresh 12hr Whitening+Perfecting Compact yet? 
For how long does it stay on you?

I hope you found my review helpful. Feel free to ask me anything in the comments. See you in my next post. Till then, be safe & keep smiling!
Disclaimer: PR sample but unbiased opinion. 

Hey guys, thanks for coming to the second day of the Fall Party. Today, I am going to share a daytime makeup look with you all which is perfect for fall/autumn. This makeup look is perfect for the days you want to look a bit more special without any hassle. This quick and simple everyday makeup look will be perfect for autumn and winter days. So, let’s get into the details now-
1. Face- As I do not like foundations in daytime, I opted for my Lakme CC Cream. I applied my MeMeMe Concealer on the problem areas like under the eyes, around my nose and mouth. I used my Maybelline Dream Lumi Touch Highlighting Concealer over the concealer and a little bit down the bridge of my nose, on my forehead and chin to highlight those areas. Then, I set my under-eye area with the Lotree Rosa Davurica Powder Pact that I received in my Wishbox Cosmic Bloom (Read Here) and used my Lakme 9 to 5 Flawless Matte Complexion Compact for the rest of my face and neck.
For blush, I used my NYX powder blush in Espresso. I did a little bit of contouring with the Sleek Face Contour Kit. I am still learning the art of contouring, so, please pardon me for any mistake.

2. Eyes- First of all, I primed my eyes with the ELF Eyelid Primer. The I applied the NYX Jumbo Eye Pencil in Milk to the entire eyelid up to the crease. Then I took some burnt orange type of shade from (I am very bad at describing colours) my BH Cosmetics Day & Night palette and swiped it across my crease, taking it slightly up towards the brow bone. Then, I took a matte beige shade from the same palette and applied it to the entire eyelid with a patting motion (this gives the maximum coverage and pigmentation). I blended the two colours very well to eliminate any harsh line. I also applied some matte brown eye shadow along the lower lash line to intensify the look.
I lined my upper lash line with the Maybelline The Colossal Liquid Liner creating a wing at the end. For mascara, I opted for the Maybelline Hyper Curl mascara.

3. Lips- For the lips, I chose a bright reddish colour to brighten up the face and at the same time keeping it wearable. I have the Estee Lauder Pure Color Envy Sculpting lipstick in Envious. I got the sample with my Sephora purchase (Read Here).

That’s all, guys! I hope you liked the post. I kept the look pretty simple. It is easy and really quick! So, you can try this out even if you are not a pro. With this post, I wrap the the second day of the Fall Party. Share the posts as much as you can to make this a hit! See you tomorrow with a new post. Till then, be safe & keep smiling!


#fallwithcherryontopblog Fall Party Programme


Read yesterday’s post-

Hello all, I am here again with a brand new post. Recently I was selected for a wonderful activity by Blogadda in association with Lakme School of Style and #Fame. I was aware of such a beautiful initiative where ‘the famous bachelor’ and extremely talented film director, Karan Johar is the editor-in-chief but I had not checked out their YouTube channel so far. When I opened their videos list, I was overwhelmed with such array of amazing videos on different topics like beauty, fashion, DIY, social issues and what not! 

Thoroughly going through the list I found a handful of my favourites among which I am going to talk about the two that I liked the most. The first thing (video) that caught my eyes is the this, obviously because of the much debated issue-


This video says the ugly truth, that too from the mouth of common people. When the world is racing against time towards modernity and progress, some people are pointing towards the women accusing them for their being a rape victim. Where some people seem to be present with a broad mind and an intellectual mindset, some just seem to be adamant to get out of the gloomy well. This video shows how even educated people have that ugly mindset and poor excuses to shut up the dirtiness of rape and the detestable deed of raping someone. It is amusing to see even the women of 21st century can think like this!
This video made me so filled with disgust that I had to scroll up and down to find something that would make my mood. And, what else than a beauty video. Being a selfie-addict I couldn’t help but watch this video-
In this video, Lakme School of Style’s beauty vlogger, Sukhneet Wadhwa shows how to do a makeup that is perfect for selfie. This is basically a tutorial where Sukhneet shows us how to do a makeup that is flawless and great for No-Filter selfies. Even if you are not a selfie person, you can definitely check out this makeup tutorial for it is very apt for any occasion. Flawless base, winged eyeliner, pink lips and peach-y cheeks make this a fun makeup look to try on. 
So guys, do not forget to watch these and some more amazing videos on #LakmeSchoolOfStyle YouTube channel and I am sure you too would find some of your favourites there!


This post is a part of the #LakmeSchoolOfStyle activity atBlogAdda.com is association with #Fame

Hi all, how was your day? Mine was a boring one. No one likes to study all day!

Anyways, today I have a very colourful post for you all. It’s March already, the transition time from Spring to Summer. Moreover, tomorrow is Bengal’s version of Holi. So, I thought of creating a look that is soft with a pop of colour. I chose the colours pink, peach and teal for this look. Have a look-


Products used-

(Face)

  • Lakme CC Cream
  • Kyolan Derma Colour Camouflage D-30
  • Maybelline Dream Lumi Touch Highlighting Concealer
  • NYX Blush in Bourgeois Pig
  • Lakme 9 to 5 Flawless Matte Complexion Compact
(Eyes)
  • E.L.F. Eye-lid Primer
  • Beauty UK Eyeshadow Palette- Soho (Used the 1st row, 2nd Shade from the left)
  • Maybelline Colossal Liner
  • Maybelline Colossal Kajal
  • Inglot AMC Gel Eyeliner- 87
  • Maybelline Hyper Curl Mascara
(Lips)
  • Colorbar Velvet Matte Lipstick- Thrilling Pink
  • Maybelline High Shine Lip Gloss- Electric Shock


How to Achieve the Look- 
Step 1: I started with my face first. I prepped my face with the Lakme CC Cream and then after color correcting my dark circles with the Kryolan Derma Color Camouflage cream, I concealed the under-eyes area and finished it off with a compact powder. Then I used a matte pink blush to the apples of my cheeks slightly dragging it diagonally. 
You can apply a highlighter too, but as my skin has started getting very oily, I skipped it. 
Step 2: Prep your eyes using a eyelid primer to prevent the eye-shadows from creasing. To make everything simple and short, I have used only one shadow to the lids. I took the peach-y shade from the Beauty UK palette, you can use any peach eye-shadow to achieve this look. After the eye-shadow, I then lined my upper lash-line with a liquid liner as thin as possible. Then, I tight-lined my eyes and applied a few coats of mascara only to the upper lashes. With the help of a stiff angled brush, I then lined my lower lash line with a teal coloured gel/cream eye-liner. This gives a sudden lift to the look.


Step 3: I applied a soft pink matte lipstick and then topped it off with a bright pink gloss. If you want the look to be less glossy, you can always blend the lip colours with the help of your finger.

That’s all, peeps! I hope you liked the look. The whole idea of this post is to share my ideas with you. You can always change the shades to create a whole new look as per your liking. If you ever re-create this look, don’t forget to share your pictures with me. I would like to showcase them on my social media. I will be back again very soon with a new post for you. Till then stay safe and keep smiling! Happy Holi in advance! 
Save water, be kind to animals and celebrate the festival of colours safely and sincerely. Lots of love. 
 photo CDC9FF6FF5EC04AD8EE1C7D59049EBD7_zpsec8626b0.png
Hi all! It’s been a long time since my first and so far last eye makeup tutorial which was posted in the month of February. As the festival of lights and glamour a.k.a Diwali is around the corner, I thought of doing another makeup tutorial for you, theme being the lights and sparkles of Diwali. You must agree with me that nothing comes in mind except for golden eye-makeup when it comes to Indian festive makeup look.
Here is my look inspired by the glitz and glam of the most glamorous Indian festival. Hope you enjoy it. Please read this post till the end for the disclaimer. Now, let’s get into the post-
Products Used-


(Face)
Ponds’ BB Cream
Maybelline Dream Lumi Touch Concealer
Lakme 9 to 5 Flawless Matte Complexion Compact
L’Oreal True Match Blush in Rosy Cheeks

(Eyes)
ELF Eyelid Primer
Maybelline Color Tattoo in Bold Gold
MUA Glamour Nights Palette (Golden and Black)
MUA Undressed Palette (Shade 1)
Maybelline Colossal Kajal
MUA Eyeliner (White)
Maybelline The Volume Express Mascara

(Brows)
MUA Glamour Nights Palette (Black)

(Lips)
Colorbar Velvet Matte Lipstick- Oh My Magenta
Essence XXXL Shine Lipgloss- True Love

(Brushes & Tools)
Real Techniques Expert Face Brush
Faces Eye Shader Brush
ELF Small Angled Brush
Colorbar Emphaseyes Blending Brush
ELF Crease Brush
Faces Eyelash Curler
Gone Gold | Simple and Easy Festive Makeup Tutorial (Step by Step)

Step 1: Prep your face with your favourite foundation and concealer and set it with a compact or loose powder.
Step 2: Fill in your brows with a black or deep brown eye shadow or eyebrow powder understanding your skin-tone. [Tip: Use an angled brush to fill in your eye-brows. It works precisely on the arches.]
Step 3: Prime your eyelids with any eyelid primer. I have used my favourite ELF eyelid primer. This step is mandatory in order to make your eye makeup last longer no matter how long you let yourself on the dance-floor.
Step 4: Now, apply the Maybelline Color Tattoo in Bold Gold all over your lids, leaving the crease area. This will act as a base and will give your eye shadows something to stick to. [Tip: Apply the product with your finger. It will allow you to work smooth and it will distribute the product evenly on the lids.]
Step 5: Apply a golden eye shadow that best matches your skin all over the lids with the help of a good shader brush. Here you can also use your fingers to apply the eye shadow.
Gone Gold | Simple and Easy Festive Makeup Tutorial (Step by Step)
Step 6: Take a crease brush and apply a little bit of any matte black eye shadow and dab it on the outer ‘v’ of your eyes. Don’t overdo it. We just want a subtle hint of black to eliminate the flatness of the eye look and add a little definition.  
Step 7: Blend it very well with a fluffy blending brush. [Tip: When you are using a black eye-shadow, make sure you blend it extra carefully. Don’t drag it to the entire lid.]
Step 8: Tightline the upper waterline with a jet black kohl. I have used the Maybelline Colossal Kajal as it lasts long. Curl your lashes and apply multiple coats of mascara. Make sure you apply generous coats of mascara on top and bottom lashes as we are not using any eyeliner to define the eyes. In this case, mascara will do it. Apply a flesh-tone shade to the brow bones. [Tip: Use a long-wear and water-resistant eye-pencil for tightlining the eyes. It won’t transfer and won’t smear the eye with black kohl.]
Step 9: Apply white kohl on your lower waterline. With the help of the same angled brush and black eye-shadow you used for the eyebrows and trace along your lower lash line, leaving the inner corners of your eyes. [Tip: Applying white liner on the lower waterline creates the illusion of bigger eyes.]
Step 10: Final look.
Gone Gold | Simple and Easy Festive Makeup Tutorial (Step by Step)
You can use your choice of products, it’s not mandatory to use what I used.

~Finished look~

Gone Gold | Simple and Easy Festive Makeup Tutorial (Step by Step)

Disclaimer:
1. Makeup is not what I think is extremely important in our lives, nor that I preach that everyone should use makeup. Some like makeup and some don’t. It’s just like some people love dressing up and some love to be in their pajamas most of the time (Even I belong to the latter category :P). So, there is nothing wrong in doing makeup and nothing wrong in not doing it as well. One should not be judged in terms of their preferences.  
2. I am not a makeup guru, nor that am I claiming myself a makeup expert. It’s just what I tried on myself and wanted to share with all of you. There are many expert makeup artists and bloggers who are way better than me. I do not compare myself to them as I feel I have a long way to walk before I reach that level. Please do not judge me.

The title of the post makes me the ‘official Gone Girl fanatic’. LOL 😛

I hope you liked the look and the tutorial. Feel free to comment below. Show your love, write down your queries and expert advices. Love you all. Till next time. Bye J
Hello everybody, I am here with a haul post as promised in my last post (Hope you’ve already read it, if not then please do it nowJ). This is going to be my second haul post here. But the difference is, all the products I am going to show you here, have bought with my own moneyJ. This post will be much more refined than the last. Between 4th – 12thMarch, I was in a shopping mood. I needed some skincare items and some makeup products too. I bought from four different websites because I didn’t find all the required products in one single website. Websites that I bought from are- Nykaa, Medplusbeauty.com, Snapdeal and Beautykafe.com.

I got some skin and hair care products from medplusbeauty.com and Snapdeal, and  some lipsticks and nail paints from Nykaa and BeautyKafe.com.

Let’s have a look on what I got in March-
~Medplusbeauty Haul~


1. Herbal Essences Hello Hydration Shampoo.
2. Maybelline Baby Lips Color in Rose Addict.

~Snapdeal Haul~


3. Inatur Pomegranate Scrub.

~Nykaa Haul~


4. Fab India Orange and Cinnamon Face and Body Gel Scrub.

5. Maybelline Lip Polish in Glam 13.

6. Maybelline Pink Alert Lipstick in POW 2. 


~BeautyKafe.com Haul~


7. Colorbar Exclusive Nail Color- 15

8. Maybelline Color Show nail paints in Tenacious Teal and Coral Craze.

I am using a few products from this list and the skincare products are almost ready to be reviewed. If everything goes well, I will post the reviews next week. I hope you liked this post. Please feel free to share your views. Thanks for being here.  I will be back with a new post very soon 🙂

 photo CDC9FF6FF5EC04AD8EE1C7D59049EBD7_zpsec8626b0.png
Hello all! Today I have come up with a Valentine’s Day special eye look which is very simple to achieve and very wearable too. I am a totally no-eyeshadow girl. I mostly apply kajal on my upper and lower lash line and step out just like that. But, it’s Valentine’s Day, so the makeup needs to be special, isn’t it? I chose to create an easy-peasy look for the occasion as you don’t want to spend a lot of time in your eye-makeup. 
** I have done the makeup on my right eye only. I was too lazy that day so couldn’t do makeup on both my eyes. Excuse me for that. 
Now, without wasting time, let’s see the pictures-


~Things I used for this look~

1. MUA Undressed Palette.

2. Maybelline Lasting Drama Gel Liner in Black.
3. Florelle True Khol Pencil
4. Maybelline The Hyper Curl Volume Express Mascara.


Brushes & Tools-


5. Vega Angular Blender Brush.
6. ELF Essential Eye Crease Brush.
7. Kryolan Art Brush no. 3810.
8. Colorbar Emphaseyes Eye Blending Brush.
9. ELF Studio Small Angle Brush (my favourite for applying gel liners).
10. Vega Eyelash Curler.

~Eye-shadows Used in this Look~

Shade 1
Shade 9
Shade 2
Shade 10

Shade 3

~How to Achieve the Look~


Before I start creating the look, I lightly fill in my brows with a darker matte brown eye-shadow from the palette and shape it with a spooley brush. 

  • Step 1– Prep your eyes by applying a base for your shadow. If you have darker eyelids, you need to cover up the pigmentation by applying a concealer before the base. 

  • Step 2– Take shade 1 from the palette and apply it all over your eyelids up to the brow-bone using a fluffy brush. Here I have used the Colorbar Blending brush. This step is intended to cancel out any discolouration that you are still left with. This step is completely optional. 

  • Step 3– Take shade 2 and pat it over your lids with a flat eye-shader brush all the way to your crease area. I have used the Vega angular brush for the purpose.

  • Step 4– Next take shade 9 from the palette which is a beautiful pinky-brown shadow and apply it over the lid. You may apply it with a damped brush. That will make the colour more gorgeous. But, as I tried to create a soft and subtle look, I didn’t do that. 

  • Step 5– Take some of shade 10 in a crease brush and apply it on to your crease area.

  • Step 6– To blend in the harsh lines, take some of the light brown shadow, i.e. shade 3, in a blending brush and start blending everything in a back and forth motion. 

  • Step 7– Apply some more shade 1 on the brow-bone for highlighting. 

  • Step 8– Take shade 2 again and apply in on the inner-corners of the eyes to brighten them up. Also this creates an illusion of wide eyes. 

  • Step 9– As the eye look was very simple and subtle, I decided to go for a winger liner to add a little oomph to the look 😉 I chose gel liner over liquid liner to maintain the subtlety of the look. If you feel creating a wing is difficult for you then just do it as you like Jthere are no strict rules. 

  • Step 10– Apply kajal on your lower waterline leaving the inner ⅓ of the lower lash line and smudge it out a bit. Work it out on the outer corners and join the upper and lower lash-line with the kajal. Add some of shade 2 on to that unfilled ⅓ part. This will make your eyes look bigger. 

  • Step 11– Apply two coats of mascara to both top and bottom lashes.  

  • Step 12– Last step, dip your powder brush in to your compact/loose powder and brush off the fallouts under your eyes.

Voila! That’s it guys. I hope I have made myself clear while explaining the steps. Now a few words before I sign off. Valentine’s Day is all about love. If you have love for something or someone you will achieve it in anyway. You don’t need makeup to impress anyone. It’s your inner beauty and your self confidence that makes you stand out from the crowd. Make-up is just a way to enhance your beauty a little more.  This particular look has no rules. You don’t need the particular products I’ve used here. You can your anything similar to the products I’ve used. At the end of the day, what really matters is your happiness. I think, that will be enough for your loved ones.

Happy Valentine’s Day!

Those who are single, you don’t need to worry. You can also go for this look too. You don’t need any reason to look beautiful, right?

P.S.– I was always hesitant of posting eye-looks. I wasn’t sure of my ability to bring out a new look myself. But, I have got a grip on that and finally decided to share a look with you all. It’s my first time posting eye makeup looks. Also, my first ever eye makeup tutorial. I know there must be some flaws. I would like to get suggestions from you guys. Good night lovelies

P.P.S.- Excuse my eyebrows :p
Pin It